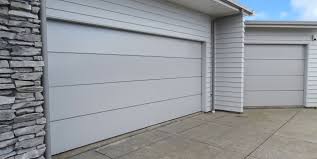
Installing a Garage Door Repair opener is a moderately complex task that requires careful planning and attention to detail.

The following step-by-step guide will help you install a garage door opener:
- Gather the necessary tools and materials:
- Garage door opener kit (including the motor, rail, and accessories)
- Power drill
- Screwdriver (flathead and Phillips)
- Wrenches
- Measuring tape
- Stepladder
- Pliers
- Safety goggles
- Garage door opener manual
- Before starting the installation, make sure to read the garage door opener manual thoroughly. It provides specific instructions and safety precautions for your particular model.
- Disconnect power: Locate the power source for the garage door and turn off the power to avoid any accidents during the installation process.
- Prepare the garage door: Check the condition of your garage door. Ensure that it is properly balanced, operates smoothly, and has no signs of damage. If necessary, consult a professional to address any issues before proceeding.
- Assemble the rail: Follow the instructions in the manual to assemble the rail system that will guide the garage door opener. This usually involves connecting multiple rail sections using provided hardware.
- Attach the motor unit: Position the motor unit on the ceiling of your garage, aligning it with the rail system. Use a power drill and screws provided in the kit to secure the motor unit in place. Ensure that it is level and stable.
- Install the trolley: Attach the trolley mechanism to the garage door opener’s rail. This component will connect the opener to the garage door itself. Make sure the trolley is properly aligned with the opener and the door.
- Mount the control panel and safety sensors: Install the control panel and safety sensors according to the manufacturer’s instructions. Typically, the control panel is mounted on the garage wall near the entry door, while the safety sensors are placed near the bottom of the garage door tracks.
- Connect the wiring: Follow the wiring diagram provided in the manual to connect the control panel, safety sensors, and motor unit. Use the appropriate wires and connectors supplied with the opener kit. Ensure that all connections are secure and properly insulated.
- Adjust the force and travel limits: Most garage door openers allow you to adjust the force required to open and close the door, as well as the travel limits to determine how far the door should move. Consult the manual for instructions on how to adjust these settings using the control panel.
- Test the opener: Once the installation is complete, reconnect the power to the garage door and test the opener’s functionality. Use the control panel or remote to open and close the garage door, making sure it operates smoothly and stops at the desired positions.
- Final adjustments: If necessary, make any additional adjustments to the force, travel limits, or safety sensors to ensure proper operation of the garage door opener. Consult the manual for guidance on these adjustments.
Remember, this guide is a general overview of the installation process. It is crucial to consult the specific instructions provided by the manufacturer for your Garage Door Repair opener model. If you encounter any difficulties or uncertainties during the installation, it is recommended to seek professional assistance to ensure a safe and accurate installation.
MF Solutions, Inc
9118 Elmwood Dr, Niles, IL 60714
302 Cherrywood Rd Buffalo Grove, IL 60089
224-434-1780

Leave a Reply