The Largest Business Blog in Texas

Month: January 2022

How do You Lock a Garage Door-The Garage Floor Company

Locking your Garage Door Repair is an essential step in ensuring the security of your property and belongings. Whether you use your garage for parking your car, storage, or as a workshop, taking the necessary measures to protect it from unauthorized access is crucial.

This guide will provide you with a step-by-step explanation of different methods and best practices to effectively lock your garage door.

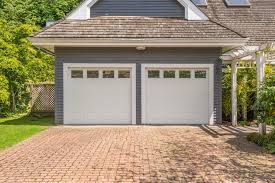
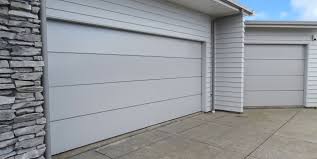
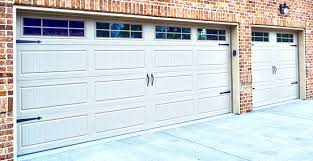
  1. Assessing Your Garage Door: Before proceeding with locking your garage door, it’s important to evaluate its type and condition. Determine whether you have a manual or automated door, and check for any damages, loose components, or malfunctioning parts that may affect its security.
  2. Exterior Locks: a) Deadbolt Locks: Install high-quality deadbolt locks on all exterior access points, including pedestrian doors or side entrances. Choose heavy-duty deadbolts with at least a one-inch throw length for enhanced security.

b) Padlocks and Hasps: Consider using padlocks and hasps on exterior doors as additional security measures. Ensure they are made of durable materials, have a shrouded shackle, and are resistant to cutting or picking.

c) Slide Bolts and Latches: Install sturdy slide bolts or latches on garage doors that swing open horizontally. These locks prevent the door from being opened without the latch being released manually.

  1. Garage Door Opener Security: a) Keypad Codes: If your garage door operates with an automated opener, change the default access code and set up a unique, secure keypad code. Avoid using easily guessable codes such as birthdays or sequential numbers.

b) Remote Controls: Keep your garage door opener remote controls secure. Do not leave them in your car or easily accessible areas. Consider using a keychain remote or a smartphone app for added convenience and security.

c) Disable Emergency Release Mechanism: Garage doors usually have an emergency release cord that allows manual operation in case of power outages or other emergencies. To prevent unauthorized access, secure this mechanism by zip-tying or using a specially designed lock.

  1. Reinforce Garage Door Security: a) Upgrade Door Material: Consider upgrading your garage door to a more robust material such as steel or solid wood. These materials offer better resistance against forced entry attempts compared to lightweight or hollow doors.

b) Reinforce Door Weak Points: Strengthen the weak points of your garage door, such as the lock area and hinges, by installing heavy-duty strike plates, security studs, or metal reinforcement plates.

c) Install a Security System: Consider installing a garage door security system that includes motion sensors, alarms, or even video surveillance cameras. These systems can deter intruders and alert you to any suspicious activity.

  1. Lighting and Visibility: a) Exterior Lighting: Ensure the area around your garage is well-lit with motion-activated lights. Bright lighting can discourage potential burglars and increase visibility for you and your neighbors.

b) Window Coverings: If your garage door has windows, consider adding blinds, curtains, or frosted film to prevent outsiders from peering inside. This helps protect your privacy and prevents thieves from seeing valuable items.

Conclusion: Securing your Garage Door Repair is essential for protecting your property and maintaining peace of mind. By following the steps outlined in this guide, you can significantly enhance the security of your garage and reduce the risk of unauthorized access. Remember to regularly inspect and maintain your locks and security measures to ensure their effectiveness. With these precautions in place, you can confidently lock your garage door, knowing that your belongings and property are well-protected.

The Garage Floor Company

866-507-0096

How to Lock Garage Door-Ohio Garage Door Repair

Securing your garage is essential for the safety and protection of your belongings. One of the crucial steps in ensuring your garage’s security is properly locking the Garage Door Repair.

This guide will provide you with a step-by-step process on how to lock a garage door effectively. By following these instructions, you can have peace of mind knowing that your garage is secure.

Step 1: Inspect the Garage Door: Before proceeding with locking the garage door, conduct a thorough inspection to ensure its functionality. Check for any signs of damage, such as broken or loose parts, worn-out hinges, or faulty locks. If any issues are detected, it’s important to address them before proceeding further.

Step 2: Choose the Right Lock: Selecting an appropriate lock is crucial for securing your garage door. There are several options available, including padlocks, deadbolts, latch locks, and keyless locks. Consider the level of security you require, your budget, and the type of garage door you have before making a decision. Consult with a professional if you are unsure about the best lock for your specific situation.

Step 3: Install a Locking Mechanism: Once you have chosen the lock, carefully follow the manufacturer’s instructions for installation. In most cases, you will need to drill holes and attach the locking mechanism to the garage door. Ensure that the lock is securely fastened and properly aligned.

Step 4: Reinforce the Door: To enhance the security of your garage door, reinforce it by installing door braces or adding a metal bar across the inside of the door. This will prevent burglars from prying the door open even if they manage to bypass the lock. Reinforcing the door is particularly important if you have an older or weaker garage door.

Step 5: Secure Windows: If your garage door has windows, reinforce their security as well. Consider installing window bars or laminating the windows with shatter-resistant film. This will make it more difficult for potential intruders to access your garage by breaking the windows.

Step 6: Implement Additional Security Measures: To further enhance the security of your garage, consider implementing additional measures. Install a security system or surveillance cameras to monitor any suspicious activity. Motion-activated lights can also deter potential intruders. Additionally, consider using a garage door opener with rolling codes, which prevents code theft.

Step 7: Create Good Habits: Developing good habits is essential for maintaining garage security. Always ensure that the garage door is fully closed and locked when not in use. Avoid leaving the garage door open for extended periods, as it increases the risk of unauthorized access. Encourage all household members to follow these practices consistently.

Step 8: Regular Maintenance: Perform regular maintenance on your garage door and its locking mechanism. Lubricate the hinges, tracks, and locks to ensure smooth operation. Check for any signs of wear and tear and replace any damaged components promptly.

Conclusion: Securing your Garage Door Repair is a vital step in safeguarding your property. By following the steps outlined in this guide, you can effectively lock your garage door and significantly reduce the risk of unauthorized access. Remember to choose the right lock, reinforce the door, secure windows, implement additional security measures, develop good habits, and perform regular maintenance. By taking these precautions, you can have peace of mind knowing that your garage and belongings are well-protected.

Ohio Garage Door Repair

199 S Chillicothe Rd Ste 212, Aurora, OH 44202

1-440-773-2246

How to Replace Garage Door Springs-EDM Garage Doors

Garage Door Repair Services springs play a crucial role in the proper functioning of your garage door. Over time, these springs can wear out or break, requiring replacement. While replacing garage door springs can be challenging, with the right tools and knowledge, you can accomplish this task safely and effectively.

In this guide, we will walk you through the step-by-step process of replacing garage door springs.

Note: Replacing garage door springs can be dangerous due to the high tension involved. If you are unsure or uncomfortable with any step, it is recommended to hire a professional garage door technician.

Tools and Materials Required:

  1. Safety glasses
  2. Work gloves
  3. Adjustable wrench
  4. Socket wrench set
  5. C-clamps or vice grips
  6. Steel rods or winding bars
  7. New garage door springs (make sure to purchase the correct type and size for your specific garage door)
  8. Ladder or step stool
  9. Measuring tape
  10. Marker or tape

Step 1: Ensure Safety Precautions Before starting, put on safety glasses and work gloves to protect yourself from any potential injuries. Disconnect the power supply to the garage door opener to prevent accidental activation while working.

Step 2: Identify the Type of Garage Door Springs There are two common types of garage door springs: torsion springs and extension springs. Torsion springs are located above the garage door, while extension springs are positioned on both sides of the door. Identify which type of springs your garage door has before proceeding.

Step 3: Release Tension on Torsion Springs For torsion springs, it is crucial to release the tension before removing them. Locate the winding cone on the spring, usually positioned at the center shaft. Insert a steel rod or winding bar into one of the holes on the winding cone and slowly unwind the spring. Use a second winding bar to secure the tension and prevent the spring from unwinding unexpectedly. Repeat this process for the second torsion spring if applicable.

Step 4: Disconnect Extension Springs For extension springs, start by securing the garage door in a fully open position using C-clamps or vice grips on the track, ensuring it cannot close unexpectedly. Disconnect the safety cables attached to the springs and carefully remove them from the brackets.

Step 5: Remove Old Springs Using a socket wrench, remove the bolts securing the old springs to the brackets or center shaft, depending on the spring type. Once the bolts are removed, carefully detach the springs from the garage door.

Step 6: Install New Springs Attach the new springs to the brackets or center shaft using the bolts you removed earlier. Ensure they are securely fastened.

Step 7: Wind Torsion Springs (if applicable) If you have torsion springs, follow the manufacturer’s instructions to wind them in the opposite direction of how you unwound the old springs. Use the steel rods or winding bars to wind the springs, ensuring they are tightly wound and under tension. Be cautious and follow the recommended number of turns specified by the manufacturer.

Step 8: Reconnect Extension Springs (if applicable) For extension springs, reattach them to the brackets, ensuring they are properly seated. Reconnect the safety cables and remove the C-clamps or vice grips securing the garage door.

Step 9: Test the Garage Door Carefully remove any tools or equipment from the garage door area. Slowly and manually operate the garage door several times to ensure smooth movement and proper spring tension. If necessary, make adjustments to the tension by winding or unwinding the springs slightly.

Conclusion: By following this step-by-step guide, you can replace your Garage Door Repair Services springs effectively. However, remember that working with garage door springs can be dangerous. If you are unsure or uncomfortable with any step, it is always best to seek assistance from a professional garage door technician to ensure your safety and the proper functioning of your garage door.

EDM Garage Doors

596 Richard Brown Blvd, Volo, IL 60073, United States

1-847-416-3036

How to Install Garage Door Opener-MF Solutions, Inc

Installing a Garage Door Repair opener is a moderately complex task that requires careful planning and attention to detail.

The following step-by-step guide will help you install a garage door opener:

  1. Gather the necessary tools and materials:
    • Garage door opener kit (including the motor, rail, and accessories)
    • Power drill
    • Screwdriver (flathead and Phillips)
    • Wrenches
    • Measuring tape
    • Stepladder
    • Pliers
    • Safety goggles
    • Garage door opener manual
  2. Before starting the installation, make sure to read the garage door opener manual thoroughly. It provides specific instructions and safety precautions for your particular model.
  3. Disconnect power: Locate the power source for the garage door and turn off the power to avoid any accidents during the installation process.
  4. Prepare the garage door: Check the condition of your garage door. Ensure that it is properly balanced, operates smoothly, and has no signs of damage. If necessary, consult a professional to address any issues before proceeding.
  5. Assemble the rail: Follow the instructions in the manual to assemble the rail system that will guide the garage door opener. This usually involves connecting multiple rail sections using provided hardware.
  6. Attach the motor unit: Position the motor unit on the ceiling of your garage, aligning it with the rail system. Use a power drill and screws provided in the kit to secure the motor unit in place. Ensure that it is level and stable.
  7. Install the trolley: Attach the trolley mechanism to the garage door opener’s rail. This component will connect the opener to the garage door itself. Make sure the trolley is properly aligned with the opener and the door.
  8. Mount the control panel and safety sensors: Install the control panel and safety sensors according to the manufacturer’s instructions. Typically, the control panel is mounted on the garage wall near the entry door, while the safety sensors are placed near the bottom of the garage door tracks.
  9. Connect the wiring: Follow the wiring diagram provided in the manual to connect the control panel, safety sensors, and motor unit. Use the appropriate wires and connectors supplied with the opener kit. Ensure that all connections are secure and properly insulated.
  10. Adjust the force and travel limits: Most garage door openers allow you to adjust the force required to open and close the door, as well as the travel limits to determine how far the door should move. Consult the manual for instructions on how to adjust these settings using the control panel.
  11. Test the opener: Once the installation is complete, reconnect the power to the garage door and test the opener’s functionality. Use the control panel or remote to open and close the garage door, making sure it operates smoothly and stops at the desired positions.
  12. Final adjustments: If necessary, make any additional adjustments to the force, travel limits, or safety sensors to ensure proper operation of the garage door opener. Consult the manual for guidance on these adjustments.

Remember, this guide is a general overview of the installation process. It is crucial to consult the specific instructions provided by the manufacturer for your Garage Door Repair opener model. If you encounter any difficulties or uncertainties during the installation, it is recommended to seek professional assistance to ensure a safe and accurate installation.

MF Solutions, Inc

9118 Elmwood Dr, Niles, IL 60714

302 Cherrywood Rd Buffalo Grove, IL 60089

224-434-1780

How Long do Garage Door Cables Last-Don and Son’s Garage Doors

Garage Door Repair cables play a crucial role in the operation and safety of the door. They are responsible for lifting and lowering the door along the tracks, ensuring smooth movement and proper balance. However, like any other mechanical component, garage door cables have a limited lifespan and will eventually require replacement.

In this article, we will explore the factors that influence the lifespan of garage door cables and provide some tips for extending their longevity.

First and foremost, it’s important to understand that the lifespan of garage door cables can vary depending on several factors. One such factor is the quality of the cables themselves. Higher quality cables, typically made from strong and durable materials such as steel, tend to last longer compared to lower quality alternatives. It’s advisable to invest in cables that are specifically designed for garage doors and are known for their durability.

Another crucial factor affecting cable lifespan is the frequency of use. The more frequently you open and close your garage door, the more strain it puts on the cables. If you have a busy household with multiple vehicles coming and going, the cables will experience more wear and tear, leading to a shorter lifespan. Similarly, commercial settings where garage doors are frequently used throughout the day may require more frequent cable replacements.

Proper installation and regular maintenance also play a significant role in determining how long your garage door cables will last. Cables that are installed incorrectly or are not properly adjusted can cause unnecessary stress, leading to premature wear. It is important to hire a professional technician who has experience in installing and maintaining garage door systems to ensure that the cables are correctly installed and adjusted.

Furthermore, regular maintenance can help identify any potential issues with the cables early on, allowing for timely repairs or replacements. Lubricating the cables and periodically inspecting them for signs of fraying, rust, or damage can go a long way in extending their lifespan. It is recommended to follow the manufacturer’s guidelines for maintenance and consult with a professional if you notice any abnormalities.

Despite proper installation and maintenance, garage door cables will eventually wear out and need to be replaced. The average lifespan of garage door cables can range from 5 to 10 years, depending on the factors mentioned above. However, it’s essential to note that this is a general estimate, and individual experiences may vary. Factors such as climate, environmental conditions, and the weight of the garage door can also impact cable lifespan.

In conclusion, Garage Door Repair cables are crucial components that require attention and maintenance. By investing in high-quality cables, using them within their recommended capacity, and following proper installation and maintenance practices, you can maximize their lifespan. Regular inspections and timely replacements are necessary to ensure the safe and efficient operation of your garage door.

Don and Son’s Garage Doors

Lewisville, TX

214-415-4109

Powered by WordPress & Theme by Anders Norén