The Largest Business Blog in Texas

Month: January 2024 Page 1 of 2

What Factors Should Be Considered When Choosing The Right Material For Your Garage Door Installation? – Bluegrass Garage Doors Sales, Service & Installation

When it comes to Louisville Garage Door Repair, selecting the right material is a crucial decision that impacts not only the aesthetics of your home but also the door’s durability, maintenance requirements, and overall performance.

With various materials available, each offering its own set of advantages and considerations, homeowners should make an informed choice based on their preferences and practical needs. In this comprehensive guide, we’ll explore the most common materials used in garage door construction, outlining their characteristics, benefits, and considerations to help you make an informed decision for your garage door installation.

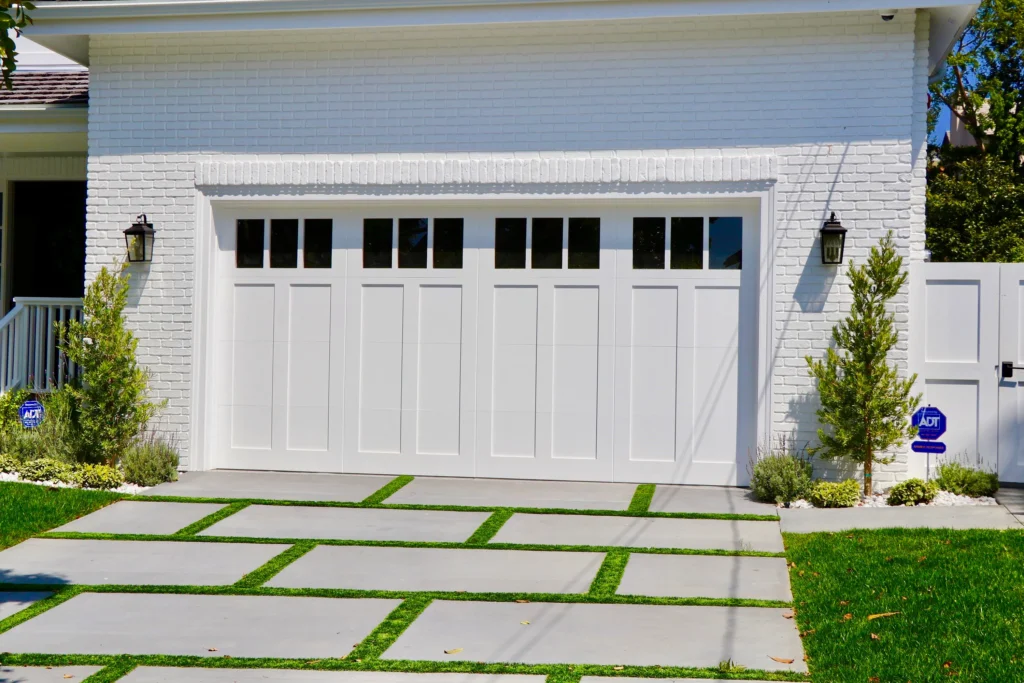
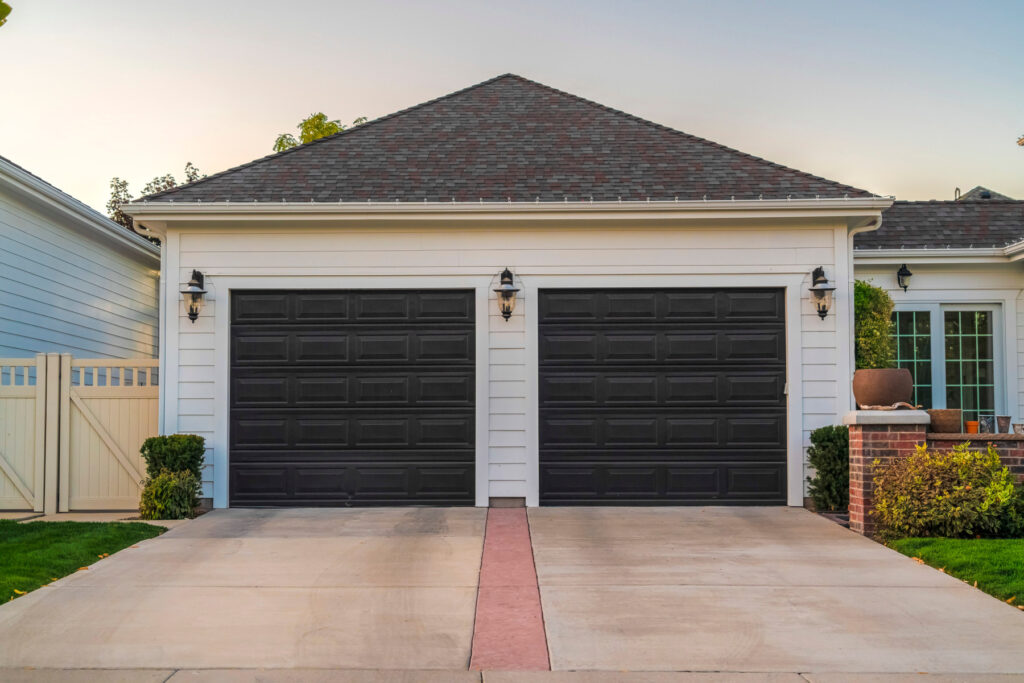
1. Steel Garage Doors:

Characteristics:

Durability: Steel is a robust and durable material, offering resistance to dents and damage.

Versatility: Available in a variety of styles, designs, and colors, providing flexibility to match various architectural styles.

Low Maintenance: Steel doors are relatively low maintenance, requiring periodic cleaning and repainting to prevent rust.

Considerations:

Insulation: While insulation options are available, steel doors may not offer the same level of insulation as some other materials.

Prone to Rust: Without proper maintenance, steel doors can be susceptible to rust, especially in humid or coastal areas.

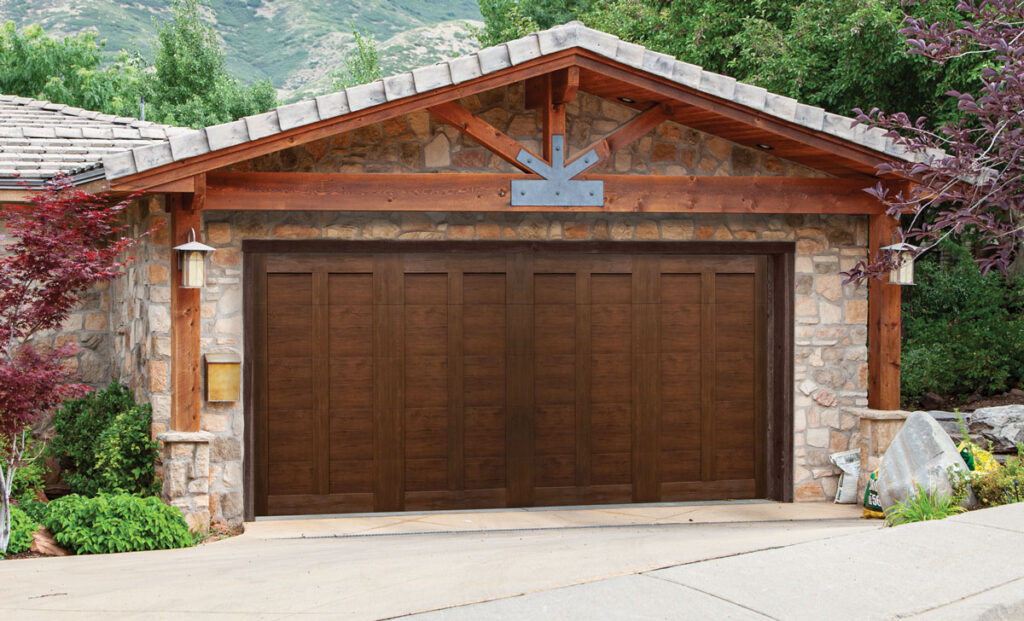
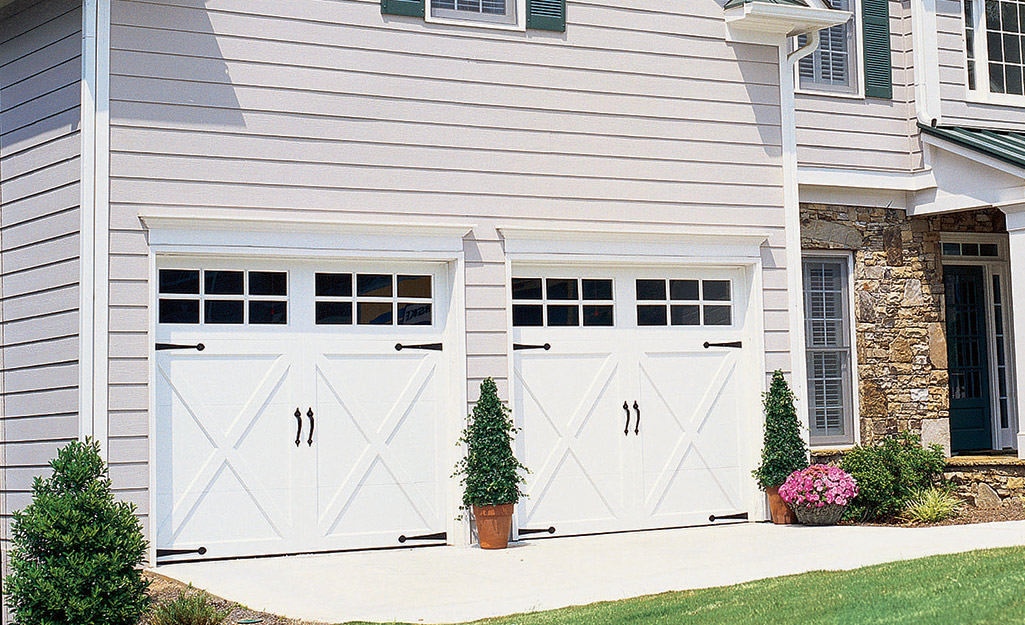
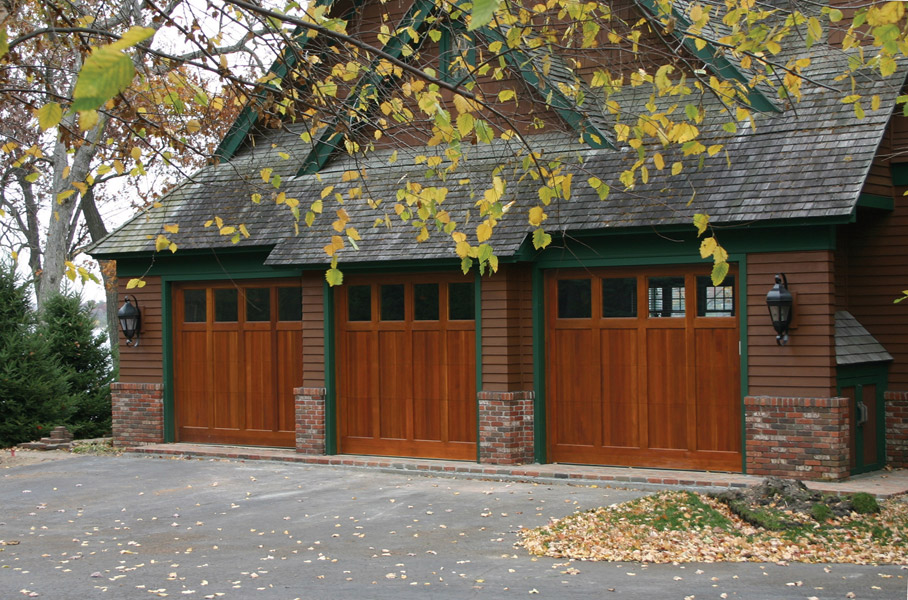
2. Wood Garage Doors:

Characteristics:

Aesthetic Appeal: Wood doors are prized for their natural beauty and can enhance the overall curb appeal of a home.

Customization: Easily customizable with various wood types, finishes, and designs.

Insulation: Wood provides natural insulation, helping regulate temperature within the garage.

Considerations:

Maintenance: Wood doors require regular maintenance, including staining or painting to protect against the elements.

Cost: Wood doors can be more expensive than other materials.

Vulnerability to Elements: Without proper sealing and finishing, wood doors may be susceptible to warping or damage from the elements.

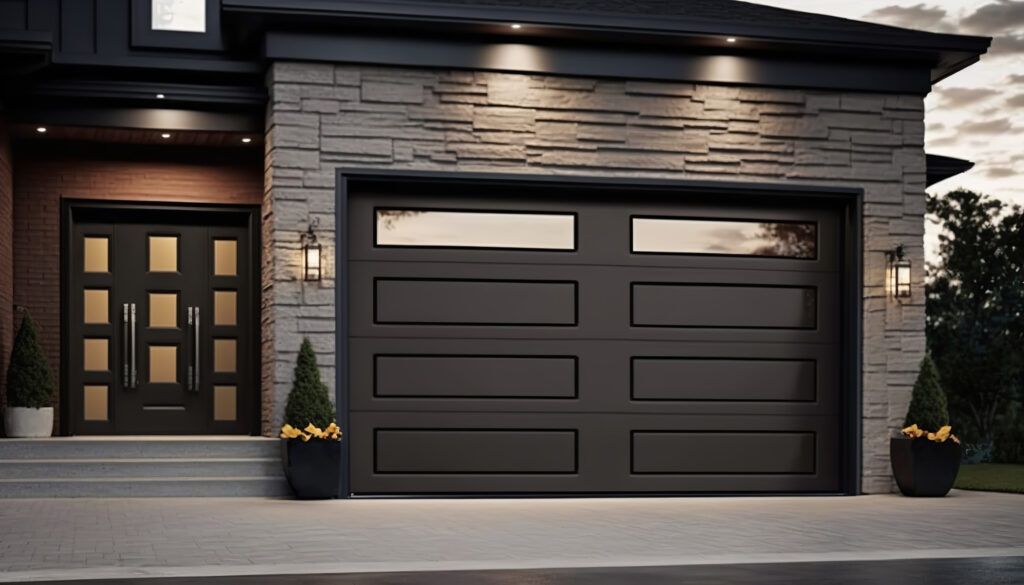
3. Aluminum Garage Doors:

Characteristics:

Lightweight: Aluminum doors are lightweight and easy to operate.

Low Maintenance: Resistant to rust and corrosion, requiring minimal maintenance.

Modern Aesthetics: Often used in contemporary designs, aluminum doors offer a sleek and modern appearance.

Considerations:

Durability: While durable, aluminum doors may not be as dent-resistant as steel.

Insulation: Aluminum doors may not provide as much insulation as other materials, although insulated options are available.

4. Fiberglass Garage Doors:

Characteristics:

Lightweight: Similar to aluminum, fiberglass doors are lightweight and easy to operate.

Resistant to Rust and Corrosion: Fiberglass is resistant to rust and corrosion, making it a low-maintenance option.

Insulation: Can be insulated for better energy efficiency.

Considerations:

Durability: Fiberglass may not be as durable as steel or wood, and it can crack under impact.

Cost: Fiberglass doors can be relatively expensive compared to some other materials.

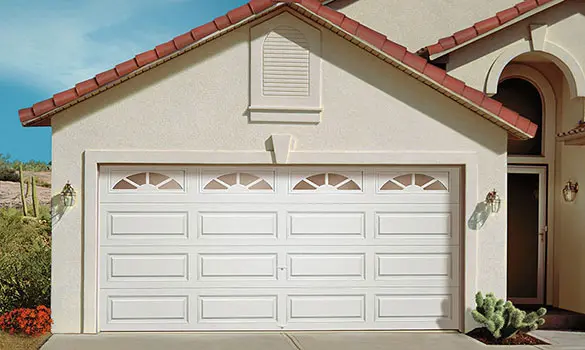
5. Vinyl Garage Doors:

Characteristics:

Durability: Vinyl is a durable and resistant material that can withstand various weather conditions.

Low Maintenance: Resistant to rust, corrosion, and rot, requiring minimal maintenance.

Insulation: This can be insulated for energy efficiency.

Considerations:

Limited Styles: While available in various styles, the design options for vinyl doors may be more limited compared to steel or wood.

Price: Vinyl doors can be more expensive than basic steel doors.

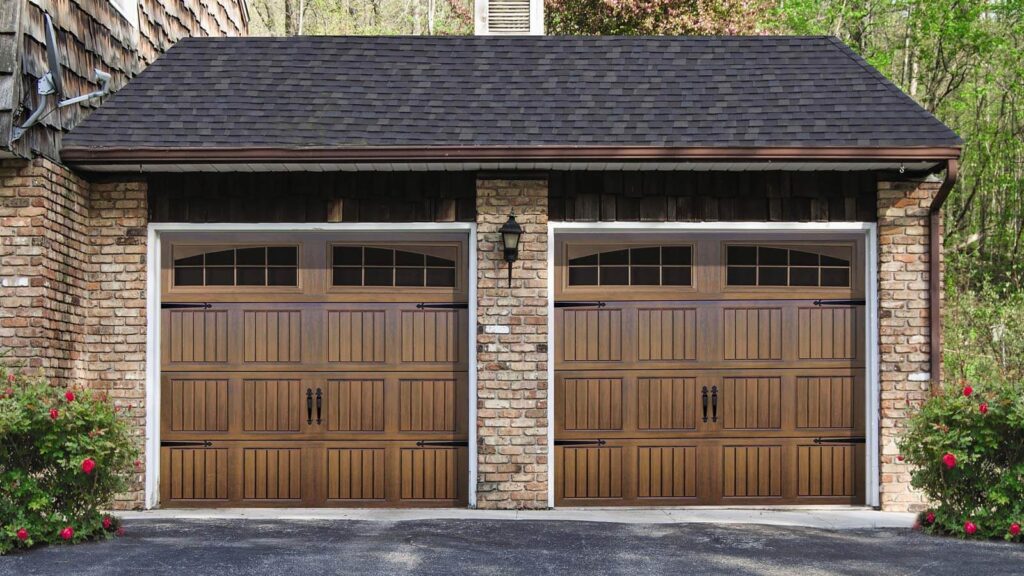
6. Composite Garage Doors:

Characteristics:

Mixture of Materials: Composite doors are made from a combination of materials, often including wood, fiberglass, and recycled materials.

Aesthetic Appeal: Mimics the look of wood but with improved durability.

Insulation: Offers good insulation properties.

Considerations:

Cost: Composite doors may be more expensive than basic steel doors.

Maintenance: While lower maintenance than wood, composite doors may still require occasional care.

7. Glass Garage Doors:

Characteristics:

Modern Aesthetics: Glass doors provide a modern and contemporary look.

Natural Light: Allows natural light to enter the garage.

Customization: This can be customized with various glass types and frame materials.

Considerations:

Privacy and Security: Glass doors may compromise privacy and security, although frosted or tinted glass options can address these concerns.

Insulation: Generally, glass doors may not provide as much insulation as other materials.

Choosing the Right Material:

Consider Your Budget: Different materials come with varying price points. Consider your budget and weigh the cost against the benefits and features offered by each material.

Evaluate Maintenance Requirements: Assess your willingness and ability to perform regular maintenance. Some materials, like wood, require more upkeep than others.

Climate Considerations: The climate in your area can impact the performance of certain materials. For example, wood may be more prone to damage in humid climates, while steel can be susceptible to rust in coastal regions.

Aesthetic Preferences: The visual appeal of your garage door contributes to the overall look of your home. Consider the architectural style of your house and choose a material that complements it.

Insulation Needs: If climate control in your garage is a priority, consider the insulation properties of the material. Insulated doors can help regulate temperature and improve energy efficiency.

Security and Privacy: Evaluate the level of security and privacy you desire. Materials like steel or composite may provide enhanced security, while glass doors offer a more open and modern feel.

Door Weight: Consider the weight of the door and how it may impact the operation of the Louisville Garage Door Repair. Some materials, like wood, can be heavier than others.

Bluegrass Garage Doors Sales, Service & Installation

1-270-898-1399

How Can You Properly Care For Your Garage Door Opener Remote Control? – CCM Overhead Doors

The Garage Door Opener Oklahoma City OK is a small yet powerful device that enhances the convenience and accessibility of your garage door system.

As a key component in your daily routine, it’s important to care for the remote control to ensure reliable performance and longevity. In this comprehensive guide, we’ll explore the best practices for caring for your garage door opener remote control, covering topics such as battery maintenance, cleanliness, programming tips, and troubleshooting.

1. Battery Maintenance: Powering Up for Performance:

The most common cause of remote control malfunction is depleted batteries. Proper battery maintenance is essential for ensuring that your garage door opener remote functions reliably. Here’s how to care for the batteries:

Regular Checks: Periodically check the battery level in your remote control. Most remote controls use coin or button cell batteries, and their lifespan can vary.

Scheduled Replacements: Even if the battery appears to be functioning, it’s advisable to replace it at least once a year to prevent unexpected failures. Choose high-quality batteries to ensure optimal performance.

Battery Type: Pay attention to the type of battery recommended for your remote control. Using the correct battery type ensures compatibility and prevents damage to the remote.

2. Cleanliness: A Dust-Free Connection:

A clean remote control contributes to effective communication with the garage door opener, preventing interference and malfunctions. Incorporate these cleanliness practices into your remote care routine:

Exterior Cleaning: Wipe the exterior of the remote control regularly with a soft, dry cloth to remove dust, fingerprints, and any accumulated grime.

Button Inspection: Inspect the remote control buttons for any debris or sticky residue. Use a cotton swab dipped in rubbing alcohol to clean the button surfaces.

Avoid Moisture: Keep the remote control away from moisture, as water or liquid spills can damage the internal components. Store it in a dry place when not in use.

3. Programming Tips: Tailoring Your Remote Control Experience:

Proper programming ensures that your garage door opener remote control works seamlessly with your specific opener model. Follow these programming tips for an optimal experience:

Refer to the Manual: Consult your garage door opener manual for specific instructions on programming the remote control. Manuals typically provide step-by-step guides for various remote control models.

Sync Multiple Remotes: If you have multiple remote controls for different family members, sync them to the same opener to avoid conflicts. This is usually done by pressing a designated button on the opener and then on each remote control.

Change the Code Regularly: Some modern garage door openers and remote controls allow you to change the access code. Changing the code periodically enhances security and reduces the risk of unauthorized access.

Security Features: If your remote control offers additional security features, such as rolling code technology, take advantage of them. These features change the access code with each use, making it more difficult for unauthorized users to replicate the code.

4. Proper Storage: Shielding from the Elements:

Where and how you store your garage door opener remote control can impact its performance and lifespan. Follow these storage recommendations:

Avoid Direct Sunlight: Prolonged exposure to direct sunlight can damage the remote control’s plastic casing and affect its internal components. Store the remote in a shaded area when not in use.

Protect from Extreme Temperatures: Avoid leaving the remote control in extreme temperatures, whether excessively hot or cold. Extreme temperatures can impact battery performance and overall functionality.

Secure Storage: When not in use, store the remote control in a secure location, such as a drawer or a designated holder. This protects it from accidental drops and potential damage.

5. Troubleshooting: Addressing Common Issues:

Even with proper care, occasional issues may arise with your garage door opener remote control. Understanding common problems and troubleshooting steps can help you address these issues promptly:

Check Battery Connection: If the remote control is unresponsive, ensure that the battery is properly inserted, and the connections are clean. Gently adjust the battery or clean the contacts if needed.

Reprogram the Remote: If the remote control stops working after a battery replacement, you may need to reprogram it. Follow the programming instructions in your opener manual to sync the remote with the opener.

Inspect for Interference: Other electronic devices or nearby equipment operating on the same frequency can interfere with the remote control’s signal. Identify and eliminate potential sources of interference.

Consider Range Issues: If the remote control has reduced range, check for obstructions or interference. Ensure that you are within the recommended operating range from the garage door opener.

6. Upgrading for Advanced Features: Exploring New Possibilities:

As technology evolves, so do the features available for garage door opener remote controls. Consider upgrading to a remote control with advanced features to enhance your overall experience:

Smart Home Integration: Explore remote controls that offer smart home integration, allowing you to operate your Garage Door Opener Oklahoma City OK via smartphone apps or voice commands through virtual assistants like Alexa or Google Assistant.

Keyless Entry Systems: Some advanced remote controls come with keyless entry systems, enabling you to enter a secure code on the remote itself for garage access.

Battery Monitoring: Select remote controls that include battery monitoring features. These remotes provide low battery alerts, preventing unexpected failures.

CCM Overhead Doors

1000 NW 80th St, Oklahoma City, OK 73114, United States

1-405-563-8982

What Are The Basic Elements To Inspect When In Need Of Garage Door Repair? – BH Garage Doors and Gates

Your Garage Door Repairs Rockwall TX is a crucial component of your home, providing security, convenience, and curb appeal. Regular maintenance and timely repairs can help ensure that your garage door operates smoothly and efficiently.

While some issues may require professional intervention, there are simple things homeowners can check before calling in the experts. In this article, we’ll explore five simple things to inspect for garage door repair, offering a DIY guide to help you identify and address common issues.

1. Visual Inspection of Hardware:

The first step in identifying potential issues with your garage door is to conduct a visual inspection of the hardware. This includes hinges, rollers, tracks, and springs. Look for signs of wear, rust, or damage. Pay attention to whether any components appear misaligned or bent. Tighten loose bolts and nuts using the appropriate tools, ensuring that all hardware is securely fastened. If you notice significant damage or wear, it may be an indication that these components need replacement.

DIY Tip:

Use a lubricant on moving parts, such as rollers and hinges, to reduce friction and ensure smooth operation. Lubrication can also help prevent rust and extend the lifespan of these components.

2. Balance and Alignment:

An imbalanced or misaligned garage door can lead to operational issues and premature wear on certain components. To check the balance of your garage door, close it and disconnect the automatic opener. Manually lift the door halfway and release it. If the door stays in place, it is well-balanced. If it moves up or down, it indicates an imbalance that should be addressed.

Inspect the alignment of the tracks by visually assessing whether they are straight and parallel. Misaligned tracks can cause the door to operate unevenly. If you notice any misalignments, carefully adjust the tracks using the appropriate tools.

DIY Tip:

Use a level to ensure that the tracks are perfectly aligned. If adjustments are needed, loosen the screws holding the tracks in place, make the necessary adjustments, and tighten the screws again.

3. Test Safety Features:

Garage doors are equipped with safety features to prevent accidents and injuries. Two common safety features are the photo-eye sensors and the auto-reverse mechanism. The photo-eye sensors are located near the ground on both sides of the door and prevent the door from closing if an object or person is in its path. Test these sensors by placing an object in the door’s path while closing it. The door should automatically reverse.

The auto-reverse mechanism ensures that the door reverses direction if it encounters resistance while closing. Test this feature by placing a piece of wood on the ground in the door’s path. If the door does not reverse upon contact with the wood, adjustments or repairs may be necessary.

DIY Tip:

Regularly clean the photo-eye sensors to ensure they are free from dirt or debris, as this can interfere with their functionality. If the auto-reverse mechanism fails to operate correctly, consult the owner’s manual for guidance on adjustments.

4. Inspect Weather Stripping:

Weather stripping along the sides and bottom of the garage door is essential for keeping out elements such as rain, snow, and debris. Over time, weather stripping can wear out or become damaged, compromising its effectiveness. Inspect the weather stripping for signs of wear, cracks, or gaps. If you notice any issues, replace the weather stripping to maintain a proper seal.

DIY Tip:

Weather-stripping replacement is a straightforward task. Purchase a suitable replacement material, remove the old weather stripping, and install the new one by pressing it firmly into place. Ensure a snug fit to prevent drafts and moisture infiltration.

5. Check the Automatic Opener:

The automatic opener plays a crucial role in the smooth operation of your garage door. Check for any unusual noises, vibrations, or delays when operating the opener. Inspect the opener’s chain or belt for signs of wear or slack. Tighten or replace the belt or chain if necessary. Additionally, test the responsiveness of the opener by operating it from both the wall control and the remote control.

DIY Tip:

Inspect the opener’s safety release mechanism by pulling the release cord and manually operating the door. This ensures that the opener is disengaged, allowing you to open and close the door manually. Re-engage the mechanism by pulling the cord again.

Conclusion: Know When to Seek Professional Help:

While these DIY checks can help you identify and address common Garage Door Repairs Rockwall TX, it’s important to know when to seek professional help. If you encounter complex problems, such as electrical issues with the opener, extensive structural damage, or if the door’s performance does not improve after DIY efforts, it’s advisable to consult with a professional garage door technician. Regular maintenance and prompt attention to minor issues can contribute to the longevity and optimal performance of your garage door, ensuring it remains a reliable and secure component of your home.

BH Garage Doors and Gates

1-214-206-5231

How To Install Chain Drive Garage Door Opener – Affordable Garage Door Repairs of Indianapolis, LLC

Installing a chain drive Garage Door Repair Indianapolis IN is a manageable DIY project that can enhance the convenience and functionality of your garage door.

A chain drive opener uses a metal chain to move the trolley and lift or lower the garage door. Follow these step-by-step instructions for a successful installation:

: Gather Necessary Tools and Materials

Before you start, gather all the tools and materials you’ll need for the installation. Typically, you’ll require a ladder, a power drill, a socket wrench, pliers, screwdrivers, a level, and safety equipment. Ensure you have all the parts provided in the garage door opener kit.

: Verify Garage Door Compatibility

Check the garage door to ensure it’s compatible with a chain drive opener. Measure the door’s height and weight to ensure the opener can handle the load. Refer to the manufacturer’s guidelines for specific requirements.

: Prepare the Garage Door Area

Clear the area around the garage door and make sure there is sufficient space for the opener and its components. Remove any obstructions, and clean the tracks and rollers.

: Install the Header Bracket

Using the power drill and screws provided, install the header bracket on the ceiling above the garage door. Make sure it is securely fastened to a structural support. Use a level to ensure the bracket is straight.

: Assemble the Rail

Follow the manufacturer’s instructions to assemble the rail, which is the track that guides the trolley as the garage door opens and closes. Typically, this involves connecting multiple pieces of the rail together. Make sure the rail is straight and level.

: Attach the Rail to the Header Bracket

Slide the rail into the header bracket and secure it using the provided hardware. Ensure it is properly aligned, and use a level to confirm that it is straight.

: Install the Trolley and Motor Unit

Attach the trolley to the rail according to the instructions provided. Install the motor unit to the ceiling, aligning it with the rail. Connect the trolley to the motor unit using the chain. Make sure everything is securely fastened.

: Mount the Wall Control and Safety Sensors

Install the wall control on the wall inside the garage, and mount the safety sensors on either side of the garage door near the floor. Connect the wiring following the manufacturer’s guidelines.

: Power Wiring

Connect the power wiring to the motor unit. Follow the specific instructions in your opener’s manual for wiring details. Ensure that all connections are secure.

: Adjust Chain Tension

Adjust the tension of the chain by using the adjustment mechanism provided by the manufacturer. There should be just enough tension to keep the chain from sagging, but not too tight that it causes strain on the motor.

: Program the Opener

If your garage door opener comes with remote controls or a keypad, follow the instructions to program them. Set the travel limits and force adjustments according to the manual to ensure smooth operation.

: Test the Garage Door Opener

Carefully test the garage door opener by opening and closing the door using the remote control and wall button. Observe the movement of the door, listen for any unusual noises, and check for smooth operation.

: Adjust as Necessary

Make any necessary adjustments to the travel limits, force settings, and chain tension based on the performance during testing. Ensure that the safety features, such as the auto-reverse function, are working correctly.

: Secure and Hide Wiring (Optional)

If desired, secure and hide the wiring along the ceiling and walls using cable clips or conduits for a cleaner appearance.

: Final Inspection and Safety Check

Perform a final inspection of the entire system. Check for any loose connections, proper alignment, and overall functionality. Test the safety features, including the auto-reverse function with an obstruction.

By following these detailed steps and referring to your specific Garage Door Repair Indianapolis IN, you can successfully install a chain drive garage door opener. If you encounter any difficulties or uncertainties during the installation process, it’s recommended to consult a professional for assistance. Always prioritize safety throughout the installation.

Affordable Garage Door Repairs of Indianapolis, LLC

1-317-372-5337

How To Fix Safety Reverse On Garage Door – Veterans Garage Door

The safety reverse mechanism is a crucial component of your Sarasota Garage Door Repair system, responsible for stopping and reversing the door if it encounters an obstruction.

When this mechanism malfunctions, it poses a potential safety risk. This guide aims to provide you with a detailed troubleshooting process to identify and fix issues with the safety reverse on your garage door.

Materials and Tools You’ll Need

Before you begin troubleshooting, ensure you have the following materials and tools on hand:

  • User manual for your garage door opener
  • Ladder
  • Clean cloth
  • Wrench
  • Screwdriver
  • Level
  • Rubber mallet
  • Test object (such as a wooden block)
  • Garage door lubricant

: Safety Check

Before diving into troubleshooting, perform a basic safety check. Ensure there are no obstructions or debris in the path of the garage door. Clear any objects that might be blocking the door’s movement.

: Test the Force Setting

Most garage door openers have an adjustable force setting that controls the amount of force the door uses to open and close. If this setting is too high, it can prevent the safety reverse from working correctly. Refer to your user manual to locate and adjust the force setting. Test the door after making adjustments to see if the safety reverse engages.

: Inspect the Safety Sensors

The safety sensors are typically located on either side of the garage door near the floor. They emit an invisible beam that, when interrupted, triggers the safety reverse. Check if there is anything blocking the sensor beams. Clean the sensors with a clean cloth and ensure they are properly aligned. Adjust the sensors if necessary to ensure a clear line of sight.

: Check Sensor Wiring

Inspect the wiring connecting the safety sensors to the garage door opener. Damaged or disconnected wiring can impede the proper functioning of the safety reverse. Repair or replace any damaged wiring and ensure all connections are secure.

: Test the Safety Sensors

Perform a test to ensure the safety sensors are functioning correctly. Close the garage door and interrupt the sensor beam with an object (e.g., a wooden block). The door should stop and reverse immediately. If it doesn’t, recheck the alignment and cleanliness of the sensors.

: Adjust the Down Limit

If the safety reverse engages when closing the garage door but not when opening, the down limit may be set too high. Adjust the down limit according to your user manual’s instructions. This ensures that the door doesn’t close too forcefully and triggers the safety reverse when necessary.

: Lubricate Moving Parts

Lack of lubrication can lead to friction and affect the smooth operation of your garage door. Apply a garage door lubricant to all moving parts, including hinges, rollers, and tracks. Lubrication promotes smooth movement and can contribute to the proper functioning of the safety reverse.

: Check for Balance

An unbalanced garage door can put additional strain on the opener, affecting the safety reverse mechanism. Close the door and disconnect the opener. Manually lift the door halfway. If the door doesn’t stay in place, it may be unbalanced, and you may need to adjust the tension on the springs. Consult your user manual or seek professional help for spring adjustments.

: Test the Auto-Reverse Feature

Modern garage door openers come equipped with an auto-reverse feature that engages when the door encounters resistance. Test this feature by placing a small, sturdy object (like a wooden block) in the door’s path. The door should stop and reverse when it comes into contact with the object. If it doesn’t, consult your user manual for information on adjusting the auto-reverse sensitivity.

: Consult Professional Help

If, after performing the above steps, your garage door safety reverse is still not functioning correctly, it may be time to consult a professional technician. Garage door opener systems can be complex, and a trained technician can diagnose and address more intricate issues.

Conclusion:

Ensuring the proper functioning of the safety reverse on your Sarasota Garage Door Repair is essential for the safety of your family and property. By following this troubleshooting guide, you can identify and fix common issues that may impede the safety reverse mechanism. Regular maintenance and periodic checks contribute to the overall safety and longevity of your garage door system.

Veterans Garage Door

6497 Parkland Dr F, Sarasota, FL 34243, United States

1-941-699-6198

How Much Does A Chamberlain Garage Door Opener Cost – Little Elm Gates & Garage Door Repair

The cost of a Garage Door Repair Little Elm TX can vary based on several factors, including the model, features, horsepower, type of drive system, and whether it includes additional accessories or professional installation.

Chamberlain is a well-known brand that offers a range of garage door openers designed for residential use, known for their reliability and innovative features. In this comprehensive guide, we’ll explore the factors influencing the cost of Chamberlain garage door openers and provide insights into the various options available.

1. Types of Chamberlain Garage Door Openers: Chamberlain offers different types of garage door openers, each catering to specific needs and preferences:

  • Chain Drive Openers: These openers use a metal chain to move the door. They are generally more affordable but can be noisier compared to other types.
  • Belt Drive Openers: Belt-driven openers use a reinforced rubber belt for quieter operation. They are suitable for homes where a quieter garage door operation is desired.
  • Screw Drive Openers: Screw-driven openers use a threaded steel rod to move the door. They offer smooth and reliable operation with fewer moving parts.
  • Wall-Mounted Openers: Also known as jackshaft openers, these are mounted on the wall rather than the ceiling, providing a space-saving solution.

2. Horsepower: Chamberlain garage door openers come in different horsepower options, typically ranging from ½ HP to 1¼ HP. The horsepower affects the opener’s lifting capacity, and higher horsepower models are suitable for heavier garage doors. The choice of horsepower can impact the overall cost.

3. Smart Features: Chamberlain offers smart garage door openers that can be controlled remotely through a smartphone app. These smart features, including Wi-Fi connectivity and compatibility with virtual assistants like Alexa or Google Assistant, can contribute to a higher overall cost.

4. Battery Backup: Some Chamberlain models come with a battery backup feature, ensuring that the garage door opener remains operational during power outages. This feature, while adding to the cost, provides convenience and security.

5. Security Features: Chamberlain garage door openers often include security features such as rolling code technology and automatic locking systems. Enhanced security features may influence the overall cost.

6. Professional Installation: While some homeowners may choose to install garage door openers themselves, professional installation is often recommended. Installation costs can vary based on factors such as the type of opener, additional accessories, and local labor rates.

7. Brand and Model: Chamberlain offers a range of garage door openers with varying levels of features and performance. Higher-end models with advanced features may have higher upfront costs.

8. Additional Accessories: Chamberlain provides various accessories such as additional remotes, keypads, and laser parking assists. Including these accessories can contribute to the overall cost.

9. Warranty: Consider the warranty offered by Chamberlain for their garage door openers. A longer warranty period can provide peace of mind and contribute to the overall value of the product.

10. Local Market Conditions: Local factors, such as retail pricing and installation costs, can influence the overall price of Chamberlain garage door openers.

11. Obtaining Quotes and Comparisons: To get an accurate estimate, it’s recommended to obtain quotes from multiple retailers and installation professionals. Comparing these quotes will help you make an informed decision based on your budget and preferences.

Conclusion:

The cost of Garage Door Repair Little Elm TX depends on various factors, including the type of opener, horsepower, smart features, battery backup, security features, professional installation, brand, and local market conditions. Carefully assess your specific needs and budget to choose a Chamberlain garage door opener that meets your requirements. Professional installation is advised to ensure proper functionality and adherence to safety standards. Regular maintenance contributes to the longevity and performance of your garage door opener.

Little Elm Gates & Garage Door Repair

14809 Lone Spring Dr, Little Elm, TX 75068

1-972-597-8816

How Much Are Lifestyle Garage Door Screens – BH Gates & Garage Door Repair

Garage Door Repair Rockwall TX provide homeowners with an innovative solution to transform their garage space into a versatile, bug-free, and comfortable area.

The cost of lifestyle garage door screens can vary based on factors such as the size of the screen, material quality, customization options, and professional installation. In this comprehensive guide, we’ll explore the factors influencing the cost of lifestyle garage door screens and provide insights into the various options available.

1. Types of Lifestyle Garage Door Screens: Lifestyle garage door screens come in different types, each catering to specific preferences and requirements:

  • Retractable Screens: These screens can be rolled up and stored when not in use, providing flexibility in using the garage space.
  • Sliding Screens: Sliding screens operate on a track system, allowing easy opening and closing. They are a popular choice for those who want a more permanent screening solution.

2. Screen Material: The material of the garage door screen affects both its durability and cost. Common materials include:

  • Fiberglass: Lightweight and cost-effective, fiberglass screens provide good visibility and ventilation.
  • Polyester: Durable and resistant to damage, polyester screens are a popular choice for long-lasting performance.
  • Vinyl: Vinyl screens are durable and offer good resistance to the elements. They provide additional privacy and are easy to maintain.

3. Size and Customization: The size of the garage door opening directly impacts the cost of the screen. Larger openings will require more material and possibly a more robust structure. Additionally, customization options, such as color choices, decorative elements, and additional features, can contribute to the overall cost.

4. Motorization and Remote Control: Some lifestyle garage door screens offer motorized options with remote control functionality. This convenient feature allows homeowners to easily open and close the screens with the touch of a button, but it can add to the overall cost.

5. Professional Installation: While some homeowners may choose to install lifestyle garage door screens themselves, professional installation is often recommended. Installation costs can vary based on factors such as the complexity of the installation, the type of screen, and local labor rates.

6. Brand and Quality: Different brands offer lifestyle garage door screens with varying levels of quality and customization options. Established and reputable brands may have higher upfront costs but can provide better durability and warranty coverage.

7. Warranty and Maintenance: Consider the warranty offered by the manufacturer for lifestyle garage door screens. A longer warranty period or comprehensive coverage may contribute to the overall value of the product.

8. Local Market Conditions: Local factors, such as labor costs and market demand, can influence the overall price of lifestyle garage door screens and installation services.

9. Obtaining Quotes and Comparisons: To get an accurate estimate, it’s recommended to obtain quotes from multiple manufacturers and installation professionals. Comparing these quotes will help you make an informed decision based on your budget and preferences.

10. Energy Efficiency: Some lifestyle garage door screens offer enhanced insulation and UV protection, contributing to energy efficiency. While this can increase the initial cost, it may lead to long-term energy savings.

Conclusion:

Garage Door Repair Rockwall TX provide a flexible and functional solution for transforming your garage space. The cost of these screens can vary based on factors such as the type of screen, material, size, customization options, professional installation, and additional features. Carefully consider your specific needs, budget, and preferences to select a lifestyle garage door screen that enhances the usability of your garage while providing durability and convenience. Professional installation is advised to ensure proper functionality and longevity.

BH Gates & Garage Door Repair

420 Lynne Dr, Rockwall, TX 75032

1-469-654-3876

How Do You Replace Garage Door Rollers – Celina Gates & Garage Door Repair

Replacing Garage Door Repair Celina TX is a practical and manageable DIY project that can improve the smooth operation and longevity of your garage door.

Worn or damaged rollers can cause friction, noise, and operational issues. In this comprehensive guide, I’ll walk you through the step-by-step process of replacing garage door rollers.

: Gather Materials and Tools

Before you start the replacement process, gather the necessary materials and tools:

  • Replacement garage door rollers (ensure they match the type and size of your existing rollers)
  • 2×4 or similar support
  • C-clamps
  • Adjustable wrench
  • Flathead screwdriver
  • Pliers
  • Lubricant spray or garage door lubricant
  • Safety glasses and gloves

: Identify Roller Type

There are different types of garage door rollers, including nylon, steel, and roller bearings. Identify the type of rollers your garage door currently has, as this will determine the replacement rollers you need.

: Disconnect Power

For safety, disconnect power to the garage door opener. This can usually be done by pulling the emergency release cord or using the opener’s manual release mechanism.

: Close the Garage Door

Manually close the garage door to its fully lowered position. This ensures stability and accessibility to the rollers.

: Secure the Door

Use C-clamps or locking pliers to secure the garage door to the tracks. This prevents the door from accidentally falling while you’re replacing the rollers.

: Locate the Bottom Roller

Identify the bottom roller on each side of the garage door. This is typically the roller closest to the ground. Starting with the bottom rollers makes the replacement process more manageable.

: Remove the Roller Bracket Bolts

Locate the roller bracket attached to the bottom of the garage door. Use an adjustable wrench to loosen and remove the bolts securing the roller bracket to the door. Keep the bolts and any nuts in a safe place.

: Remove the Old Roller

Slide the old roller out of the roller bracket. Depending on the type of roller, you may need to use pliers to remove clips or retainers holding the roller in place. If your roller has a shaft, use a flathead screwdriver to pry it out.

: Install the New Roller

Insert the new roller into the roller bracket, ensuring that it aligns correctly with the shaft or retaining clips. If necessary, use pliers or a screwdriver to secure the roller in place.

: Reattach the Roller Bracket

Position the roller bracket back onto the garage door and align it with the holes. Insert the bolts through the bracket and tighten them securely using an adjustable wrench. Repeat the process for each bottom roller.

: Repeat for Top Rollers

Proceed to replace the top rollers using the same method. If your garage door has multiple sections, you may need to repeat the process for each section. Use the 2×4 or similar support to hold the door open while you work on the top rollers.

: Lubricate the Rollers

Once all new rollers are installed, use a lubricant spray or garage door lubricant to lubricate the rollers. Apply the lubricant to the roller bearings or shafts. This helps reduce friction and ensures smooth operation.

: Test the Garage Door

Operate the garage door manually or using the opener to test the new rollers. The door should move smoothly and quietly without any unusual noises. If there are any issues, double-check the installation and lubrication.

: Adjust Roller Screws (if applicable)

Some roller brackets have adjustment screws that can be used to fine-tune the alignment of the garage door. If needed, make small adjustments to ensure the door is level and moves smoothly along the tracks.

: Remove Supports and Restore Power

Remove the C-clamps or locking pliers securing the garage door. Reconnect power to the garage door opener by either plugging it back in or turning on the circuit breaker.

Additional Tips:

  1. Choose Quality Rollers: Invest in high-quality replacement rollers. Nylon rollers with ball bearings are a popular choice for smooth and quiet operation.
  2. Consider Professional Help: If you’re uncomfortable or unsure about replacing garage door rollers, consider hiring a professional garage door technician. They have the expertise and tools to ensure a smooth installation.
  3. Regular Maintenance: Periodically inspect and lubricate your garage door rollers as part of routine maintenance. This helps prolong the life of the rollers and ensures optimal performance.

Conclusion:

Replacing Garage Door Repair Celina TX is a practical and rewarding DIY task that can enhance the performance and lifespan of your garage door. By following these step-by-step instructions and taking safety precautions, you can successfully replace the rollers and enjoy a smoother and quieter operation. If you encounter challenges or if your garage door system requires additional repairs, consider seeking professional assistance for expert guidance and service.

Celina Gates & Garage Door Repair

211 S Ohio Dr, Celina, TX 75009

1-214-833-9968

How Do You Program A Remote Garage Door Opener – Valley Center Gates & Garage Doors

Programming a remote Valley Center Garage Door Repair is a straightforward process that allows you to control your garage door with ease and convenience.

Whether you’re setting up a new remote or reprogramming an existing one, the steps are generally similar across various brands and models of garage door openers. In this comprehensive guide, I’ll provide you with a step-by-step approach to program a remote garage door opener.

: Identify Your Garage Door Opener Model

Before you begin the programming process, identify the model of your garage door opener. This information is crucial as different openers may have specific instructions for programming remotes. Check the user manual that came with your opener or look for the model information on the motor unit.

: Access the Garage Door Opener

Locate the motor unit of your garage door opener. This is usually mounted on the ceiling of your garage. On the motor unit, you will find a “Learn” or “Program” button. Press and release this button to put the opener into programming mode.

: Choose a Button on the Remote

Decide which button on the remote you want to program for your garage door. Most remotes have multiple buttons, allowing you to control multiple garage doors or functions.

: Press and Hold the Remote Button

Hold down the button on the remote that you want to program. Hold it down until you see a light or indicator on the remote, signaling that it is in programming mode.

: Release the Remote Button

Once the remote is in programming mode, release the button. The remote is now ready to send a signal to the garage door opener.

: Press the Learn Button on the Opener

Quickly go to the motor unit of the garage door opener and press the “Learn” or “Program” button. You’ll typically have around 30 seconds to do this after releasing the button on the remote. The indicator light on the motor unit should activate, indicating that it’s ready to receive the programming signal.

: Wait for Confirmation

After pressing the “Learn” button on the opener, wait for the indicator light on the motor unit to flash or click. This signifies that the garage door opener has received the programming signal from the remote and has successfully learned its code.

: Test the Remote

Test the remote by pressing the button you programmed. The garage door should respond by either opening or closing. If it doesn’t, double-check the programming steps and repeat the process if necessary.

: Repeat for Multiple Doors (if needed)

If you have a multi-door garage opener or if you want to program additional remotes, repeat the entire process for each button or remote you want to add.

: Finalize Programming

Once all remotes are successfully programmed, press the “Learn” button on the garage door opener once more to exit programming mode. This ensures that the opener is back to its regular operating state.

: Troubleshooting

If you encounter any issues during the programming process or if the remote doesn’t work as expected, consult the user manual for your garage door opener. Common troubleshooting tips may include checking battery levels in the remote, ensuring proper alignment with the opener, or reprogramming the remote.

Conclusion:

Programming a remote Valley Center Garage Door Repair is a user-friendly process that enhances the convenience of accessing your garage. By following these detailed steps and referring to your specific garage door opener’s user manual, you can successfully program your remote and enjoy seamless operation of your garage door. If you encounter challenges, don’t hesitate to seek assistance from the garage door opener manufacturer or customer support for further guidance.

Valley Center Gates & Garage Doors

15947 Mac Tan Ln, Valley Center, CA 92082

1-760-309-7584

How Much Does It Cost To Replace Garage Door Spring – Encinitas Overhead & Garage Doors

Garage Door Repair Encinitas CA, often overlooked yet essential components, play a crucial role in the smooth operation of your garage door.

When faced with the need for replacement, understanding the factors influencing the cost can guide homeowners through this necessary maintenance task. From the type of spring to the intricacies of the replacement process, various elements contribute to the overall expense.

Importance of Garage Door Springs:

Garage door springs are responsible for counterbalancing the weight of the door, making it possible to open and close with ease. There are two primary types of springs used in garage doors: torsion springs and extension springs. Both types are subject to wear and tear over time, necessitating eventual replacement.

Common Signs of Faulty Springs:

  1. Unusual Noises:
    • Squeaking or popping sounds during operation may indicate a spring issue.
  2. Difficulty in Operation:
    • A door that struggles to open or close evenly is a clear sign of spring problems.
  3. Visible Wear and Tear:
    • Inspection may reveal visible signs of wear, such as rust or fraying.
  4. Door Imbalance:
    • An unevenly hanging door may suggest a broken or worn-out spring.

Factors Influencing Replacement Costs:

  1. Type of Spring:
    • Torsion springs are generally more expensive to replace than extension springs.
  2. Number of Springs:
    • Single-door systems typically have one spring, while double-door systems may have two. Replacement costs increase with the number of springs.
  3. Size and Weight of the Door:
    • Larger and heavier doors require more robust springs, impacting replacement costs.
  4. Material and Quality:
    • High-quality springs made from durable materials may cost more initially but offer long-term reliability.
  5. Professional Labor:
    • Hiring a professional for spring replacement ensures proper installation but adds to the overall cost.
  6. Emergency Repairs:
    • Urgent spring replacements outside regular business hours may incur additional charges.

Average Costs for Garage Door Spring Replacement:

  1. Torsion Springs:
    • Single spring replacement: $150 – $300
    • Double spring replacement: $200 – $400
  2. Extension Springs:
    • Single spring replacement: $80 – $150
    • Double spring replacement: $150 – $300

Tips for Cost-Effective Spring Replacement:

  1. Regular Maintenance:
    • Conduct routine inspections and lubrication to prolong the lifespan of springs.
  2. Address Issues Promptly:
    • Timely replacements can prevent further damage and reduce overall costs.
  3. Professional Inspection:
    • Schedule periodic inspections by professionals to identify potential issues before they escalate.
  4. DIY Assessments:
    • Homeowners can visually inspect springs for signs of wear, but replacements should be left to professionals.

Conclusion:

The cost to replace Garage Door Repair Encinitas CA depends on various factors, including the type of spring, the number needed, and the size of the door. Investing in timely replacements not only ensures the smooth operation of the garage door but also prevents more extensive and costly issues down the line. Understanding the factors influencing replacement costs empowers homeowners to make informed decisions regarding the maintenance of this integral component.

Encinitas Overhead & Garage Doors

1069 Double Ll Ranch Rd, Encinitas, CA 92024

1-858-758-9493

Page 1 of 2

Powered by WordPress & Theme by Anders Norén