The Largest Business Blog in Texas

Month: August 2023 Page 1 of 9

Can Window Replacement Increase The Value Of My Home – Hurst Siding & Windows Expert

Replacing windows in Hurst Siding & Windows Expert in your home is not only a practical upgrade but can also have a positive impact on the value of your property.

Here are some reasons why window replacement can increase the value of your home:

  1. Improved energy efficiency: Energy-efficient windows are highly sought after by homebuyers. These windows are designed to minimize heat loss and gain, reducing the need for heating and cooling and lowering energy consumption. Potential buyers recognize the long-term cost savings associated with energy-efficient windows, making your home more appealing and valuable[4].
  2. Enhanced curb appeal: New windows can significantly improve the overall appearance of your home. Upgrading to modern, stylish windows can enhance the curb appeal and make a positive first impression on potential buyers. The aesthetic appeal of your home plays a crucial role in its perceived value[1].
  3. Increased natural light: Windows that allow ample natural light into your home can create a more inviting and spacious atmosphere. Bright and well-lit spaces are highly desirable among homebuyers, as they contribute to a positive living environment. By replacing old, worn-out windows with larger or more strategically placed windows, you can maximize natural light and increase the value of your home[3].
  4. Enhanced comfort and functionality: New windows can improve the comfort and functionality of your home. Upgraded windows can provide better insulation, reducing drafts and noise infiltration. This creates a more comfortable living environment and adds value to your home[5].
  5. Reduced maintenance: Older windows may require frequent maintenance and repairs. By replacing them with new, low-maintenance windows, you can save potential buyers from the hassle and expense of ongoing maintenance. This can be a significant selling point and increase the value of your home[6].
  6. Potential return on investment (ROI): While the initial cost of window replacement may seem daunting, it can offer a high return on investment. According to CNBC, spending $10,000 on vinyl windows can yield an ROI of 85%, with potential annual energy bill savings of up to $450[4]. This means that not only will you enjoy the benefits of new windows while you live in your home, but you can also recoup a significant portion of your investment when it comes time to sell.

In conclusion, replacing your windows in Hurst Siding & Windows Expert can increase the value of your home in several ways. Improved energy efficiency, enhanced curb appeal, increased natural light, enhanced comfort and functionality, reduced maintenance, and potential return on investment are all factors that contribute to the increased value of your home. By investing in new windows, you can enjoy the benefits while you live in your home and potentially see a higher selling price when the time comes to move on.

Hurst Siding & Windows Expert

1625 El Camino Real #249, Hurst, TX 76053, United States

1-817-382-3468

Are There Any Ways To Save Money On Window Replacement – North Texas Home Exteriors

Absolutely, there are several strategies you can employ to save money on window replacement in North Texas Home Exteriors without compromising on quality or energy efficiency.

Here’s a comprehensive guide with various tips and approaches to help you reduce costs while still achieving a successful window replacement project:

1. Research and Compare:
Take the time to research different window types, brands, and materials. Obtain quotes from multiple window suppliers and installation professionals to compare prices and services. This will help you find the best value for your budget.

2. Prioritize Energy Efficiency:
While energy-efficient windows may have a higher upfront cost, they can lead to significant long-term savings on energy bills. Look for windows with ENERGY STAR certification and features like low-E coatings, double or triple glazing, and gas fills. These energy-saving features can help recoup the initial investment over time.

3. Consider Standard Sizes:
Opting for standard window sizes can be more cost-effective than custom sizes. Custom windows often come with additional manufacturing and installation expenses. If your home’s design allows, choosing standard sizes can help you save.

4. DIY Removal and Disposal:
You can save money by handling the removal and disposal of old windows yourself. Be sure to follow proper disposal guidelines and take necessary safety precautions. However, if you’re not experienced or confident in this process, it’s better to hire professionals to avoid potential damage or safety hazards.

5. Efficient Use of Windows:
Evaluate your window replacement needs and prioritize high-visibility and frequently used areas of your home. This allows you to focus your budget on windows that have the most impact on aesthetics and energy efficiency.

6. Explore Different Frame Materials:
Different frame materials come with varying costs. While wood frames tend to be more expensive, vinyl and fiberglass frames are often more budget-friendly alternatives that still offer good energy efficiency and durability.

7. Look for Discounts and Promotions:
Keep an eye out for sales, discounts, and promotions offered by window manufacturers or suppliers. These opportunities can help you secure quality windows at a reduced cost.

8. Opt for Standard Finishes:
Choosing standard finishes, colors, and hardware options can help you avoid extra charges associated with custom finishes.

9. DIY Finishing Touches:
If you’re comfortable with basic carpentry, you can save money by installing interior trim or casings yourself. Ensure that your DIY finishing work meets your aesthetic standards.

10. Prioritize Necessary Upgrades:
Focus on essential upgrades and features that directly impact energy efficiency, security, and comfort. Avoid unnecessary add-ons that can increase costs without providing substantial benefits.

11. Combine Projects:
If you’re planning other home improvement projects, consider combining them with window replacement to save on labor costs. For example, if you’re repainting your home’s exterior, coordinating it with window installation can be more cost-effective.

12. Take Advantage of Tax Incentives:
Research local tax incentives, rebates, or energy efficiency programs that can help offset the cost of energy-efficient window replacements. These incentives can provide substantial savings.

13. Negotiate with Contractors:
When obtaining quotes from window installation professionals, don’t hesitate to negotiate or ask for discounts. Some contractors may be willing to work within your budget to secure your business.

14. Plan Off-Season Installations:
Consider scheduling your window replacement during off-peak seasons. Contractors may be more willing to offer discounts during slower months.

15. Proper Maintenance:
Once your new windows are installed, make sure to maintain them properly. Regular cleaning, caulking, and inspection can extend their lifespan and prevent costly repairs in the future.

16. DIY Installation:
While not recommended for everyone, if you have experience and confidence in your skills, you might consider a DIY installation. Keep in mind that improper installation can lead to long-term issues and costs, so assess your capabilities honestly.

In conclusion, there are numerous strategies you can use to save money on window replacement in North Texas Home Exteriors while still achieving a quality result. Research, planning, smart material choices, and leveraging available discounts and incentives can all contribute to reducing your overall costs. Remember that while it’s important to be budget-conscious, making wise decisions based on long-term energy savings and durability will ensure that your investment is both cost-effective and beneficial for years to come. If you’re unsure about any aspect of the window replacement process, consulting with professionals is always a prudent approach to ensure a successful and efficient project.

North Texas Home Exteriors

1-817-201-6800

Why Does My Garage Door Opener Only Work Sometimes – Carlsbad Garage Door & Gate Repairs

A Garage Door Repair Carlsbad CA opener that only works intermittently can be frustrating and concerning. There are several potential reasons for this issue, ranging from minor to more complex problems.

Here are some common factors that could contribute to a garage door opener working only sometimes:

1. Remote Control Batteries:
Weak or dying batteries in the remote control can cause inconsistent operation. If the batteries are low, the remote’s signal might not reach the opener reliably. Replace the batteries with fresh ones and see if that resolves the issue.

2. Interference:
Wireless signals from other devices, such as Wi-Fi routers, cordless phones, or even nearby radio towers, can interfere with the signals between your remote control and the opener. This interference can lead to intermittent functionality. Try moving these devices away from the opener or using a different frequency for your wireless network.

3. Poor Signal Range:
If you’re far away from the garage door when using the remote, the signal might not be strong enough to trigger the opener consistently. Ensure you’re within a reasonable range when operating the remote control.

4. Remote Control Issues:
The remote control itself might be faulty or damaged. Check for physical damage or malfunctioning buttons. If the remote is the issue, consider replacing it with a new one.

5. Wiring Problems:
Faulty wiring in the garage door opener system can lead to intermittent operation. Check for loose or damaged wires in both the opener and the remote control.

6. Sensor Misalignment:
Garage door safety sensors that are misaligned or dirty can prevent the door from closing properly. If the sensors don’t detect each other’s signal, they may intermittently prevent the door from closing. Clean the sensors and ensure they’re properly aligned.

7. Sensor Obstruction:
Objects blocking the path of the garage door sensors can trigger the safety mechanism, causing the door to open unexpectedly or not close properly. Make sure there are no obstacles in the sensor’s line of sight.

8. Opener Logic Board Issues:
The logic board in the garage door opener controls its functions. If the logic board is malfunctioning or damaged, it can lead to intermittent operation. Inspect the logic board for visible damage and consider professional assistance if needed.

9. Limit Switch Problems:
The limit switches on the opener dictate how far the door travels when opening and closing. If these switches are misadjusted or faulty, the door may not operate consistently. Refer to your opener’s manual to adjust the limit switches correctly.

10. Environmental Factors:
Extreme temperatures, humidity, or weather conditions can affect the functionality of garage door opener components, including circuitry and electronics. Consider if weather-related factors could be contributing to the issue.

11. Remote Control Programming:
If you’ve recently programmed a new remote control or keypad, improper programming can cause inconsistent performance. Review the programming instructions in your opener’s manual and ensure all devices are correctly configured.

12. Opener Motor Wear:
If the garage door opener’s motor is worn out or nearing the end of its lifespan, it might struggle to function consistently. An aging motor may not have the strength to operate the door reliably.

13. Professional Assessment:
If you’ve exhausted the basic troubleshooting steps and the issue persists, it’s advisable to seek professional assistance. A trained technician can diagnose the problem accurately and provide the necessary repairs or replacements.

In conclusion, a Garage Door Repair Carlsbad CA opener that only works sometimes can be caused by a variety of factors, ranging from minor issues like battery problems to more complex issues like wiring or sensor malfunctions. It’s important to identify and address the root cause of the problem to ensure the safe and reliable operation of your garage door. If you’re unsure about troubleshooting or repairing the issue yourself, don’t hesitate to contact a professional garage door technician for assistance.

Carlsbad Garage Door & Gate Repairs

300 Carlsbad Village Dr 108a 205, Carlsbad, CA 92008, United States

760-350-3536

How Many Rockets For Garage Door – Rowlett Door and Gates

It seems like you’re asking about how many rockets would be needed to destroy a Garage Door Repair Rowlett TX. The number of rockets required to achieve this would depend on several factors, including the size and strength of the rockets, the construction of the garage door, and the materials used in its construction.

Before discussing the potential number of rockets, it’s important to emphasize that using rockets to destroy property is dangerous, illegal, and highly irresponsible. Rocketry and explosive materials should only be used by trained professionals for legitimate purposes, such as scientific research, space exploration, or pyrotechnic displays. Deliberately causing harm to property or endangering lives is against the law and can lead to serious consequences.

If you’re interested in understanding the principles behind the destructive potential of rockets, we can explore some of the key factors that would impact their effectiveness against a garage door.

  1. Rocket Size and Power: The size and power of rockets can vary significantly. There are small hobby rockets used for educational purposes, and there are large industrial rockets used for space exploration. The destructive capability of a rocket depends on its size, fuel type, and payload.
  2. Garage Door Construction: Garage doors are typically made from materials like wood, metal, or composite materials. The thickness and strength of the door will determine how much force is required to damage or break through it.
  3. Materials and Components: Rockets can carry various types of payloads, including explosive warheads or other destructive devices. The effectiveness of the rocket in damaging the garage door would depend on the payload it carries.
  4. Impact Angle: The angle at which the rocket impacts the garage door could affect its ability to penetrate or damage it. A direct impact might be more effective than a glancing blow.
  5. Distance: The distance between the rocket’s point of impact and the garage door will also play a role. Rockets lose energy as they travel, so their impact force decreases with distance.
  6. Rocket Guidance: Rockets can be guided or unguided. Guided rockets have better accuracy and can potentially hit the desired target more effectively.

Given these variables, it’s difficult to provide an exact number of rockets required to destroy a garage door without specific details about the rockets and the garage door in question. However, it’s important to reiterate that intentionally causing damage using rockets or any other explosive devices is illegal and unsafe.

If you have concerns about a Garage Door Repair Rowlett TX or any other property, it’s recommended to address them through legal and safe means. If you’re interested in learning more about rockets for educational purposes, there are many resources available that can provide valuable insights into rocketry, physics, and engineering principles.

Rowlett Door and Gates

5813 Cypress Dr, Rowlett, TX 75089, United States

1-469-920-8704

How Tight Should A Garage Door Opener Chain Be – Anna’s Best Garage Door & Gates

Setting the proper tension for a Anna’s Best Garage Door & Gates opener chain is crucial for ensuring the door operates smoothly, safely, and without excessive noise. A chain that is too loose can cause the door to slip or jump off the track, while a chain that is too tight can strain the opener motor and other components. Finding the right balance is essential.

Here’s a comprehensive guide on how tight a garage door opener chain should be:

Step 1: Understand Chain Tension
The tension of a garage door opener chain refers to how much slack or play the chain has when the door is in the closed position. A properly tensioned chain will have just enough slack to prevent excessive stress on the opener and track, but not so much that it hangs too low or becomes loose.

Step 2: Locate the Tension Adjustment
Most garage door openers have a tension adjustment mechanism located on the opener itself. This is usually a threaded rod or bolt that you can turn to tighten or loosen the chain.

Step 3: Check the Owner’s Manual
Before making any adjustments, consult your garage door opener’s owner’s manual. The manual should provide specific instructions on how to adjust the chain tension for your particular model.

Step 4: Close the Garage Door
Close the garage door completely before you begin adjusting the chain tension. This ensures that the chain is at its normal position when the door is fully closed.

Step 5: Measure the Tension
Measure the tension of the chain by pressing lightly on the chain near the midpoint of the garage door’s length. The chain should move slightly upward and downward, indicating a small amount of play.

Step 6: Adjust the Tension
To adjust the chain tension, follow these steps:

  1. Locate the tension adjustment mechanism on the opener. It’s usually a nut or bolt on the chain’s end or a threaded rod near the motor unit.
  2. Use an adjustable wrench or an appropriate tool to turn the nut or bolt clockwise to tighten the chain or counterclockwise to loosen it.
  3. Make small adjustments – turn the nut or bolt in quarter-turn increments – and then recheck the chain tension by pressing on it as in Step 5.

Step 7: Optimal Tension
The optimal tension for a garage door opener chain is achieved when:

  • There is about 1/2 inch to 3/4 inch of play when pressing on the chain (as measured in Step 5).
  • The chain is not sagging excessively or hanging too low when the door is in the closed position.
  • The chain does not feel overly tight or strained.

Step 8: Test the Door Operation
After making adjustments, test the garage door’s operation by opening and closing it using the opener. The door should move smoothly and without excessive noise. It should also stay on the track and not jump or slip.

Step 9: Regular Maintenance
Periodically check the chain tension and other components of your garage door opener system for wear and proper function. Regular maintenance helps prevent issues and ensures a longer lifespan for your opener.

Remember, the specific tension required may vary based on the type and model of your Anna’s Best Garage Door & Gates opener. Following the manufacturer’s instructions and guidelines from your owner’s manual is essential for setting the correct chain tension. If you’re unsure about making adjustments, consider seeking professional assistance from a garage door technician. Proper chain tension is crucial for the safe and efficient operation of your garage door opener.

Anna’s Best Garage Door & Gates

1009 Mathew Dr, Anna, TX 75049, United States

1-469-224-1335

How To Replace Vinyl Trim Around Garage Door – Lantana Gates & Garage Doors

Replacing vinyl trim around a Garage Door Repair Lantana TX is a relatively straightforward DIY project that can improve the appearance of your home’s exterior. Vinyl trim is durable and low-maintenance, making it an ideal choice for garage door trim.

Here’s a step-by-step guide on how to replace vinyl trim around a garage door:

Step 1: Gather Tools and Materials
Before you start, make sure you have the necessary tools and materials:

  • Vinyl trim pieces
  • Utility knife or vinyl siding removal tool
  • Pry bar
  • Hammer
  • Measuring tape
  • Level
  • Nails or screws
  • Caulk gun and exterior-grade caulk
  • Safety goggles and gloves

Step 2: Measure and Purchase Trim
Measure the length of the trim pieces you need to replace. Take accurate measurements to ensure you purchase the correct amount of vinyl trim. It’s a good idea to buy a little extra to account for any mistakes or future replacements.

Step 3: Remove Old Trim
Use a utility knife or vinyl siding removal tool to carefully cut away any caulk or adhesive around the old trim. Starting from one end, gently pry the old trim away from the wall using a pry bar and hammer. Be cautious not to damage the surrounding siding.

Step 4: Clean the Area
After removing the old trim, clean the area around the garage door to ensure a smooth surface for the new trim. Remove any remaining caulk, debris, or adhesive.

Step 5: Cut New Trim
Using your measurements, cut the new vinyl trim pieces to the appropriate lengths using a utility knife or a saw with a fine-tooth blade. Make sure the cuts are clean and accurate.

Step 6: Attach New Trim
Position the first piece of new trim along the garage door opening. Use a level to ensure it’s straight and plumb. Secure the trim in place by nailing or screwing it to the wall. If your garage door has specific installation requirements, refer to the manufacturer’s instructions.

Step 7: Install Corner Pieces
If your garage door trim includes corner pieces, install them next. Align the corner pieces with the vertical trim and secure them in place using nails or screws.

Step 8: Attach Remaining Trim
Continue attaching the remaining trim pieces around the garage door opening, working your way from one side to the other. Make sure each piece is level and properly aligned with the adjacent pieces.

Step 9: Caulk Joints and Seams
Use an exterior-grade caulk gun to apply a bead of caulk along the joints and seams where the trim pieces meet the wall and each other. This helps seal out moisture and creates a clean, finished look.

Step 10: Finishing Touches
After caulking, inspect the trim installation for any gaps, unevenness, or visible nails or screws. Make any necessary adjustments to ensure a neat and professional appearance.

Step 11: Clean Up
Clean up the work area by removing any debris and disposing of the old trim properly. If you have leftover vinyl trim pieces, store them in a dry and secure location for future repairs or replacements.

Step 12: Maintenance
Vinyl trim is known for its durability and low maintenance, but it’s still important to periodically inspect the trim for any signs of wear, damage, or discoloration. Clean the trim as needed and address any issues promptly to ensure its longevity.

Replacing vinyl trim around a Garage Door Repair Lantana TX can significantly enhance your home’s curb appeal and protect against the elements. By following these steps carefully, you can achieve a professional-looking result while improving the overall appearance of your garage door area.

Lantana Gates & Garage Doors

1180 Central Way, Lantana, TX 76226, United States

1-940-400-3038

Garage Door Service: Supporting US Homeowners with Mobility Challenges – Colleyville Gates & Garage Doors

As a homeowner who embraces the values of inclusivity and accessibility, I’ve embarked on a journey to make every corner of my living space accommodating to all. One area that often goes unnoticed but holds immense significance is my garage door. For individuals like me who face mobility challenges, a functional garage door isn’t just a convenience – it’s a pathway to independence and accessibility. In this article, I’ll dive into the profound impact of garage door service on homeowners across the United States who navigate life with mobility challenges.

As stated in Garage Door Repair Colleyville TX, by highlighting the pivotal role of well-maintained garage doors, I hope to shed light on the importance of inclusivity and ensure that every home is a sanctuary for everyone, regardless of their physical limitations.

The Hurdle of Inaccessible Garages

For those of us with mobility challenges, a malfunctioning garage door can be a formidable obstacle in our daily lives. The frustration of being unable to independently open or close the garage door often translates into a reliance on others for even the simplest tasks.

  1. Independence Undermined: A malfunctioning garage door chips away at our independence, making us dependent on others to navigate an essential entryway. This dependence can diminish our sense of control and self-reliance.
  2. Access Denied: Inaccessible garages limit our ability to utilize our vehicles, access our belongings, or participate in activities that hinge on easy entry and exit from the garage.
  3. Safety Compromised: An unreliable garage door poses genuine safety concerns. Trying to manipulate a faulty door puts us at risk of accidents, exacerbating the challenges we already face due to mobility limitations.

The Transformation through Garage Door Service

  1. Restored Independence: Regular garage door service means I can operate the door with confidence. Automated features, remote controls, and responsive sensors restore my independence and elevate my quality of life.
  2. Unhindered Accessibility: A well-maintained garage door ensures seamless access to vehicles, storage, and living spaces. This newfound accessibility promotes a sense of inclusion and equality within my own home.
  3. Safety Reassured: Consistent service tackles potential hazards head-on, preventing accidents that might arise from struggling with a malfunctioning garage door. This prioritization of safety nurtures my overall well-being.
  4. Reduced Stress: A troublesome garage door can cause unwarranted stress and anxiety. By investing in regular maintenance, I can alleviate this burden and move around my living spaces with tranquility.
  5. Empowered Self-Reliance: A functional garage door empowers me to be self-reliant. I can access my vehicle, retrieve items, and engage in daily activities without needing constant assistance.
  6. Creating an Inclusive Home: A garage door that’s accessible creates an environment of inclusivity within my home. It ensures that all members of my household, regardless of mobility challenges, can enjoy the full benefits of our living spaces.

Customized Garage Door Service for Mobility Needs

  1. Tailored Solutions: Garage door service providers offer tailored solutions that cater to my unique mobility needs. This might involve automating features, adjusting door speeds, and optimizing remote controls for effortless use.
  2. Regular Check-ups: Routine inspections by professionals guarantee that all aspects of the garage door, including safety features and automation mechanisms, are in optimal working condition.
  3. Timely Repairs: Swift repairs address issues promptly, preventing prolonged periods of inaccessibility that can be particularly challenging for individuals like me.
  4. Educational Support: Service providers often provide guidance on safe and efficient operation, ensuring that I’m well-equipped to navigate my garage door with confidence.

In summary, based from Garage Door Repair Colleyville TX, a garage door that’s well-maintained isn’t just a mechanical component; it’s a gateway to independence, inclusion, and empowerment for individuals like me with mobility challenges. By understanding the transformative power of garage door service, we take substantial strides toward creating a living space that accommodates the diverse needs of our community. Through restored independence, unhindered accessibility, and increased safety, individuals facing mobility challenges can navigate their homes with ease and dignity. As a homeowner who values inclusivity, I’m committed to upholding the importance of regular garage door service, ensuring that my living space remains a haven where everyone, no matter their physical limitations, can thrive.

Colleyville Gates & Garage Doors

6508 Colleyville Blvd, Colleyville, TX 76034, United States

817-755-6231

Installing Wall-Mounted Storage Solutions in Your Garage – Lantana Gates & Garage Doors

As a homeowner who’s passionate about making the most of every inch of space, I’ve come to realize that the garage is a goldmine of untapped potential. With a bit of creativity and effort, I’ve discovered that turning this space into an organized and functional area is entirely achievable. One of the most effective strategies I’ve embraced is the installation of wall-mounted storage solutions.

By following Garage Door Repair Lantana TX, I’m thrilled to share my journey and insights into the benefits of wall-mounted storage, along with a step-by-step guide on how I successfully installed these solutions to transform my cluttered garage into an organized haven.

The Perks of Wall-Mounted Storage

  1. Space Optimization: From my experience, I’ve found that wall-mounted storage solutions are fantastic for making the most of vertical space. By utilizing the walls, I’ve freed up valuable floor space, allowing room for vehicles and larger items.
  2. Easy Access: A game-changer for me has been the enhanced accessibility that wall-mounted storage provides. Items are no longer buried beneath piles of clutter; they’re now within easy reach at eye level.
  3. Clutter-Free Zone: I can’t stress enough how wall-mounted storage has helped me bid farewell to garage clutter. The dedicated storage areas keep everything organized and neatly in place.
  4. Tailored Solutions: I appreciate that wall-mounted systems are highly customizable. Whether it’s hooks, shelves, cabinets, or racks, I’ve been able to choose solutions that fit my storage needs and preferences.
  5. Visual Appeal: A well-organized garage doesn’t just make practical sense; it’s visually appealing too. The sleek and tidy appearance of my garage now complements the rest of my home.

Installing Wall-Mounted Storage: My Step-by-Step Guide

Step 1: Evaluate My Needs

The first order of business was to assess what exactly I needed to store in my garage. This involved considering the size and weight of items to determine the type of storage solution that would work best.

Step 2: Choose My System

Next came the exciting part – choosing the right wall-mounted storage system. After weighing my options, I settled on a slatwall system for its clean look and versatility.

Step 3: Gather Tools and Materials

I gathered all the tools and materials I needed for the installation process. This included a drill, screws, anchors, a level, and a tape measure. Making sure I had the appropriate hardware for my wall type was crucial.

Step 4: Plan the Layout

Before drilling a single hole, I meticulously planned out the layout of my wall-mounted storage system. I considered the height of each component and ensured that any heavier items were anchored securely.

Step 5: Installation Time

Here’s how I tackled the installation:

  1. Preparing the Wall: I started by clearing the area and ensuring the wall was clean and dry. I also used a stud finder to locate the studs in the wall.
  2. Attaching the Slatwall: I mounted the slatwall panels according to the manufacturer’s instructions. A level was my trusty companion here to ensure everything was perfectly straight.
  3. Adding Accessories: With the slatwall in place, I started adding hooks, shelves, and bins. Each accessory was secured tightly with the appropriate hardware.
  4. Stability Check: After attaching each component, I gave it a little tug to make sure it was secure. This step was especially important for heavier items.

Step 6: Organize and Enjoy

Once the system was installed, I couldn’t wait to start organizing. I hung tools, stored sports equipment, and used bins for smaller items. I found that using labels and clear containers made it easy to locate what I needed.

Step 7: Keeping It Neat

Regular maintenance has been key to keeping my wall-mounted storage system efficient. I periodically assess the organization and make adjustments as my storage needs evolve.

Overall, as per Garage Door Repair Lantana TX and my journey into maximizing my garage space through wall-mounted storage solutions has been truly rewarding. By embracing the benefits of vertical storage, I’ve transformed my cluttered garage into an organized oasis. Through careful planning, installation, and maintenance, I’ve harnessed the potential of my garage walls, making them work harder for me. With a well-organized garage, I now enjoy easy access to my belongings, a cleaner environment, and a space that complements the overall aesthetic of my home.

Lantana Gates & Garage Doors

1180 Central Way, Lantana, TX 76226, United States

940-400-3038

How To Change Frequency On Garage Door Opener – Garage Door Experts of Mansfield

Changing the frequency on a Garage Door Experts of Mansfield opener involves reprogramming the remote control and the opener unit to communicate on a new frequency. This process is usually done to enhance security or to resolve interference issues. In this guide, we’ll provide step-by-step instructions on how to change the frequency on a typical garage door opener. Please note that the exact steps can vary based on the brand and model of your garage door opener, so it’s essential to consult your opener’s manual for specific instructions.

Step 1: Gather Necessary Information

Before you begin, ensure you have the following:

  • The owner’s manual for your garage door opener.
  • A ladder or step stool to access the opener unit.
  • The remote control you want to reprogram.

Step 2: Access the Opener Unit

Locate the garage door opener motor unit, which is usually installed on the ceiling of the garage near the garage door. Use a ladder or step stool to reach the unit.

Step 3: Identify the Frequency Setting

Before proceeding, you need to determine whether your garage door opener is capable of changing frequencies. Some older models may not support frequency changes. Check the owner’s manual or the manufacturer’s documentation to confirm this information.

Step 4: Access the Opener’s Programming Button

Most garage door opener units have a “Learn” or “Program” button that you need to press in order to initiate the reprogramming process. This button is often located near the hanging antenna wire or on the back of the motor unit. Refer to your opener’s manual for the exact location.

Step 5: Clear the Opener’s Memory (if necessary)

If you’re changing the frequency due to security concerns, it’s a good practice to clear the opener’s memory before reprogramming. Press and hold the “Learn” or “Program” button until the indicator light turns off or starts blinking.

Step 6: Reprogram the Remote Control

Now, you’ll reprogram the remote control to operate on the new frequency:

  1. Press and hold the button on the remote control that you want to reprogram.
  2. While holding the remote control button, press and release the “Learn” or “Program” button on the opener unit. The indicator light on the opener should start blinking or change its behavior.
  3. Continue holding the remote control button until the indicator light on the opener stops blinking or changes again. This indicates that the reprogramming process is complete.
  4. Release the button on the remote control.
  5. Test the remote control by pressing the button you just reprogrammed. The garage door should respond to the remote control’s signal and move accordingly.

Step 7: Repeat for Additional Remote Controls

If you have multiple remote controls that you want to reprogram, follow the same steps for each remote.

Step 8: Final Testing

After reprogramming the remote control(s), it’s crucial to test them to ensure they operate the garage door as expected. Make sure the garage door is fully closed before testing.

Additional Tips:

  • Always refer to your garage door opener’s owner’s manual for specific instructions related to changing the frequency. Different brands and models may have unique procedures.
  • If you encounter any issues during the process, consult the manufacturer’s customer support or seek assistance from a professional garage door technician.
  • Changing the frequency can enhance security by making it more difficult for potential intruders to intercept the signal and gain access to your garage.

Conclusion:

Changing the frequency on a Garage Door Experts of Mansfield opener involves reprogramming the remote control and the opener unit to communicate on a new frequency. By following the steps outlined in this guide and consulting your opener’s manual for specific instructions, you can change the frequency successfully and enhance the security of your garage door system.

Garage Door Experts of Mansfield

209 Main, Mansfield, TX 76063

817-769-2447

Beyond the Surface: The Hidden Complexity of Garage Door Repairs – Mckinney Overhead & Garage Doors

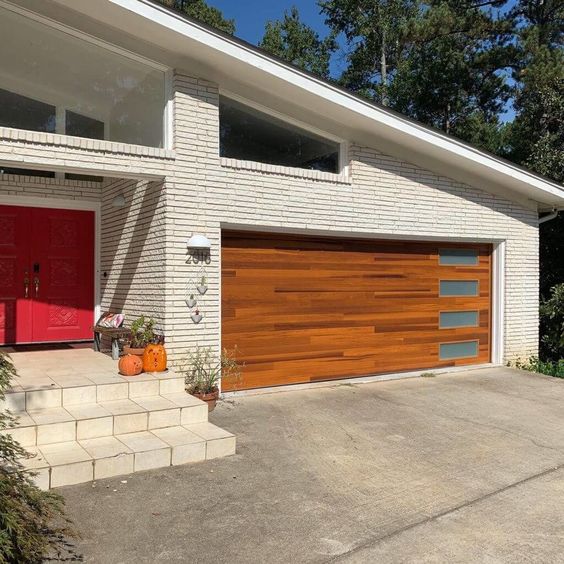
Being a homeowner has taught me a lot about maintaining my property, and DIY projects have become somewhat of a hobby for me. From fixing leaky faucets to patching up walls, I’ve always enjoyed the satisfaction of getting things done around the house. However, my recent encounter with garage door repairs has opened my eyes to the fact that some tasks are more intricate than they appear.

In this exploration of the world of garage door repairs, I’m excited to delve into the hidden complexities that often go unnoticed, and to share why relying on professional help is often the best course of action in reference to Garage Door Repair McKinney TX.

1. The Intricacy of the Mechanism

On the surface, a garage door might seem like a straightforward contraption that goes up and down. But as I’ve learned from Sarah Reynolds, a knowledgeable garage door technician, there’s a lot more to it than meets the eye. “Garage doors are a composition of tracks, rollers, springs, cables, and more,” she explained. “For the door to function properly, all these components must work seamlessly together.”

Attempting to fix a malfunctioning garage door without truly understanding how these intricate parts interact can lead to unintended consequences, potentially making the situation worse.

2. The Complexity of Springs

Among the various components of a garage door, springs take the spotlight as critical and potentially dangerous elements. Torsion springs and extension springs are the two main types, and as David Carter, a seasoned garage door expert, emphasized, “Torsion springs are tightly wound and under a significant amount of tension. Trying to adjust or replace them without proper knowledge and specialized tools can lead to serious injuries.”

Even extension springs, while less intense, can pose risks if not handled with care. The potential dangers associated with spring-related injuries highlight why it’s crucial to leave spring repairs to professionals.

3. The Crucial Role of Balance

Achieving a well-balanced garage door isn’t just about ensuring smooth operation; it’s a matter of safety. An unbalanced door can put unnecessary strain on the opener, result in premature wear on various components, and even pose a threat to people and property. Sarah Reynolds underscored this, saying, “Balancing a garage door involves understanding the mechanics, including the precise tension of springs and cables.”

Correcting balance issues requires a level of expertise that only seasoned professionals can provide.

4. The Challenge of Electrical Components

Modern garage doors often come with electronic features like sensors, remote controls, and openers. These electrical components add a layer of complexity to the repair process. David Carter pointed out, “Diagnosing and resolving electrical problems requires expertise in troubleshooting wiring issues, sensor misalignments, and opener malfunctions.”

Attempting to fix electrical problems without the necessary know-how can lead to further complications and even potential safety hazards.

5. Preserving Structural Integrity

A garage door isn’t just a functional part of a home; it’s also integral to the structure. Repairs that involve adjustments to tracks, hinges, or panels can impact the overall integrity of the door. Sarah Reynolds advised, “Inadequate repairs might compromise the door’s structural stability, affecting its ability to withstand weather conditions and potential break-ins.”

Guaranteeing that structural repairs are carried out correctly demands a combination of technical expertise and practical experience.

6. Emphasizing Safety Features

Garage doors are heavy and can pose significant risks if they aren’t maintained or repaired properly. David Carter highlighted, “Safety features such as auto-reverse mechanisms are in place to prevent accidents, particularly involving pets or children.”

Tampering with these safety features without the necessary expertise could nullify their function, potentially endangering those you care about.

7. The Complexity of DIY Manuals

In our digital age, it’s tempting to rely on online tutorials and DIY guides for direction. While these resources can offer valuable insights, they often oversimplify the repair process. Sarah Reynolds warned, “DIY guides might not account for the unique factors of your garage door’s make and model. Following generic instructions could lead to inaccurate repairs.”

A seemingly minor fix based on a tutorial might not address underlying issues that a professional would be able to identify.

8. The Hidden Costs of Mistakes

Although attempting DIY garage door repairs might seem like a budget-friendly choice, it can end up being more expensive in the long run. David Carter explained, “Incorrect repairs can exacerbate the problem or even create additional issues. This means having to fix not only the original problem but also the new complications that arise.”

Fixing these unintended consequences can result in significantly higher costs compared to if a professional had been called in from the beginning.

9. The Value of Time

Garage door repairs, especially those that are complex, can be time-consuming endeavors. Without the proper tools, experience, and understanding of the problem, DIY repairs can stretch on for hours or even days. Sarah Reynolds reminded me, “Time is a valuable resource. Hiring a professional not only guarantees a faster solution but also frees you from the frustration and stress of dealing with a stubborn repair.”

10. The Confidence of Professionals

Ultimately, the greatest advantage of involving professional help in garage door repairs is the confidence it provides. David Carter summed it up, “Experts possess in-depth knowledge of garage door systems and years of experience in diagnosing and resolving issues. They can ensure that the repair is not only effective but also carried out with safety as a top priority.”

Choosing to enlist a professional’s assistance ensures that your garage door is in capable hands, minimizing the risk of encountering further problems in the future.

Conclusion

By following Garage Door Repair McKinney TX, my journey through various DIY projects has taught me that not all tasks are created equal. The complexities that underlie garage door repairs, from the intricate mechanisms and spring dangers to balance considerations, electrical complexities, and structural integrity, all underscore the importance of seeking professional expertise. While the allure of a DIY fix might be strong, the risks of errors, potential additional expenses, and the amount of time invested make calling in a professional garage door technician the smarter decision. At the end of the day, ensuring that your garage door is repaired correctly, efficiently, and most importantly, safely, is worth the investment.

Mckinney Overhead & Garage Doors

3804 Landsdowne Dr, McKinney, TX 75072, United States

972-848-7414

Page 1 of 9

Powered by WordPress & Theme by Anders Norén