The Largest Business Blog in Texas

Month: November 2023 Page 1 of 7

How To Change Garage Door Code Without Old Code – Southern Home Creations Garage Doors & Openers

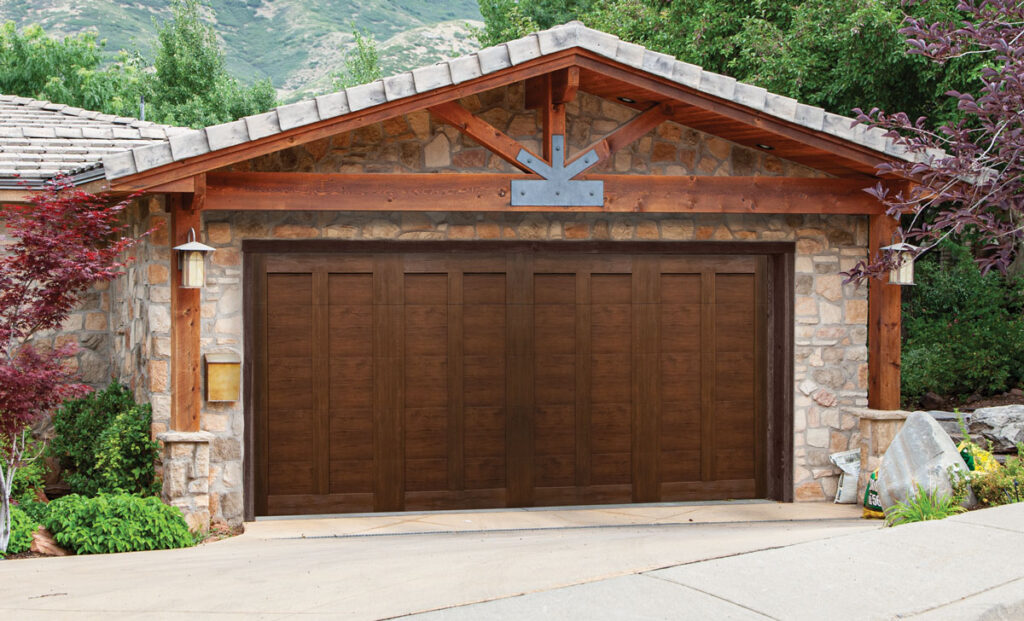
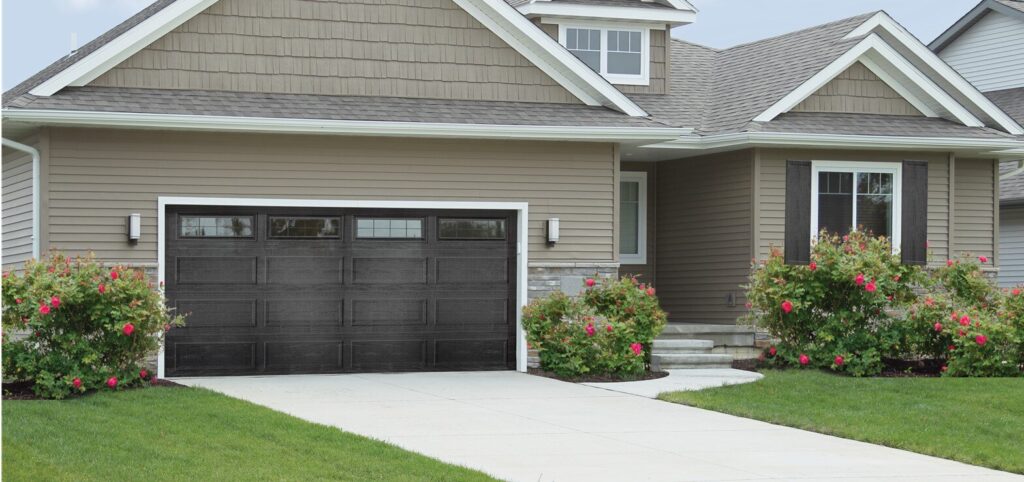
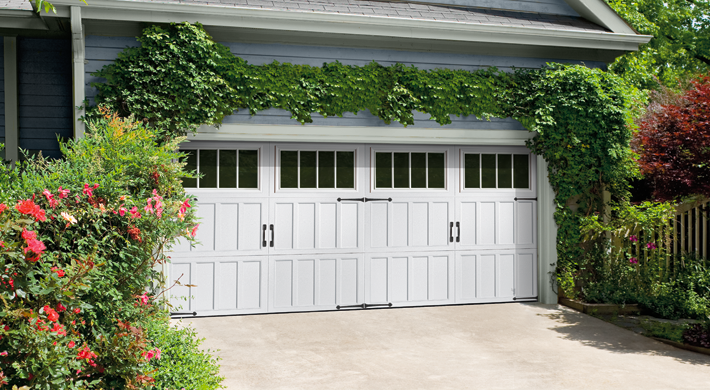
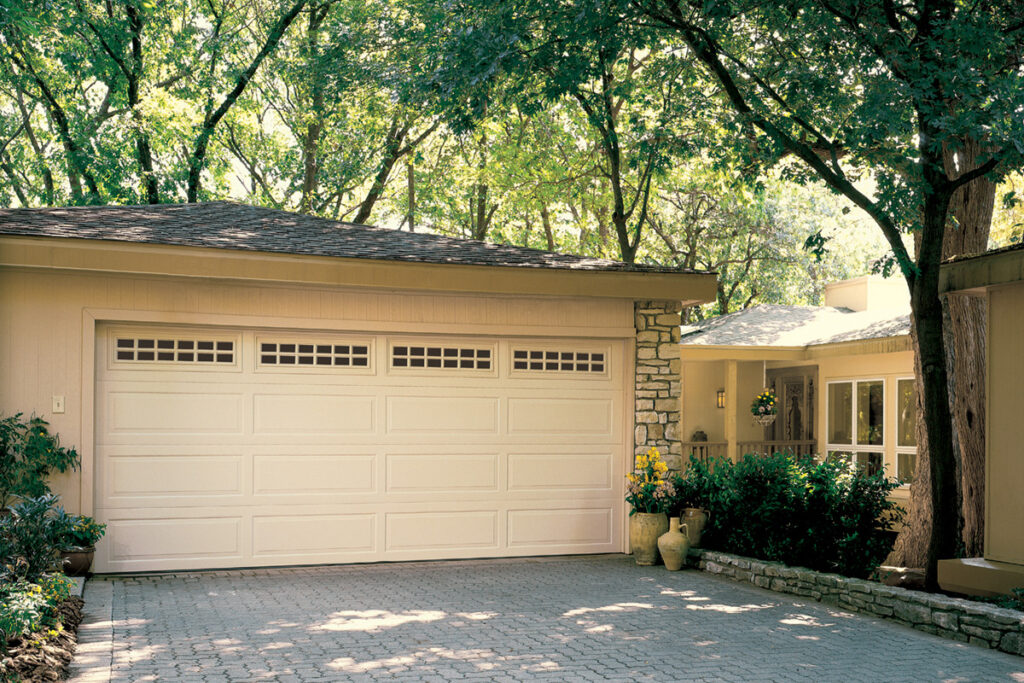
Changing your Garage Door Repair Suwanee GA one can be a necessary task for security reasons or if you’ve recently moved into a new home.

While the process might vary slightly depending on the type and model of your garage door opener, the following comprehensive guide provides general steps to help you reset your garage door code without the old one.

: Identify Your Garage Door Opener Model

Before you start, identify the make and model of your garage door opener. This information is crucial as different openers have varying procedures for code changes.

: Locate the “Learn” Button or DIP Switches

Most modern garage door openers have a “Learn” button on the motor unit. Alternatively, some older models use DIP switches. Find the location of these components on your garage door opener.

: Clear Existing Codes

If possible, clear the existing codes from the opener by holding down the “Learn” button or following specific instructions in the manual. For DIP switches, set them all to the same position.

: Access the Control Panel

Locate the control panel on your garage door opener. This panel is usually on the same side as the motor unit and may have buttons or a keypad.

: Enter Programming Mode

Follow the instructions in your opener’s manual to enter programming mode. This often involves pressing a specific combination of buttons on the control panel.

: Select a New Code

Choose a new code for your garage door. Typically, garage door opener codes are four to six digits long. Avoid easily guessable codes for security reasons.

: Program the New Code

Enter the new code on the control panel or keypad, following the instructions in your manual. This usually involves pressing the chosen digits in a specific order.

: Test the New Code

After programming the new code, test it by entering it on the keypad or remote control. Make sure the garage door responds as expected, either opening or closing.

: Reconnect the Opener to Remote Controls

If you use remote controls for your garage door, follow the instructions in your manual to reprogram them with the new code. This often involves pressing the “Learn” button on the opener and then pressing the corresponding button on the remote.

: Reprogram Homelink (if applicable)

For vehicles equipped with Homelink, consult your vehicle’s manual for instructions on reprogramming it with the new garage door code.

: Finalize the Process

Once you’ve successfully programmed the new code and verified that all devices are working correctly, finalize the process by securing the control panel and closing the garage door.

: Update Additional Security Features

Check if your garage door opener has additional security features, such as vacation mode or timer-to-close functionality. Update these settings according to your preferences.

: Document the New Code

Record the new code in a secure location. This can be useful in case you forget the code and need to reference it later.

: Seek Professional Help if Needed

If you encounter difficulties or are uncertain about the process, consult your garage door opener’s manual or seek professional assistance. Some openers may have specific procedures that are not covered in this general guide.

Changing your Garage Door Repair Suwanee GA one is typically feasible, but the exact steps may vary based on your specific garage door opener. Always refer to your opener’s manual for accurate instructions. If you’re unsure or uncomfortable with the process, it’s advisable to seek professional help to ensure the security of your garage and home.

Southern Home Creations Garage Doors & Openers

4110 Tench Rd Suite D, Suwanee, GA 30024, United States

1-770-831-0301

How To Program Universal Garage Door Opener – Ohio Garage Door Repair

Programming a universal Garage Door Repair Solon OH can be a straightforward process, ensuring compatibility with a variety of garage door opener brands.

Below are detailed instructions to guide you through the programming steps, ensuring a successful setup.

: Gather Necessary Tools and Information

Before you start, ensure you have fresh batteries for your universal garage door opener remote. Identify the make and model of your garage door opener to facilitate the programming process.

: Read the Universal Remote Manual

Consult the manual that came with your universal garage door opener. Each brand may have specific instructions, and the manual is a valuable resource for accurate programming steps.

: Identify the Learn Button or DIP Switches on the Opener

Locate the “Learn” button or DIP switches on your garage door opener. The “Learn” button is common in modern openers, while older models might use DIP switches. If using DIP switches, take note of the switch positions.

: Clear Opener Memory (if needed)

If you’re reprogramming the remote or experiencing issues, clear the opener’s memory. This is usually done by holding down the “Learn” button or following specific instructions in the opener’s manual.

: Press the Learn Button or Set DIP Switches

Press the “Learn” button on the garage door opener or set the DIP switches to the desired code as per the opener’s manual. This action prepares the opener to receive signals from the universal remote.

: Prepare Universal Remote for Programming

Follow the instructions in your universal remote manual to enter programming mode. This often involves pressing and holding specific buttons until a light on the remote begins to flash.

: Program the Universal Remote

Press the button on the universal remote that you want to program for your garage door opener. Hold the button until the indicator light on the remote changes, confirming that the code has been transmitted.

: Test the Universal Remote

Test the programmed button on the universal remote to ensure it effectively opens and closes the garage door. If successful, proceed to program additional buttons for other doors or features.

: Programming Homelink (if applicable)

If your vehicle is equipped with Homelink, follow the vehicle’s manual for programming instructions. Typically, this involves pressing a button on the Homelink system and then pressing the button on the universal remote.

: Final Testing

Conduct thorough testing of all programmed buttons on the universal remote and, if applicable, the Homelink system. Ensure consistent and reliable operation by opening and closing the garage door multiple times.

: Troubleshooting

If any issues arise, check the remote’s battery, ensure it’s within range of the opener, and confirm that you are following the correct steps. Refer to the universal remote manual for troubleshooting tips or contact customer support.

: Refer to the Manuals

For model-specific details or unique features, refer to the manuals of both the universal remote and your garage door opener. These resources provide additional information and troubleshooting guidance.

By carefully following these comprehensive steps, you should be able to successfully program your universal Garage Door Repair Solon OH, providing you with convenient and versatile control over your garage door.

Ohio Garage Door Repair

7201 Longview Dr, Solon, OH 44139

1-440-773-2246

How To Program Garage Door Remote Clicker – Garage Door Wizard

Programming a Garage Door Repair Cypress TX is a relatively simple process that allows you to wirelessly control your garage door opener.

The specific steps may vary depending on the brand and model of your garage door opener and remote clicker, but the following comprehensive guide provides general instructions applicable to many systems.

1. Identify the Type of Garage Door Opener: Before you begin programming your remote clicker, identify the type and brand of your garage door opener. This information is usually available on the motor unit located in the garage. Consult the user manual for your specific opener and remote clicker, as the programming steps may vary.

2. Choose a Remote Clicker: If you have multiple remote clickers, choose one that you want to program. Ensure that the remote clicker is compatible with your garage door opener. Consult the user manual for your opener for information on compatible remote clickers.

3. Access the Garage Door Opener Motor Unit: Locate the motor unit of your garage door opener, usually mounted on the ceiling in the garage. The motor unit contains a button called the “Learn” or “Program” button, which is essential for programming the remote clicker.

4. Clear Existing Codes (if needed): Before programming a new remote clicker, it’s advisable to clear existing codes from both the opener and the remote. This ensures that only the new remote clicker will be programmed. Consult the user manual for specific instructions on clearing existing codes.

5. Press the Learn/Program Button: Press and release the “Learn” or “Program” button on the garage door opener motor unit. The indicator light on the motor unit will usually start blinking to indicate that the opener is in programming mode.

6. Act Quickly: After pressing the Learn/Program button, you typically have a limited amount of time (usually 30 seconds to a minute) to program the remote clicker. Act quickly to ensure successful programming.

7. Press the Button on the Remote Clicker: On the remote clicker, press and hold the button you want to program. Hold the button until the indicator light on the garage door opener motor unit blinks, indicating that the programming was successful.

8. Release the Button: Once the indicator light blinks, release the button on the remote clicker. The remote clicker is now programmed to the garage door opener.

9. Test the Remote Clicker: Test the newly programmed remote clicker by pressing the programmed button. The garage door should respond by opening or closing, depending on the desired function. If the door doesn’t respond, repeat the programming steps.

10. Program Additional Buttons (if applicable): If your remote clicker has multiple buttons, you can program each button to control different garage doors or functions. Repeat the programming process for each button following the same steps.

11. Repeat for Additional Remotes: If you have additional remote clickers, repeat the programming process for each one. Ensure that each remote clicker is compatible with your garage door opener.

12. Consult User Manual for Troubleshooting: If you encounter difficulties during the programming process or if the remote clicker is not working as expected, consult the user manual for troubleshooting tips. The manual may provide specific guidance for your garage door opener model.

13. Keep the User Manual Handy: After successfully programming the remote clicker, keep the user manual in a convenient and accessible location. It can be helpful for future reference, especially if you need to reprogram or troubleshoot the remote clicker.

14. Replace Batteries (if needed): If your remote clicker uses batteries, replace them periodically to ensure optimal performance. Low batteries can affect the signal strength and lead to operational issues.

15. Seek Professional Assistance (if needed): If you encounter persistent issues or if the remote clicker is not working despite following the programming instructions, consider seeking professional assistance. Garage door professionals have experience with various models and can diagnose and address programming issues.

Conclusion:

Programming a Garage Door Repair Cypress TX is a straightforward process that enhances the convenience of operating your garage door. By following these general instructions and consulting the user manual for your specific opener and remote clicker, you can successfully program the remote clicker and enjoy the ease of wireless garage door control. Regular maintenance, such as replacing batteries and keeping the user manual handy, contributes to the long-term functionality of your garage door remote clicker system.

Garage Door Wizard

17302 House & Hahl Rd Suit 208, Cypress, TX 77433, United States

1-832-373-7681

How Do I Clean Windows With Mold Or Mildew – DFW Window Cleaning Colleyville

Window Cleaning Service Colleyville TX requires a targeted approach to not only remove the visible growth but also prevent its return.

Mold and mildew thrive in damp conditions, making windows susceptible to these issues, especially in humid environments. In this comprehensive guide, we’ll explore effective steps and techniques to clean windows affected by mold or mildew and prevent their recurrence.

1. Safety First: Before tackling mold or mildew, prioritize safety. Wear protective gear, including gloves and a mask, to avoid direct contact with mold spores. Ensure proper ventilation in the area by opening windows and doors.

2. Gather Your Cleaning Supplies: Assemble the necessary cleaning supplies. You’ll need white vinegar, hydrogen peroxide, a spray bottle, warm water, a soft brush or sponge, a squeegee, and a microfiber cloth. Additionally, consider using a mold and mildew cleaner for stubborn cases.

3. Identify the Severity of the Issue: Assess the severity of the mold or mildew growth on your windows. If it’s a minor case, you may be able to address it with household solutions. For more extensive or persistent issues, you may need to consult professional help.

4. Pre-Rinse with Water: Before applying any cleaning solution, pre-rinse the windows with water to remove loose mold or mildew spores. Use a hose or a bucket of water for this step, focusing on clearing away the surface growth.

5. Use White Vinegar: White vinegar is a powerful natural cleaner that can help combat mold and mildew. Fill a spray bottle with undiluted white vinegar and generously spray it on the affected areas. Allow the vinegar to sit for at least 10-15 minutes to break down the mold.

6. Scrub with a Soft Brush or Sponge: Use a soft brush or sponge to scrub the affected areas. Gently agitate the surface to dislodge the mold or mildew. Be cautious not to use abrasive brushes that could damage the window material. Focus on corners and edges where mold tends to accumulate.

7. Rinse with Hydrogen Peroxide: To further eliminate mold and mildew, create a mixture of hydrogen peroxide and water. Use a ratio of one part hydrogen peroxide to two parts water. Spray this solution on the windows, ensuring complete coverage. Hydrogen peroxide is effective against mold and mildew and also has disinfectant properties.

8. Allow Dwell Time: Let the hydrogen peroxide solution sit on the windows for at least 10-15 minutes. This dwell time allows the solution to penetrate and kill remaining mold spores.

9. Scrub Again if Necessary: For stubborn mold or mildew spots, scrub the windows again with the soft brush or sponge. Pay attention to areas where the growth is more concentrated. Repeat the process until you achieve satisfactory results.

10. Rinse Thoroughly: Thoroughly rinse the windows with clean water to remove any remaining cleaning solution. Use a hose or a bucket of water for this step, ensuring that all traces of vinegar and hydrogen peroxide are washed away.

11. Use a Commercial Mold and Mildew Cleaner (Optional): If the mold or mildew persists, or for particularly stubborn cases, consider using a commercial mold and mildew cleaner. Follow the manufacturer’s instructions for application and safety precautions.

12. Squeegee for a Streak-Free Finish: After rinsing, use a squeegee to remove excess water and achieve a streak-free finish. Starting from the top corner, pull the squeegee down in a straight, overlapping motion. Wipe the squeegee blade with a dry cloth after each pass.

13. Dry and Polish: After squeegeeing, use a dry, lint-free cloth to wipe away any remaining water from the edges of the windows. This final step helps prevent water spots and ensures a polished finish.

14. Check for Residue: Thoroughly inspect the windows for any leftover cleaning residue. If you notice any, wipe the windows again with a clean, dry cloth to remove any remaining traces of the cleaning solutions.

15. Use Borax as a Preventive Measure: Borax is a natural substance that can be effective in preventing the return of mold and mildew. Mix borax with water to create a paste and apply it to the window frames. This acts as a preventive measure against future growth.

16. Improve Ventilation: Enhance ventilation in the area to discourage mold and mildew growth. Use fans, open windows, or consider installing a dehumidifier if the space is consistently humid.

17. Regular Maintenance: Establish a regular window cleaning schedule to prevent the buildup of mold and mildew. Regular maintenance will make future cleanings quicker and more manageable.

18. Consult Professionals if Needed: If the mold or mildew issue is extensive or recurring, consider consulting professionals. Mold remediation experts can assess the situation, identify the root cause, and provide effective solutions.

19. Address the Root Cause: Identify and address the root cause of the mold or mildew growth. It could be due to water leaks, poor ventilation, or other underlying issues. Fixing these issues will help prevent future problems.

20. Consider Protective Coatings: After cleaning and addressing the root cause, consider applying protective coatings to your windows. These coatings can help repel water and resist mold and mildew growth.

In conclusion, Window Cleaning Service Colleyville TX requires a systematic approach to eliminate the existing growth and prevent its return. By following these detailed steps and using effective cleaning solutions, you can restore your windows to a clean and mold-free state.

DFW Window Cleaning Colleyville

1808 Maplewood Trail, Colleyville, TX 76034, United States

1-817-813-8010

Can I Clean Windows With Just Water – Plano Window Cleaning & Glass Repair

Window Cleaning Service Plano TX is indeed possible and can be an eco-friendly and cost-effective approach. Water, when used correctly, can effectively remove dust, dirt, and light grime from windows.

In this guide, we’ll explore the benefits of using water for window cleaning, discuss the potential challenges, and provide tips for achieving streak-free and sparkling windows with this minimalist approach.

The Benefits of Using Water:

  • Environmentally Friendly: Cleaning windows with water alone eliminates the need for chemical cleaners, reducing your environmental impact. It’s a sustainable choice that minimizes the use of potentially harmful substances.
  • Cost-Effective: Water is readily available and inexpensive. Choosing a water-only method can save you money on commercial cleaning solutions.
  • Safe for All Window Types: Using water is generally safe for all types of windows, including single-pane, double-pane, and specialty windows. It’s a gentle approach that won’t damage glass or window frames.
  • Reduced Residue: Water leaves behind minimal residue, reducing the likelihood of streaks or spots on the windows.

Potential Challenges of Water-Only Cleaning:

  • Stubborn Stains: Water alone may not effectively remove stubborn stains or built-up grime. For such cases, you might need to consider additional cleaning methods or solutions.
  • Mineral Deposits: In areas with hard water, mineral deposits can be left behind when water evaporates. This can result in cloudy or hazy windows. However, this issue can be addressed with proper drying techniques.

Tips for Successful Water-Only Window Cleaning:

  • Use Distilled Water: Distilled water is free from minerals and impurities, making it an excellent choice for streak-free cleaning. It helps minimize the risk of mineral deposits on the windows.
  • Choose the Right Time of Day: Optimal results can be achieved by cleaning windows when they are not exposed to direct sunlight. Direct sunlight can cause water to evaporate quickly, leaving behind streaks.
  • Use Microfiber Cloths or Squeegees: To enhance the cleaning process, use microfiber cloths or squeegees. These tools help absorb and remove water, reducing the chances of streaking.
  • Wipe in a Pattern: When using water and a cloth or squeegee, wipe the window in a consistent pattern to ensure thorough coverage and minimize streaks. Vertical or horizontal motions are commonly recommended.
  • Dry Thoroughly: After cleaning with water, it’s crucial to dry the windows thoroughly to prevent water spots or mineral deposits. Use a dry microfiber cloth or squeegee for this final step.

Addressing Specific Window Challenges:

  • Hard Water Stains: For windows with hard water stains, consider using a mixture of equal parts white vinegar and water. Apply this solution to the stained areas and wipe with a cloth or sponge. Follow up with a water-only rinse.
  • Grease or Grime: For windows with greasy or grimy buildup, adding a small amount of mild dish soap to the water can enhance the cleaning power. Use a soft cloth or sponge to scrub the affected areas.

Additional Water-Only Window Cleaning Methods:

  • Window Vacuums: Window vacuums are handheld devices that use suction to remove water from the windows. They can be effective for achieving streak-free results without the need for additional cleaning solutions.
  • Water Fed Poles: Water fed poles are long poles with a brush at the end, connected to a water source. The brush is used to scrub the windows, and the water rinses away the dirt. This method is often used for exterior windows, especially at heights.

Maintaining Clean Windows with Water:

  • Regular Cleaning: Regular maintenance is key to keeping windows clean. Frequent cleaning with just water can prevent the buildup of dirt and grime, making the process more efficient each time.
  • Consistent Drying: Consistently drying windows after cleaning is crucial to avoid water spots. Ensure thorough drying using a squeegee or microfiber cloth.

Conclusion:

Window Cleaning Service Plano TX is a viable and environmentally friendly option for maintaining clean and clear windows. While it may not be suitable for all situations, particularly when dealing with stubborn stains, it provides an effective solution for routine cleaning. By following the tips and techniques mentioned, you can achieve streak-free, sparkling windows with minimal environmental impact and cost.

Plano Window Cleaning & Glass Repair

1201 Legacy Dr #2114, Plano, TX 75023, United States

1-972-544-1373

What Is The Best Way To Clean Windowsills – NRH Window Cleaning & Glass Repair

North Richland Hills Window Cleaning Service often play a subtle yet significant role in the overall appearance of a room.

Over time, they can accumulate dust, dirt, and grime, detracting from the beauty of your windows and the entire space. In this comprehensive guide, we’ll explore the best way to clean windowsills, ensuring they remain fresh, polished, and complement the aesthetic of your home.

Why Clean Windowsills Matter

Before delving into the cleaning process, it’s essential to understand why clean windowsills are crucial:

Aesthetics:

Clean windowsills contribute to the overall cleanliness and attractiveness of your living space. They frame the view outside, and a well-maintained sill enhances the visual appeal of your windows.

Health and Hygiene:

Dirty windowsills can harbor allergens, dust mites, and mold. Regular cleaning is essential for maintaining a healthy indoor environment, especially for those with respiratory issues or allergies.

Preventing Damage:

Accumulated dirt and grime can damage the windowsill material over time. Regular cleaning helps prevent deterioration and extends the lifespan of your windowsills.

Enhancing Natural Light:

Clean windowsills allow natural light to enter your home unobstructed. This not only brightens up the space but also creates a more inviting atmosphere.

The Best Way to Clean Windowsills

Cleaning windowsills requires a systematic approach and the right tools. Here’s a step-by-step guide to ensure your windowsills receive the care they deserve:

: Gather Your Supplies

Before you start, assemble the necessary cleaning supplies:

  • Soft-bristle brush or vacuum cleaner with an attachment
  • Microfiber or soft cloth
  • Mild detergent or all-purpose cleaner
  • Warm water
  • Cotton swabs for detailed cleaning
  • Optional: Old toothbrush for hard-to-reach areas

: Remove Loose Debris

Begin by removing loose dirt and debris from the windowsill. Use a soft-bristle brush or a vacuum cleaner with a brush attachment to gently sweep away dust, crumbs, and other particles. Pay attention to corners and crevices where dirt tends to accumulate.

: Wipe Down the Surface

Dampen a microfiber or soft cloth with a mixture of warm water and a mild detergent or all-purpose cleaner. Wipe down the entire surface of the windowsill, including the edges and corners. This helps remove surface-level grime and stains.

: Tackle Stubborn Stains

For stubborn stains or dried-on grime, use a soft cloth or sponge soaked in a slightly stronger cleaning solution. Avoid using abrasive cleaners that may damage the windowsill material. Gently scrub the stained areas until the dirt is lifted.

: Detail Cleaning with Cotton Swabs

For intricate details or narrow spaces, use cotton swabs to reach and clean areas that might be challenging with a cloth. This ensures a thorough cleaning, leaving no nook or cranny untouched.

: Rinse and Dry

After cleaning, rinse the windowsill with a clean, damp cloth to remove any residual cleaning solution. Ensure the windowsill is completely dry to prevent water damage or the growth of mold. Open the windows to facilitate the drying process.

: Polish (Optional)

If your windowsills are made of a material that can be polished, such as wood, consider applying a suitable polish to enhance their natural beauty. Be sure to choose a polish that is compatible with the material of your windowsills.

Tips for Maintaining Clean Windowsills

Regular Cleaning Schedule:

Establish a routine for cleaning windowsills. Depending on your environment, aim to clean them at least once a month to prevent the buildup of dirt and allergens.

Address Spills Immediately:

Accidents happen. If liquids or food spill onto the windowsill, clean it up promptly to prevent stains and stickiness.

Use Preventive Measures:

Consider placing mats or indoor plants on windowsills to prevent direct contact with dirt and debris. This adds an extra layer of protection and makes cleaning easier.

Inspect for Damage:

Periodically inspect your windowsills for any signs of damage, such as cracks or water damage. Addressing issues early can prevent further deterioration.

Ventilate the Space:

Proper ventilation helps prevent mold growth. Ensure that the room is adequately ventilated, especially after cleaning, to allow for effective drying.

Conclusion:

In conclusion, North Richland Hills Window Cleaning Service is a simple yet impactful task that contributes to the overall cleanliness and aesthetic appeal of your home. By following the steps outlined in this guide and incorporating regular maintenance into your routine, you can ensure that your windowsills remain fresh, polished, and complement the beauty of your windows.

NRH Window Cleaning & Glass Repair

7510 Davis Blvd # B, North Richland Hills, TX 76182, United States

1-817-601-6082

How Often Should I Clean My Windows – Southlake Window Cleaning & Glass Repair

The frequency at which you should clean your Window Cleaning service depends on various factors, including your location, the climate, and personal preferences.

Clean windows not only enhance the overall appearance of your home but also allow more natural light to enter, providing a brighter and more inviting living space. Let’s explore different considerations to help you determine how often you should clean your windows.

1. Climate and Weather Conditions: The climate in your area plays a significant role in how quickly windows accumulate dirt and grime. In regions with high humidity, frequent rain, or airborne pollutants, windows may require more frequent cleaning. Similarly, if you live in an area with seasonal changes, consider adjusting your window cleaning schedule accordingly.

2. Urban vs. Rural Environments: The environment around your home can impact how quickly windows get dirty. Urban areas with increased pollution and traffic may result in dirtier windows compared to rural or suburban environments. If your home is close to busy roads, industrial areas, or construction sites, you may need to clean your windows more often to maintain clarity.

3. Window Location and Exposure: The location of your windows and their exposure to elements such as direct sunlight, wind, and rain can influence cleaning frequency. South and west-facing windows often accumulate more dirt and may require more frequent cleaning due to increased sun exposure. Similarly, windows facing prevailing winds might accumulate more dust and debris.

4. Seasonal Considerations: Seasonal changes can impact the cleanliness of your windows. During spring and summer, when pollen and airborne particles are more prevalent, you may find that windows get dirtier faster. Similarly, winter can bring snow, salt residue, and other elements that affect the cleanliness of your windows.

5. Personal Preferences and Standards: Your personal standards for cleanliness and the importance you place on clear windows also play a role. Some individuals prefer spotless windows year-round and may clean them more frequently, while others may adopt a more relaxed approach.

6. Regular Maintenance Routine: Establishing a regular maintenance routine can contribute to consistently clean windows. Whether you choose to clean your windows monthly, quarterly, or seasonally, having a schedule in place helps prevent the buildup of dirt and grime. Regular maintenance also makes the cleaning process more manageable.

7. High-Traffic Areas vs. Low-Traffic Areas: Consider the traffic flow within your home. Windows in high-traffic areas, such as living rooms and kitchens, may accumulate fingerprints and smudges more quickly. Paying extra attention to these areas can help maintain a clean and clear view.

8. Consider the Type of Glass: The type of glass used in your windows can influence cleaning frequency. Some windows have coatings or treatments that repel dirt and water, while others may be more prone to collecting grime. If you have energy-efficient or low-maintenance glass, you may find that they require less frequent cleaning.

9. Special Events or Occasions: Planning to host a special event or celebration at your home? Consider giving your windows a thorough cleaning before such occasions to ensure that your space looks its best. This can be an opportunity to clean both the interior and exterior of your windows for a comprehensive refresh.

10. Signs That It’s Time to Clean: Pay attention to visual cues that indicate it’s time to clean your windows. Water stains, streaks, and a noticeable layer of grime are clear signs that your windows need attention. Regularly inspecting your windows allows you to address cleaning needs promptly.

11. Professional Window Cleaning: If you find that maintaining clean windows is challenging due to factors like accessibility or time constraints, consider hiring professional window cleaners. Professional services have the expertise and tools to clean windows thoroughly and efficiently, ensuring a streak-free finish.

12. Window Cleaning Frequency Recommendations:

  • Monthly: In areas with high pollution or if you have specific aesthetic preferences.
  • Quarterly: A common schedule for general maintenance in moderate climates.
  • Bi-Annually: Suitable for locations with milder weather conditions and less environmental impact.
  • Seasonal: Consider cleaning windows at the beginning of each season to address seasonal challenges.

In conclusion, the frequency at which you should clean your Window Cleaning service depends on a combination of environmental factors, personal preferences, and the specific conditions around your home. Regular maintenance, a keen eye for visual cues, and a proactive approach to cleaning can contribute to consistently clear and inviting windows. Adjust your cleaning schedule based on the unique factors that affect your living space, and enjoy the benefits of a brighter, more visually appealing home

Southlake Window Cleaning & Glass Repair

1052 Summerplace Ln, Southlake, TX 76092, United States

1-817-839-4773

How Do I Program My Clicker Garage Door Opener – Denzel Garage Door of Long Beach


Programming your Clicker Long Beach Garage Door Repair is a straightforward process that allows you to control your garage door with ease.

Clicker, a popular brand for universal garage door remotes, provides user-friendly devices with simple programming features. In this comprehensive guide, I’ll walk you through the step-by-step process to ensure a successful programming experience for your Clicker garage door opener.

1. Identify Your Garage Door Opener Model: Clicker remotes are designed to be compatible with a wide range of garage door opener brands and models. While the basic programming steps are similar, it’s essential to consult the user manual that came with your Clicker remote for specific instructions tailored to your garage door opener.

2. Gather Necessary Materials: Before you start, make sure you have the following:

  • Clicker garage door opener remote
  • Fresh batteries for the remote
  • Access to the garage door opener motor unit
  • A stable ladder if needed to reach the motor unit

3. Locate the “Learn” or “Smart” Button on the Opener: Most garage door openers have a “Learn” or “Smart” button on the motor unit. This button is crucial for programming the remote. Find this button; it’s typically located on the back or side of the motor unit. If you’re unsure, consult your garage door opener manual for the exact location.

4. Clear Existing Codes (Optional): If you are setting up a new remote or want to reset existing codes, it’s advisable to clear the memory on the garage door opener. Press and hold the “Learn” or “Smart” button until the indicator light on the opener blinks, indicating that the memory is cleared.

5. Prepare the Clicker Remote: Open the battery compartment on the back of the Clicker remote and insert fresh batteries. Follow the instructions in your manual for the correct battery type and orientation.

6. Press and Release the “Learn” or “Smart” Button: Once the opener is in programming mode (indicated by a blinking light), press and release the “Learn” or “Smart” button. The indicator light on the opener should become solid or display a different pattern, signaling that the opener is ready to receive the new code.

7. Program the Clicker Remote: Press and hold the button on the Clicker remote that you want to use for controlling the garage door. Keep the button depressed until the indicator light on the opener blinks or changes, confirming that the remote has successfully transmitted the code to the opener.

8. Test the Remote: Stand a few feet away from the garage door and test the Clicker remote. Press the programmed button, and the door should respond by either opening or closing. If the door doesn’t respond, repeat the programming steps.

9. Program Additional Clicker Remotes: If you have multiple Clicker remotes, repeat the programming process for each one. It’s essential to program each remote separately.

10. Troubleshooting: If you encounter any issues during the programming process or if the remote doesn’t function as expected, refer to the troubleshooting section in your Clicker remote manual. Common issues may include interference or incorrect programming steps.

11. Final Checks: Conduct a final check to ensure that all Clicker remotes operate smoothly. Test each remote from various distances and angles to ensure consistent performance.

In conclusion, programming a Clicker Long Beach Garage Door Repair is a user-friendly process that enhances the convenience and security of your garage door system. While this guide provides a general overview, it’s crucial to consult your Clicker remote manual for precise instructions tailored to your specific model and garage door opener. If challenges persist, consider reaching out to Clicker’s customer support for expert assistance. With patience and attention to detail, you’ll have your Clicker garage door opener remote programmed for secure and convenient use.

Denzel Garage Door of Long Beach

1635 Cedar Ave, Long Beach, CA 90813, United States

1-562-337-3432

How To Change Battery In Liftmaster Garage Door Opener – Affordable Garage Door Repairs of Indianapolis, LLC

LiftMaster Garage Door Repair Indianapolis IN are reliable devices, but like any electronic equipment, they rely on batteries for smooth operation.

If you’ve noticed a decrease in performance or your opener isn’t working as efficiently as before, it may be time to replace the battery. This step-by-step guide will walk you through the process, ensuring a successful battery replacement for your LiftMaster garage door opener.

: Identify the Battery Type

LiftMaster garage door openers typically use a 12-volt battery. Consult your LiftMaster opener manual to confirm the specific battery type required for your model. Once identified, purchase a replacement battery from a reputable source.

: Gather Necessary Tools

Before you start, gather the tools you’ll need: a Phillips screwdriver, safety gloves, and safety glasses. Having these items on hand will make the process smoother and safer.

: Disconnect Power

Safety is a top priority. Before working on your garage door opener, disconnect the power to avoid any electrical accidents. Unplug the opener from the electrical outlet or turn off the circuit breaker that powers it.

: Locate the Battery Compartment

The battery compartment on LiftMaster garage door openers is typically located on the back or side of the unit. Use your Phillips screwdriver to remove the screws securing the compartment cover. Set the screws aside, making sure not to misplace them.

: Remove the Old Battery

Once the compartment cover is off, locate the old battery. Carefully remove it, paying attention to the battery’s orientation. Note the positive (+) and negative (-) markings on the old battery to ensure correct placement of the new one.

: Dispose of the Old Battery Properly

Batteries contain hazardous materials, so it’s essential to dispose of them properly. Check with your local recycling center or follow any guidelines provided by the battery manufacturer for safe and eco-friendly disposal.

: Insert the New Battery

Take the new 12-volt battery and insert it into the battery compartment, following the orientation of the markings (positive to positive, negative to negative). Some batteries have a specific direction for insertion, so consult the manual if needed.

: Secure the Battery Compartment Cover

With the new battery in place, secure the battery compartment cover back onto the LiftMaster garage door opener. Use the Phillips screwdriver to tighten the screws, ensuring a secure fit without over-tightening.

: Reconnect Power

Now that the new battery is installed and the compartment securely closed, it’s time to reconnect power to your LiftMaster garage door opener. Plug it back into the electrical outlet or turn the circuit breaker back on if it was hardwired.

: Test the Garage Door Opener

To confirm that the battery replacement was successful, test your LiftMaster garage door opener. Use the remote control or wall-mounted button to open and close the garage door. If the door operates smoothly and without issues, you’ve successfully changed the battery.

: Regular Maintenance

Consider implementing a regular maintenance schedule for your LiftMaster garage door opener. This includes periodic battery checks and replacements to ensure consistent performance.

Conclusion:

By following these step-by-step instructions, you’ve effectively replaced the battery in your LiftMaster Garage Door Repair Indianapolis IN. Regular maintenance is key to prolonging the life of your opener and preventing unexpected issues. If you ever encounter difficulties or have specific questions, consult the LiftMaster manual or seek assistance from a professional technician.

Affordable Garage Door Repairs of Indianapolis, LLC

1-317-372-5337

How Do I Program A Craftsman Garage Door Opener – Denzel Garage Door Repair

Programming a Victorville Garage Door Repair involves a series of steps to synchronize the opener with your garage door remote or keypad.

Follow these detailed instructions to ensure a successful programming process:

1. Identify Your Craftsman Garage Door Opener Model: Before you begin programming, identify the model of your Craftsman garage door opener. This information is essential as programming steps may vary based on the specific model.

2. Prepare the Remote or Keypad: Ensure that the battery in your Craftsman remote or keypad is fresh. Replace the battery if needed, following the manufacturer’s instructions for your specific Craftsman model.

3. Locate the “Learn” Button on the Opener: Find the “Learn” button on your Craftsman garage door opener. This button is typically located on the motor unit, mounted on the ceiling of your garage. The color and shape of the button can vary, so consult your opener’s manual for guidance.

4. Clear Existing Codes (Optional): If you are programming a new remote or keypad or wish to start fresh, clear any existing codes from the opener’s memory. Press and hold the “Learn” button until the indicator light on the opener blinks or goes out, indicating that previous codes are cleared.

5. Choose a Programming Method: Craftsman garage door openers may support different programming methods. The most common methods include “DIP Switch” settings, “Smart/Learn” button programming, or using a wireless keypad. Refer to your Craftsman device’s manual to determine which method is applicable to your model.

6. DIP Switch Programming: If your Craftsman device uses DIP switches, set the switches according to a predetermined code. Match the switch positions on the remote or keypad with those on the opener. This step is crucial to ensure communication on the same frequency.

7. Smart/Learn Button Programming: For Smart/Learn button programming, press the “Learn” button on the opener. The indicator light on the opener should illuminate, indicating that it is ready to receive the remote or keypad’s signal.

8. Transmit the Code: Press the button on the Craftsman remote or keypad that you want to program. Hold the button down until the opener’s indicator light blinks or flashes, indicating that the device’s code has been successfully received and stored.

9. Test the Remote or Keypad: Confirm that the programming was successful by testing the Craftsman remote or keypad. Stand within the opener’s range, press the programmed button on the device, and observe the garage door’s response. The door should either open or close, depending on the programmed command.

10. Wireless Keypad Programming: If you are programming a wireless keypad, follow the specific instructions in your Craftsman manual. Typically, this involves entering a PIN code on the keypad, followed by pressing the “Enter” or “Program” button, and then completing the process on the opener.

11. Program Additional Features (Optional): Craftsman devices may offer additional features, such as the ability to control multiple garage doors or activate lighting functions. Refer to your device’s manual for instructions on programming these optional features.

12. Secure the Remote or Keypad: Once programming is complete, securely attach the Craftsman remote to your car visor or keep it in a designated and easily accessible location. Ensure that the remote or keypad is not visible or easily accessible to unauthorized individuals for security reasons.

13. Troubleshooting: If you encounter any issues during the programming process or if the remote or keypad does not operate the garage door as expected, consult the user manuals for both your garage door opener and Craftsman device. These manuals often provide troubleshooting tips and additional instructions for specific models.

In conclusion, programming your Victorville Garage Door Repair involves a systematic process. Always refer to the user manuals for your specific models to ensure accurate and precise programming instructions. If difficulties persist, consider reaching out to Craftsman customer support for assistance.

Denzel Garage Door Repair

12127 Mall Blvd SUITE A251, Victorville, CA 92392, United States

1-760-377-8735

Page 1 of 7

Powered by WordPress & Theme by Anders Norén