The Largest Business Blog in Texas

Month: March 2024 Page 2 of 5

How To Get Garage Door On Track – All Goods Garage Doors


If your Garage Door Las Vegas Nevada has come off its track, it’s crucial to address the issue promptly to avoid further damage and potential safety hazards.

Here’s a detailed guide on how to get a garage door back on track:

1. Assess the Situation: Before attempting to fix the garage door, carefully assess the situation to determine the extent of the problem. Inspect the tracks, rollers, and other components to identify any visible damage, misalignment, or obstructions that may be causing the door to come off track.

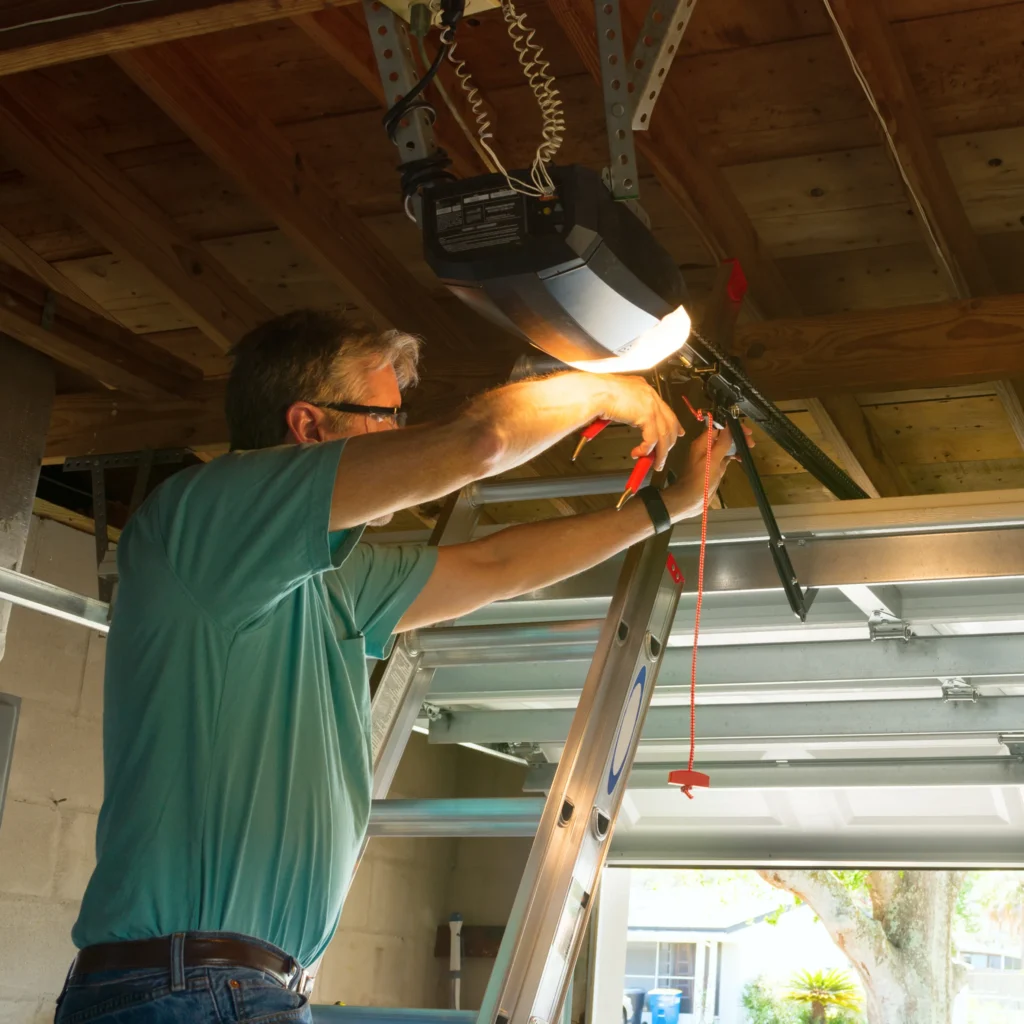
2. Disconnect Power and Secure the Door: For safety purposes, disconnect power to the garage door opener by unplugging it from the electrical outlet or turning off the circuit breaker. If the garage door is partially open or stuck in an awkward position, use C-clamps or locking pliers to secure the door in place and prevent it from moving unexpectedly.

3. Clear Any Obstructions: Inspect the tracks for any debris, dirt, or objects that may be obstructing the movement of the rollers. Use a stiff brush or vacuum cleaner to remove any buildup or debris from the tracks, ensuring smooth and unobstructed movement of the rollers along the track.

4. Straighten Bent Tracks: If the garage door tracks are bent or warped, use a rubber mallet or hammer to carefully straighten them. Place a block of wood against the track to protect it from damage, then gently tap the bent section of the track until it’s straightened. Be careful not to apply too much force, as excessive bending may cause further damage to the tracks.

5. Align the Tracks: Ensure that the tracks are properly aligned and level along the vertical and horizontal surfaces. Use a level to check the alignment of the tracks, adjusting them as needed by loosening the mounting brackets and tapping them into the correct position with a hammer. Once the tracks are aligned, tighten the mounting bolts securely to hold them in place.

6. Adjust the Roller Alignment: Inspect the rollers to ensure that they are properly seated in the track and aligned with the vertical and horizontal tracks. If necessary, adjust the roller alignment by loosening the roller brackets and repositioning them within the track. Use a level to ensure that the rollers are aligned evenly along the track’s surface.

7. Lubricate Moving Parts: Apply a generous amount of lubricant, such as silicone-based lubricant or garage door lubricant, to the rollers, tracks, hinges, and other moving parts of the garage door mechanism. Lubrication helps reduce friction and allows the door to operate smoothly and quietly.

8. Test the Door: Once you’ve completed the adjustments and lubrication, carefully test the garage door to ensure that it operates smoothly and without any issues. Manually lift and lower the door a few times to check for smooth movement and proper alignment. If the door operates smoothly and stays on track, you can reconnect power to the garage door opener and test it using the remote or wall switch.

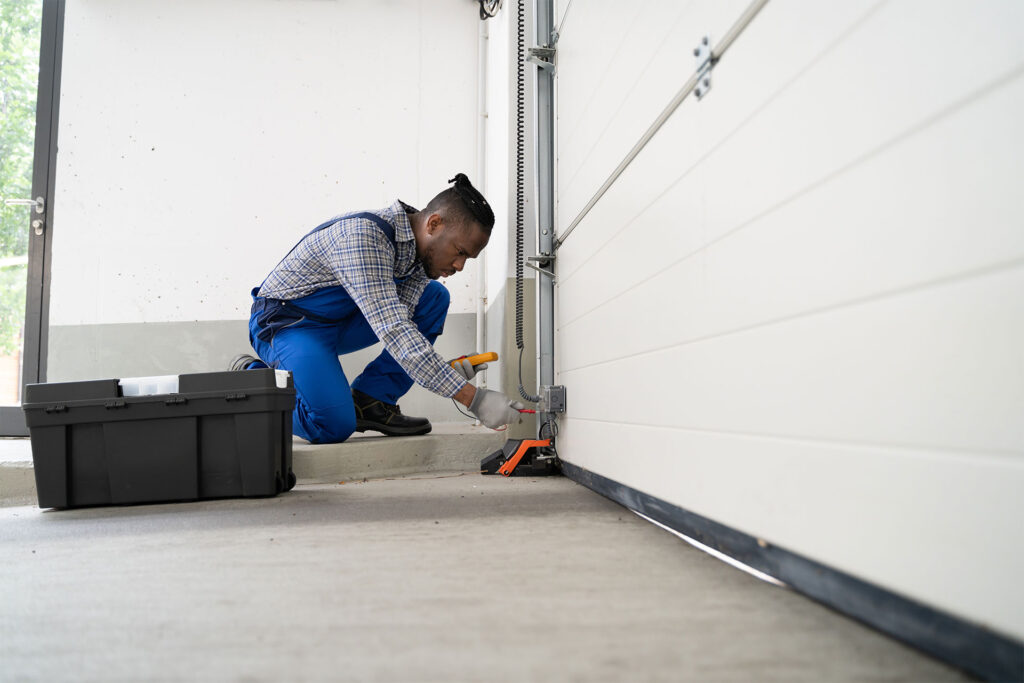
9. Schedule Professional Inspection and Maintenance: While DIY adjustments can address minor issues with garage door tracks, it’s advisable to schedule a professional inspection and maintenance service to ensure that the door is in optimal condition and operating safely. A qualified garage door technician can identify any underlying issues, perform necessary repairs, and provide recommendations for ongoing maintenance to prevent future problems.

If you encounter any difficulties or if the problem persists, consider seeking assistance from a professional Garage Door Las Vegas Nevada technician to address the issue effectively and ensure long-term reliability and safety.

All Good Garage Doors

494 Cape Alan Dr, Henderson, NV 89052, USA

702-343-2252

https://maps.app.goo.gl/Ra96tSSbVGCtGmSj7

Do Garage Door Openers Have A Reset Button – Camco Commercial Door Company


However, not all Garage Door Repair Knoxville TN  have a physical reset button, as some models may use alternative methods or procedures for resetting or troubleshooting issues. In this guide, we’ll explore the common types of garage door opener reset buttons,

how to locate and use them, and alternative methods for resetting garage door openers without a dedicated reset button.

  1. Locating the Reset Button: The reset button on a garage door opener is usually located on the motor unit or control panel of the opener. It may be labeled as “Reset,” “Learn,” “Program,” or a similar designation, depending on the manufacturer. The reset button is often small and recessed to prevent accidental activation, requiring a pointed object such as a pen or paperclip to press it. Refer to the owner’s manual or documentation provided with your garage door opener for specific instructions on locating the reset button for your model.
  2. Function of the Reset Button: The function of the reset button can vary depending on the type of garage door opener and the specific issue you’re experiencing. In some cases, pressing the reset button may clear error codes, reset the opener’s programming or settings, or re-sync the opener with remote controls or keypads. The reset button may also be used to initiate the learning process for programming new remote controls or keypad codes. Consult the owner’s manual or manufacturer’s instructions for your garage door opener to understand the specific functions and procedures associated with the reset button.
  3. Resetting the Opener: To reset a garage door opener using the reset button, follow these general steps:a. Ensure that the garage door is fully closed and that there are no obstructions blocking the door’s movement. b. Locate the reset button on the motor unit or control panel of the garage door opener. c. Use a pointed object such as a pen or paperclip to press and hold the reset button for several seconds. d. Release the reset button once you see or hear confirmation that the reset process has been initiated, such as a flashing light or audible beep. e. Wait for the garage door opener to complete the reset process, which may take a few moments. Once the process is complete, the opener should return to its default settings or enter a programming mode, depending on the specific function of the reset button.
  4. Alternative Reset Methods: If your garage door opener does not have a dedicated reset button or if pressing the reset button does not resolve the issue, there may be alternative methods for resetting the opener. These methods can vary depending on the manufacturer and model of the opener but may include procedures such as power cycling the opener, performing a factory reset, or reprogramming the opener’s settings manually. Refer to the owner’s manual or manufacturer’s instructions for your garage door opener for guidance on alternative reset methods and troubleshooting procedures.
  5. Safety Precautions: When working with a garage door opener, it’s essential to observe proper safety precautions to prevent accidents or injuries. Before attempting to reset the opener, ensure that the garage door is fully closed and that there are no obstructions blocking the door’s movement. Use caution when pressing the reset button or performing any troubleshooting procedures, and follow the manufacturer’s instructions carefully to avoid damaging the opener or compromising safety.

conclusion:

Always refer to the owner’s manual or manufacturer’s instructions for your specific Garage Door Repair Knoxville TN  model for guidance on resetting and troubleshooting procedures.

Camco Commercial Door Company

Camco Commercial Door Company

1-865-776-9455

https://maps.app.goo.gl/EHYTdzvLDSBDwnoi8

How Can landscaping Improve The Energy Efficiency Of A Home – Green Earth Services


Through careful planning and design, Land Scaping Service Keller TX  can help mitigate the effects of temperature extremes, reduce reliance on mechanical heating and cooling systems, and ultimately lower energy consumption and utility costs.

Here’s a comprehensive guide on how landscaping can improve the energy efficiency of a home:

  1. Strategic Tree Planting: Trees are one of the most effective elements of landscaping for improving energy efficiency. By strategically planting trees in locations that provide shade to the home during the hottest parts of the day, you can reduce solar heat gain through windows and walls. Deciduous trees, which shed their leaves in the winter, provide shade during the summer while allowing sunlight to penetrate during the winter, maximizing their energy-saving benefits year-round. Plant trees on the west and east sides of the house to block the low-angle afternoon and morning sun, respectively.
  2. Shrubbery and Groundcovers: In addition to trees, shrubs and groundcovers can also provide shade and insulation to the home. Planting shrubs and groundcovers around the perimeter of the house can help reduce heat absorption from the ground and minimize heat transfer through walls and foundations. Choose dense, evergreen shrubs to provide year-round insulation and windbreaks, particularly on the north side of the house to shield against cold winter winds.
  3. Creating Windbreaks: Strategic placement of trees and shrubs can create natural windbreaks that help reduce heat loss from the home during the winter. Planting dense evergreen trees or shrubs on the north and northwest sides of the house can block cold winter winds, reducing the need for heating and improving comfort indoors. Windbreaks also help reduce air infiltration and drafts, enhancing the efficiency of heating systems.
  4. Installing Hardscape Features: Hardscape features such as walls, fences, and trellises can help modify microclimates around the home, providing additional insulation and reducing heat gain or loss. Use materials with high thermal mass, such as stone or brick, for hardscape features to absorb and release heat slowly, moderating temperature fluctuations indoors. Consider incorporating climbing vines or ivy on trellises to provide additional shade and insulation to walls during the summer months.
  5. Creating Outdoor Living Spaces: Designing outdoor living spaces such as patios, decks, and pergolas can extend the usable living area of the home while reducing the need for indoor heating and cooling. Outdoor spaces shaded by trees, pergolas, or retractable awnings can provide comfortable areas for relaxation and entertainment during hot weather, reducing reliance on air conditioning. Use permeable paving materials such as gravel or pavers for outdoor surfaces to reduce heat absorption and promote natural drainage.
  6. Optimizing Water Features: Incorporating water features such as ponds, fountains, or birdbaths into the landscape can have a cooling effect on the surrounding area through evaporation. Position water features in areas where prevailing winds can carry evaporated moisture toward the home, providing natural cooling during hot weather. Additionally, aquatic plants and vegetation around water features can further enhance cooling effects and contribute to biodiversity in the landscape.
  7. Implementing Green Roofs and Walls: Green roofs and walls, also known as living roofs and walls, involve covering roof or wall surfaces with vegetation to provide insulation, reduce heat gain, and improve air quality. Green roofs and walls can significantly reduce energy consumption by insulating the building envelope, absorbing solar radiation, and mitigating urban heat island effects. Choose drought-tolerant plants and lightweight growing media for green roofs and walls to minimize maintenance and structural load.
  8. Promoting Natural Ventilation: Landscaping can be used to promote natural ventilation and airflow around the home, reducing the need for mechanical cooling systems. Planting trees and shrubs strategically to channel prevailing winds toward windows and openings can facilitate cross-ventilation and improve indoor air quality. Design outdoor spaces with open-air features such as pergolas, arbors, or lattice screens to encourage airflow and create comfortable microclimates.
  9. Reducing Irrigation Water Demand: Selecting drought-tolerant plants and native species for landscaping can reduce the demand for irrigation water, conserving resources and lowering utility costs. Use mulch around plants to retain soil moisture, suppress weed growth, and regulate soil temperature, reducing the need for frequent watering. Install efficient irrigation systems such as drip irrigation or soaker hoses to deliver water directly to the root zone of plants, minimizing water waste through evaporation and runoff.
  10. Maintaining Landscaping: Regular maintenance of landscaping features is essential to ensure their continued effectiveness in improving energy efficiency. Prune trees and shrubs regularly to maintain their shape and promote healthy growth, removing any dead or diseased branches that could obstruct airflow or impede sunlight. Monitor irrigation systems for leaks and adjust watering schedules seasonally to match plant needs and weather conditions. Inspect hardscape features for cracks or damage and repair as needed to prevent heat loss or moisture infiltration.


Land Scaping Service Keller TX  With careful planning, design, and maintenance, landscaping can transform outdoor spaces into functional, beautiful, and energy-efficient environments that complement and enhance the home.

Green Earth Services

1110-1130 Mossy Rock Dr, Keller, TX 76248, United States

1-817-966-5292

https://maps.app.goo.gl/7GipKvmBaWW6KQ2HA

How To Program Car Garage Door Opener Without Remote – Veterans Garage Door


Programming a car’s built-in Garage Door Repair Villages FL without a remote typically involves utilizing the or similar system integrated into the vehicle’s interior. While the exact process may vary depending on the vehicle make and model,

here’s a general guide to help you through the programming process:

Step 1: Prepare the Garage Door Opener

  1. Locate the Learn/Program Button: On your garage door opener unit, find the “Learn,” “Program,” or “Smart” button. This button is usually located on the motor unit near the antenna wire.
  2. Clear Previous Programming: If the garage door opener has been previously programmed, clear its memory by pressing and holding the “Learn” button until the indicator light turns off or blinks, typically for about 10 seconds.

Step 2: Access the Vehicle’s HomeLink System

  1. Locate HomeLink Buttons: In your vehicle’s interior, locate the HomeLink buttons. These buttons are often integrated into the ceiling console, sun visor, or rearview mirror, depending on the vehicle model.
  2. Prepare HomeLink: Turn on the ignition without starting the engine. This step may vary depending on your vehicle’s manufacturer, so refer to your vehicle’s manual for specific instructions.

: Program HomeLink

  1. Choose Button to Program: Decide which HomeLink button you want to program for your garage door opener.
  2. Press and Hold HomeLink Button: Press and hold the desired HomeLink button and the button you want to use to control your garage door simultaneously. Hold them until the HomeLink indicator light starts flashing rapidly, usually for about 20 seconds.
  3. Release Buttons: Once the indicator light starts flashing rapidly, release both buttons.

: Program Garage Door Opener

  1. Activate Garage Door Opener: Within 30 seconds of releasing the buttons, return to your garage and press the “Learn” button on the garage door opener unit.
  2. Complete Programming: After pressing the “Learn” button, return to your vehicle and press and hold the HomeLink button you programmed earlier. Hold it until the garage door starts to move, indicating that programming was successful.

: Test the Garage Door Opener

  1. Test Functionality: Test the programmed HomeLink button by pressing it and observing the garage door’s movement.
  2. Ensure Proper Operation: Watch and listen to the garage door’s movement to ensure it operates smoothly and without any issues.

: Additional Programming (If Necessary)

  1. Repeat Process: If your vehicle has multiple HomeLink buttons or if you want to program additional garage doors or gates, repeat the programming process for each button.

: Finalize Programming

  1. Save Settings: Once all desired HomeLink buttons are programmed, save the settings according to your vehicle’s instructions.
  2. Secure Covers: Replace any covers or protective layers on the HomeLink buttons and garage door opener unit.

: Troubleshooting (If Necessary)

  1. Refer to Manual: If you encounter any issues during programming, refer to your vehicle’s manual for troubleshooting tips or contact the manufacturer’s customer support for assistance.

Conclusion:

By following the steps outlined in this guide and referring to your vehicle’s manual for specific instructions, you can successfully program your vehicle to operate your Garage Door Repair Villages FL without the need for an additional remote. Enjoy the convenience of seamless access to your garage directly from your vehicle.

Veterans Garage Door

2113 Everglades Ln., The Villages, FL 32163, United States

1-352-844-3925

https://maps.app.goo.gl/CGJVdphMK4kfWbDV6

How To Hang Garage Door Track – DFW Garage Door Experts


Hanging a Garage Door Repair Bedford TX track is a critical step in the installation process, as it provides support and guidance for the movement of the garage door. Proper installation ensures smooth and reliable operation of the door while minimizing wear and tear on its components. In this guide, I’ll walk you through the steps to hang a garage door track, from preparation to mounting and alignment.

Step 1: Gather Necessary Tools and Materials

  1. Garage Door Track Kit: Ensure you have all components included in the garage door track kit, including horizontal and vertical track sections, brackets, bolts, nuts, and screws.
  2. Power Drill: You’ll need a power drill with appropriate drill bits for securing the track brackets to the wall or ceiling.
  3. Level: Use a level to ensure the track is installed straight and level for smooth door operation.
  4. Tape Measure: Measure distances accurately to ensure proper alignment and spacing of the track sections.
  5. Ladder: Use a sturdy ladder to access the installation area safely.

Step 2: Prepare the Installation Area

  1. Clear the Space: Remove any obstructions or clutter from the installation area to provide ample space for mounting the track sections.
  2. Measure and Mark: Use a tape measure and pencil to mark the locations where the track brackets will be mounted on the wall or ceiling. Ensure the marks are level and evenly spaced according to the manufacturer’s guidelines.

Step 3: Install the Vertical Track Sections

  1. Attach the Bottom Bracket: Position the bottom bracket of the vertical track section at the desired height above the floor, typically around 6 inches from the ground. Use a level to ensure it is plumb, and mark the hole locations for drilling.
  2. Drill Pilot Holes: Use a power drill to drill pilot holes for the mounting bolts or screws into the marked locations on the wall. Use appropriate anchors if mounting to drywall or other non-structural materials.
  3. Secure the Track: Align the vertical track section with the pilot holes and attach it to the wall using bolts, nuts, and washers. Tighten the bolts securely to ensure the track is firmly anchored in place.

Step 4: Install the Horizontal Track Sections

  1. Position the Horizontal Track: Position the horizontal track sections on the ceiling or wall above the garage door opening, ensuring they are parallel to the floor and aligned with the vertical track sections.
  2. Mark Hole Locations: Mark the hole locations for drilling pilot holes to secure the track brackets. Ensure the track sections are spaced evenly and aligned properly with the vertical tracks.
  3. Drill Pilot Holes: Use a power drill to drill pilot holes into the marked locations on the ceiling or wall. Use anchors if necessary to ensure secure attachment.
  4. Secure the Track: Attach the track brackets to the ceiling or wall using bolts, nuts, and washers. Ensure the brackets are aligned with the pilot holes and tighten the bolts securely to hold the track sections in place.

Step 5: Align and Test the Track

  1. Check Alignment: Use a level to check the alignment of the track sections and ensure they are straight and level. Make any necessary adjustments to the track brackets to achieve proper alignment.
  2. Test Door Operation: Once the track sections are securely installed and aligned, test the operation of the garage door to ensure it moves smoothly along the track without binding or sticking.
  3. Make Adjustments: If the door does not operate smoothly, check for any obstructions or misalignments in the track system. Make adjustments to the track brackets as needed to correct any issues.

Step 6: Secure Loose Ends and Finish

  1. Trim Excess Track: Trim any excess length from the track sections using a hacksaw or reciprocating saw, if necessary, to ensure a clean and finished appearance.
  2. Secure Loose Ends: Use end caps or fasteners to secure any exposed ends of the track sections and prevent injury or damage.
  3. Final Inspection: Conduct a final inspection of the installed track system to ensure all components are securely attached, aligned properly, and free from defects or damage.

Conclusion:

By following the steps outlined in this guide and using the appropriate tools and techniques, you can successfully install a Garage Door Repair Bedford TX track system that provides support and guidance for your garage door for years to come. If you’re unsure about any aspect of the installation process, consider consulting a professional garage door installer for assistance.

DFW Garage Door Experts

2165 Loma Alta Dr, Bedford, TX 76021, United States

https://maps.app.goo.gl/CJiQmxsf3p2hxXfYA

How Tall Is A Standard Garage Door- EDM Garage Doors, LLC

A standard Garage Door Repair Volo IL typically ranges in height from 7 to 8 feet (84 to 96 inches). However, the exact height can vary depending on factors such as the type of garage door, the size of the opening, and local building codes. In this guide, I’ll provide an overview of the standard height of garage doors and factors that can influence the height of a garage door.

Standard Height of Garage Doors:

  1. Single Garage Doors:
    • Single garage doors are commonly found in residential homes and typically have a standard height of 7 feet (84 inches). This height allows for adequate clearance for most vehicles, including sedans, SUVs, and trucks.
  2. Double Garage Doors:
    • Double garage doors, also known as two-car garage doors, are wider than single garage doors and can accommodate larger vehicles or multiple vehicles parked side by side. The standard height for double garage doors is also 7 feet (84 inches), although some may be taller, up to 8 feet (96 inches), to accommodate taller vehicles or provide additional clearance.

Factors Influencing Garage Door Height:

  1. Vehicle Size:
    • The height of the garage door should be sufficient to accommodate the vehicles that will be parked inside the garage. Larger vehicles such as trucks, vans, or SUVs may require a taller garage door to ensure adequate clearance.
  2. Ceiling Height:
    • The height of the garage door opening is often determined by the height of the garage ceiling or roof. Standard residential garage ceilings are typically between 8 and 10 feet high, although some may be taller in custom-built homes or commercial properties.
  3. Local Building Codes:
    • Building codes and regulations may specify minimum requirements for the height of garage doors based on safety standards and accessibility requirements. It’s essential to check local building codes before installing or replacing a garage door to ensure compliance.
  4. Customization Options:
    • Some homeowners may choose to customize their garage doors with additional features such as windows, decorative panels, or insulation. These customizations can affect the overall height of the garage door and may require adjustments to the opening or framing.

Conclusion:

The standard height of a Garage Door Repair Volo IL typically ranges from 7 to 8 feet (84 to 96 inches), with single garage doors commonly measuring 7 feet high and double garage doors measuring either 7 or 8 feet high. The exact height may vary depending on factors such as vehicle size, ceiling height, local building codes, and customization options. It’s essential to consider these factors when selecting a garage door to ensure adequate clearance and compliance with safety standards. If you’re unsure about the height requirements for your garage door, consult with a qualified garage door technician or contractor for advice and assistance.

EDM Garage Doors, LLC

596 Richard Brown Blvd, Volo, IL 60073, United States

1-847-416-3036

How To Open Electric Garage Door Manually – All American Door


Garage Door Repair Miami FL, is a crucial skill to have in case of emergencies such as power outages or when the automatic opener malfunctions.

While the process may seem daunting at first, it’s relatively straightforward with the right knowledge and precautions. In this comprehensive guide, I’ll walk you through the step-by-step process of manually opening an electric garage door.

: Prepare for Manual Operation

Before attempting to open the garage door manually, take the following precautions:

  1. Ensure Safety Gear: Wear appropriate clothing and sturdy shoes to protect yourself from potential hazards.
  2. Clear the Area: Remove any obstacles or obstructions from around the garage door to provide a clear path for operation.
  3. Identify the Emergency Release Mechanism: Locate the emergency release cord or handle, typically hanging from the center rail or trolley of the garage door opener. It is often red and easily identifiable.

: Access the Emergency Release Mechanism

  1. Use a Ladder if Necessary: If the emergency release mechanism is out of reach, use a ladder or step stool to access it safely.
  2. Locate the Cord or Handle: Identify the emergency release cord or handle near the center rail or trolley of the garage door opener.
  3. Pull Down Firmly: Grasp the emergency release cord or handle firmly and pull it down in a straight motion. Apply enough force to disengage the door from the automatic opener.

: Manually Lift the Garage Door

  1. Assume Proper Lifting Position: Stand facing the garage door, with your feet shoulder-width apart and knees slightly bent.
  2. Position Your Hands: Place your hands on the bottom edge of the garage door, near the sides, for better leverage.
  3. Lift Smoothly and Steadily: Using your leg muscles and maintaining a straight back, lift the garage door upward in a smooth and steady motion. Be mindful of the door’s weight, especially for larger doors.
  4. Clear the Opening: Continue lifting the garage door until it is fully open and clear of the opening. You may need to step back slightly to allow the door to clear the opening completely.

: Secure the Garage Door

  1. Prop Up the Door: Once the garage door is fully open, prop it up securely using a sturdy object such as a block of wood or a ladder. This will prevent the door from accidentally closing while you’re working.
  2. Ensure Stability: Make sure the door is securely supported to prevent it from falling or closing unexpectedly.

: Re-engage the Electric Garage Door Opener (Optional)

  1. Return the Release Mechanism to its Original Position: To re-engage the garage door opener, return the emergency release cord or handle to its original position. This will reconnect the door to the automatic opener.
  2. Test the Opener: Once the release mechanism is reset, manually lower the garage door until it reconnects with the automatic opener’s carriage. Test the automatic operation of the garage door to ensure that it’s functioning properly.

: Practice Safety Precautions

  1. Avoid Hand Injuries: Keep your hands and fingers away from moving parts of the garage door to prevent injuries.
  2. Clear Surroundings: Ensure that the area around the garage door is clear of obstructions and bystanders before operating it manually.
  3. Consult a Technician: If you encounter any difficulties or issues during the manual operation of the garage door, consult the manufacturer’s instructions or contact a professional garage door technician for assistance.

Conclusion:

By following these step-by-step instructions and safety precautions, you can safely and effectively Garage Door Repair Miami FL, in the event of an emergency or malfunction. Familiarizing yourself with the emergency release mechanism and practicing the manual operation of your garage door can provide peace of mind and ensure that you’re prepared for unexpected situations.

All American Doors

8155 NW 93rd St, Medley, FL 33166, United States

1-305-885-8088

How To Manually Open Garage Door -MF Solutions


Garage Door Repair Niles IL can be necessary in various situations, such as during a power outage or when the automatic opener malfunctions.

Here’s a step-by-step guide to manually open a typical sectional garage door:

  1. Ensure Safety: Before attempting to manually open the garage door, make sure there are no obstructions in the door’s path, and clear the area around the door to prevent accidents.
  2. Locate the Emergency Release Cord: Most garage door openers have an emergency release cord hanging from the center rail of the garage door mechanism. This cord is usually red and has a handle or a knob attached to it.
  3. Pull Down on the Cord: Grip the handle or knob firmly and pull it straight down towards the floor. This action disengages the garage door opener from the door, allowing you to manually operate it.
  4. Lift the Door: With the emergency release cord pulled down, you can now lift the garage door manually. Place your hands on the bottom edge of the door, ensuring a firm grip, and lift it slowly and steadily. Sectional garage doors are typically balanced with springs, so they shouldn’t be excessively heavy to lift.
  5. Lift the Door to the Fully Open Position: Continue lifting the door until it is fully open. Be mindful of any resistance or unusual noises during this process, as they may indicate a problem with the door or its components.
  6. Secure the Door in the Open Position: Once the door is fully open, you may want to secure it in place to prevent accidental closure. Some garage doors have a locking mechanism built into the tracks, while others may require the use of additional tools like clamps or locking pliers to keep the door open securely.
  7. Release the Emergency Release Cord: After securing the door, release the emergency release cord by gently pushing it back up towards the ceiling. This action re-engages the garage door opener with the door, allowing it to function normally once power is restored or the automatic opener is repaired.
  8. Test the Door: Before leaving the garage, test the manual operation of the door by lowering it halfway and then lifting it back up again. Ensure that the door moves smoothly and without any unusual resistance.
  9. Close the Door: To close the garage door manually, simply reverse the process by pulling down on the emergency release cord, lowering the door gently to the ground, and releasing the cord to re-engage the opener.
  10. Restore Power or Repair the Opener: Once the garage door is closed, you can restore power to the opener if necessary or proceed with repairing any issues that may have caused the need for manual operation.

By following these steps carefully, you can safely and effectively manually open aGarage Door Repair Niles IL when needed. Remember to exercise caution and prioritize safety at all times during this process.

MF Solutions

1-224-434-1780

Tips for Extending the Lifespan of Your Garage Door – Ryder Garage Doors

As a homeowner who has experienced the convenience and security of a well-functioning garage door, I understand the importance of maintaining this crucial entry point to my home. Over the years, I’ve learned that regular care and attention can significantly extend the lifespan of a garage door, saving both time and money on repairs and replacements.

By following Garage Door Repair Vancouver WA, I’ll share my top tips for maximizing the longevity of your garage door, ensuring smooth operation and peace of mind for years to come.

1. Routine Inspection and Maintenance

Regular inspections are the cornerstone of garage door maintenance. I make it a point to visually inspect my garage door at least once a month, checking for any signs of wear, damage, or misalignment. Pay close attention to the tracks, rollers, springs, cables, and hinges, as these components are critical to the door’s functionality. Addressing minor issues promptly can prevent them from escalating into more significant problems down the line.

2. Keep Moving Parts Lubricated

Proper lubrication is essential for maintaining smooth and quiet operation of your garage door. I make it a habit to lubricate the moving parts, including rollers, hinges, tracks, and springs, every six months or as needed. Use a silicone-based lubricant to avoid attracting dirt and debris, and be sure to wipe off any excess to prevent buildup. This simple maintenance task can significantly reduce friction and wear on the door components.

3. Balance and Alignment Checks

A properly balanced garage door is essential for smooth and efficient operation. Periodically check the balance of your door by disconnecting the opener and manually lifting the door halfway. If the door stays in place, it’s well-balanced. If it moves up or down, it may be out of balance and require adjustment. Additionally, ensure that the tracks are properly aligned and free from obstructions to prevent strain on the door system.

4. Weatherproofing and Insulation

Protecting your garage door from the elements is key to extending its lifespan. Consider weatherproofing measures such as installing weather stripping along the bottom of the door and sealing gaps around the frame to prevent drafts and moisture infiltration. Additionally, investing in insulated garage doors can help regulate temperature and reduce stress on the door components, particularly in extreme climates.

5. Mindful Operation

Practicing mindful operation of your garage door can go a long way in preserving its longevity. Avoid slamming the door shut or allowing it to crash to the ground, as this can put unnecessary strain on the springs and hardware. Instead, gently guide the door through its full range of motion and avoid excessive force when opening or closing. Additionally, be mindful of objects in the door’s path and ensure that the area is clear before operating the door.

6. Regular Professional Servicing

While DIY maintenance is essential, it’s also wise to schedule regular professional servicing for your garage door. A qualified technician can perform comprehensive inspections, tune-ups, and adjustments to ensure that your door is operating at peak performance. They can also identify potential issues early on and recommend preventative measures to avoid costly repairs down the road.

7. Secure Hardware and Accessories

Loose or damaged hardware can compromise the safety and functionality of your garage door. Periodically check and tighten bolts, screws, and brackets to ensure that everything is securely fastened. Additionally, inspect safety features such as sensors and auto-reverse mechanisms to ensure that they are functioning correctly. Taking these proactive measures can help prevent accidents and prolong the lifespan of your garage door.

8. Seasonal Care

Finally, don’t forget to adjust your maintenance routine to account for seasonal changes. Extreme temperatures, humidity, and precipitation can impact the performance of your garage door, so be sure to take extra precautions during periods of inclement weather. For example, lubricate moving parts more frequently in cold weather to prevent freezing, and clear debris from tracks and rollers after heavy rain or snowfall.

Conclusion: A Long-Term Investment

In conclusion, according to Garage Door Repair Vancouver WA, extending the lifespan of your garage door is a worthwhile investment that can save you time, money, and hassle in the long run. By following these expert tips for routine inspection and maintenance, lubrication, balance and alignment checks, weatherproofing, mindful operation, professional servicing, hardware security, and seasonal care, you can ensure that your garage door remains in optimal condition for years to come. With a little care and attention, your garage door will continue to provide reliable performance and peace of mind for you and your family.

Ryder Garage Doors

Vancouver, WA

360-843-7981

How To Set Travel Limits On Genie Garage Door Opener – Camco Commercial Door Company


In this guide, I’ll walk you through the process of setting the travel limits on a Genie  Garage Door Repair Knoxville TN in, covering each step in detail to help you complete the task successfully.

Step 1: Prepare the Opener

Before you begin, make sure the garage door opener is powered off to avoid any accidents. Locate the “Learn Code” button on the opener unit, typically located near the antenna wire. This button is used to enter programming mode.

Step 2: Access the Adjustment Controls

Depending on the model of your Genie garage door opener, the adjustment controls may be located on the opener unit itself or on the remote control. Refer to your owner’s manual to determine the location of the adjustment controls and how to access them.

Step 3: Identify the Up and Down Limit Screws

Most Genie garage door openers have separate limit adjustment screws for the up (open) and down (close) travel limits. These screws are typically labeled “Up Limit” and “Down Limit” and may be located on the opener unit or on the remote control.

Step 4: Set the Down Limit

To set the down limit, start with the garage door fully closed. Use a stepladder to access the opener unit if necessary. Locate the “Down Limit” adjustment screw and turn it clockwise to decrease the travel distance or counterclockwise to increase it.

Step 5: Test the Down Limit

After making adjustments to the down limit, test the door to ensure it closes completely without hitting the ground. Press the remote control or wall button to operate the door and observe its movement. If the door stops too high or too low, continue adjusting the down limit screw until it closes properly.

Step 6: Set the Up Limit

Once the down limit is properly set, move on to adjusting the up limit. Open the garage door fully and locate the “Up Limit” adjustment screw. Turn the screw clockwise to decrease the travel distance or counterclockwise to increase it.

Step 7: Test the Up Limit

After making adjustments to the up limit, test the door to ensure it opens completely without hitting the ceiling. Press the remote control or wall button to operate the door and observe its movement. If the door stops too high or too low, continue adjusting the up limit screw until it opens properly.

Step 8: Fine-Tune the Limits

Once both the up and down limits are set, perform several additional tests to fine-tune the travel distances. Open and close the door multiple times, observing its movement and ensuring that it stops in the correct positions each time. Make any necessary adjustments to the limit screws as needed.

Step 9: Lock in the Settings

Once you are satisfied with the travel limits, lock in the settings to prevent accidental changes. Press the “Learn Code” button on the opener unit or remote control to exit programming mode and save your adjustments.

Step 10: Perform Safety Tests

After setting the travel limits, it’s essential to perform safety tests to ensure that the door operates safely and smoothly. Test the safety reversal system by placing an object, such as a piece of wood, in the path of the closing door. The door should reverse immediately upon contact with the object.

Conclusion

If you encounter any difficulties or have questions about the process, refer to your owner’s manual or contact Genie customer support for assistance. With properly set travel limits, your Genie Garage Door Repair Knoxville TN will provide reliable performance for years to come.

Camco Commercial Door Company

1-865-776-9455

Page 2 of 5

Powered by WordPress & Theme by Anders Norén