The Largest Business Blog in Texas

Tag: garage door repair knoxville tn

Can You Program A Garage Door Opener From Another Remote – Camco Commercial Door Company

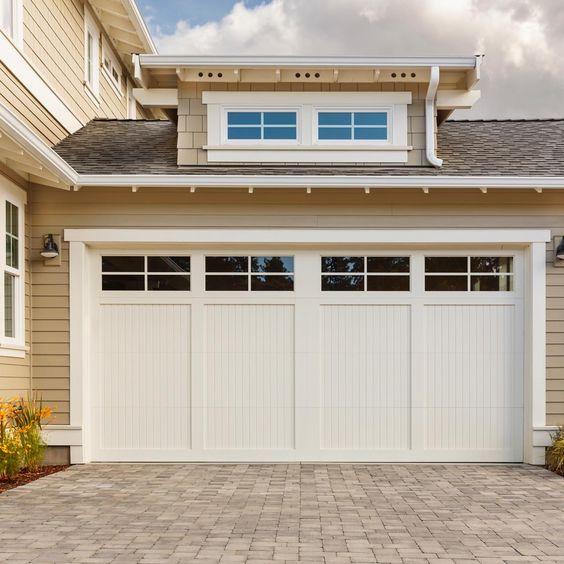
This process, commonly referred to as “remote cloning” or “remote syncing,” allows you to synchronize multiple remotes to control the same Garage Door Repair Knoxville TN.

However, the specific steps and compatibility requirements may vary depending on the make and model of the garage door opener and the remote control. Let’s explore in more detail how to program a garage door opener from another remote:

1. Check Compatibility: Before attempting to program a garage door opener from another remote, it’s crucial to ensure that both remotes are compatible with the garage door opener and designed to work together. Check the manufacturer’s instructions or specifications to confirm compatibility between the two devices.

2. Determine Programming Method: Garage door openers typically offer various methods for programming additional remotes, such as using a “learn” button on the opener motor unit or entering a specific code sequence. Determine the programming method supported by your garage door opener and refer to the manufacturer’s instructions for detailed steps.

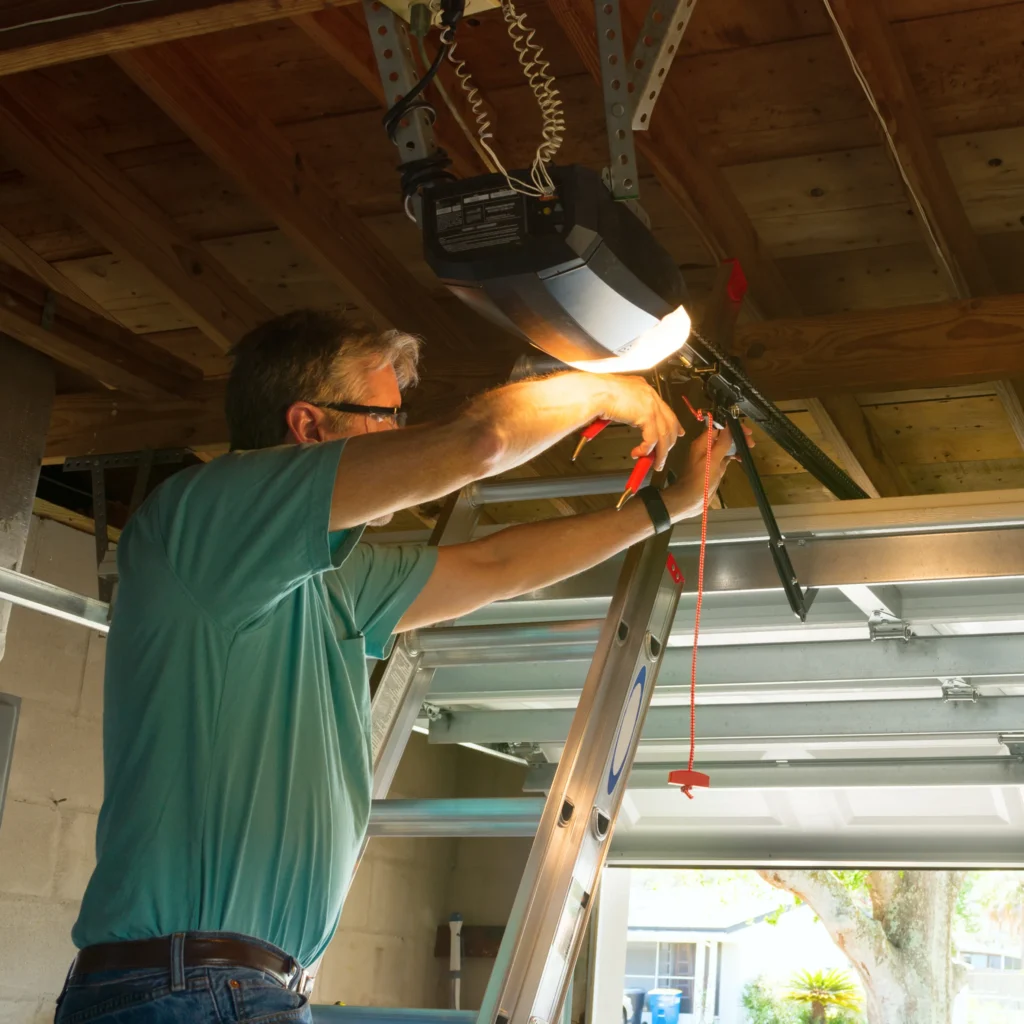
3. Locate the “Learn” Button: If your garage door opener features a “learn” button, you’ll need to locate this button on the motor unit of the opener. The “learn” button is usually located near the antenna wire and may be labeled as such or identified by a specific color (e.g., red, purple).

4. Activate Programming Mode: To program the garage door opener from another remote, you’ll need to activate programming mode on the opener. This typically involves pressing and releasing the “learn” button, which triggers the opener to enter programming mode and await synchronization with a new remote.

5. Press the Button on the Other Remote: Once the garage door opener is in programming mode, press the desired button on the other remote that you want to program. Hold the button down for a few seconds until the indicator light on the opener flashes or blinks, indicating that the programming was successful.

6. Test the New Remote: After programming the new remote, test its functionality by pressing the programmed button to open or close the garage door. Ensure that the remote operates the door as expected and that the door responds smoothly without any issues.

7. Repeat if Necessary: If you have multiple remotes that you want to program to the same garage door opener, repeat the programming process for each additional remote. Follow the same steps outlined above, ensuring that each remote is successfully programmed before proceeding to the next one.

8. Secure Programming Mode: Once all desired remotes have been programmed, secure programming mode on the garage door opener to prevent unauthorized access or accidental reprogramming. This may involve pressing the “learn” button again or following specific instructions provided by the manufacturer.

9. Troubleshooting: If you encounter any issues or difficulties during the programming process, refer to the manufacturer’s instructions for troubleshooting tips and guidance. Common issues may include interference from nearby electronic devices, low battery power, or incorrect button sequences.

10. Conclusion:

In conclusion, programming a garage door opener from another remote is a convenient way to synchronize multiple remotes to control the same garage door opener. By following the manufacturer’s instructions and using the appropriate programming method, you can successfully program additional remotes to your garage door opener system. Ensure compatibility between the devices, activate programming mode on the opener, press the button on the other remote, and test the functionality to ensure successful programming. With proper programming, you can enjoy the convenience and flexibility of controlling your garage door from multiple remotes.

Camco Commercial Door Company

1-865-776-9455

Do Garage Door Openers Have A Reset Button – Camco Commercial Door Company


However, not all Garage Door Repair Knoxville TN  have a physical reset button, as some models may use alternative methods or procedures for resetting or troubleshooting issues. In this guide, we’ll explore the common types of garage door opener reset buttons,

how to locate and use them, and alternative methods for resetting garage door openers without a dedicated reset button.

  1. Locating the Reset Button: The reset button on a garage door opener is usually located on the motor unit or control panel of the opener. It may be labeled as “Reset,” “Learn,” “Program,” or a similar designation, depending on the manufacturer. The reset button is often small and recessed to prevent accidental activation, requiring a pointed object such as a pen or paperclip to press it. Refer to the owner’s manual or documentation provided with your garage door opener for specific instructions on locating the reset button for your model.
  2. Function of the Reset Button: The function of the reset button can vary depending on the type of garage door opener and the specific issue you’re experiencing. In some cases, pressing the reset button may clear error codes, reset the opener’s programming or settings, or re-sync the opener with remote controls or keypads. The reset button may also be used to initiate the learning process for programming new remote controls or keypad codes. Consult the owner’s manual or manufacturer’s instructions for your garage door opener to understand the specific functions and procedures associated with the reset button.
  3. Resetting the Opener: To reset a garage door opener using the reset button, follow these general steps:a. Ensure that the garage door is fully closed and that there are no obstructions blocking the door’s movement. b. Locate the reset button on the motor unit or control panel of the garage door opener. c. Use a pointed object such as a pen or paperclip to press and hold the reset button for several seconds. d. Release the reset button once you see or hear confirmation that the reset process has been initiated, such as a flashing light or audible beep. e. Wait for the garage door opener to complete the reset process, which may take a few moments. Once the process is complete, the opener should return to its default settings or enter a programming mode, depending on the specific function of the reset button.
  4. Alternative Reset Methods: If your garage door opener does not have a dedicated reset button or if pressing the reset button does not resolve the issue, there may be alternative methods for resetting the opener. These methods can vary depending on the manufacturer and model of the opener but may include procedures such as power cycling the opener, performing a factory reset, or reprogramming the opener’s settings manually. Refer to the owner’s manual or manufacturer’s instructions for your garage door opener for guidance on alternative reset methods and troubleshooting procedures.
  5. Safety Precautions: When working with a garage door opener, it’s essential to observe proper safety precautions to prevent accidents or injuries. Before attempting to reset the opener, ensure that the garage door is fully closed and that there are no obstructions blocking the door’s movement. Use caution when pressing the reset button or performing any troubleshooting procedures, and follow the manufacturer’s instructions carefully to avoid damaging the opener or compromising safety.

conclusion:

Always refer to the owner’s manual or manufacturer’s instructions for your specific Garage Door Repair Knoxville TN  model for guidance on resetting and troubleshooting procedures.

Camco Commercial Door Company

Camco Commercial Door Company

1-865-776-9455

https://maps.app.goo.gl/EHYTdzvLDSBDwnoi8

How To Set Travel Limits On Genie Garage Door Opener – Camco Commercial Door Company


In this guide, I’ll walk you through the process of setting the travel limits on a Genie  Garage Door Repair Knoxville TN in, covering each step in detail to help you complete the task successfully.

Step 1: Prepare the Opener

Before you begin, make sure the garage door opener is powered off to avoid any accidents. Locate the “Learn Code” button on the opener unit, typically located near the antenna wire. This button is used to enter programming mode.

Step 2: Access the Adjustment Controls

Depending on the model of your Genie garage door opener, the adjustment controls may be located on the opener unit itself or on the remote control. Refer to your owner’s manual to determine the location of the adjustment controls and how to access them.

Step 3: Identify the Up and Down Limit Screws

Most Genie garage door openers have separate limit adjustment screws for the up (open) and down (close) travel limits. These screws are typically labeled “Up Limit” and “Down Limit” and may be located on the opener unit or on the remote control.

Step 4: Set the Down Limit

To set the down limit, start with the garage door fully closed. Use a stepladder to access the opener unit if necessary. Locate the “Down Limit” adjustment screw and turn it clockwise to decrease the travel distance or counterclockwise to increase it.

Step 5: Test the Down Limit

After making adjustments to the down limit, test the door to ensure it closes completely without hitting the ground. Press the remote control or wall button to operate the door and observe its movement. If the door stops too high or too low, continue adjusting the down limit screw until it closes properly.

Step 6: Set the Up Limit

Once the down limit is properly set, move on to adjusting the up limit. Open the garage door fully and locate the “Up Limit” adjustment screw. Turn the screw clockwise to decrease the travel distance or counterclockwise to increase it.

Step 7: Test the Up Limit

After making adjustments to the up limit, test the door to ensure it opens completely without hitting the ceiling. Press the remote control or wall button to operate the door and observe its movement. If the door stops too high or too low, continue adjusting the up limit screw until it opens properly.

Step 8: Fine-Tune the Limits

Once both the up and down limits are set, perform several additional tests to fine-tune the travel distances. Open and close the door multiple times, observing its movement and ensuring that it stops in the correct positions each time. Make any necessary adjustments to the limit screws as needed.

Step 9: Lock in the Settings

Once you are satisfied with the travel limits, lock in the settings to prevent accidental changes. Press the “Learn Code” button on the opener unit or remote control to exit programming mode and save your adjustments.

Step 10: Perform Safety Tests

After setting the travel limits, it’s essential to perform safety tests to ensure that the door operates safely and smoothly. Test the safety reversal system by placing an object, such as a piece of wood, in the path of the closing door. The door should reverse immediately upon contact with the object.

Conclusion

If you encounter any difficulties or have questions about the process, refer to your owner’s manual or contact Genie customer support for assistance. With properly set travel limits, your Genie Garage Door Repair Knoxville TN will provide reliable performance for years to come.

Camco Commercial Door Company

1-865-776-9455

How To Align Chamberlain Garage Door Sensors – Camco Commercial Door Company

Aligning Chamberlain Garage Door Repair Knoxville TN is a crucial step in ensuring the safe and proper operation of your garage door opener. The sensors, also known as safety reversing sensors or photoelectric sensors, are located near the bottom of the garage door tracks on either side of the door opening.

They work together to detect obstructions in the path of the closing door and prevent it from closing if an object or person is in the way. If the sensors are misaligned or obstructed, the garage door may not close properly or may reverse unexpectedly. In this guide, we’ll walk you through the steps to align Chamberlain garage door sensors for optimal performance and safety.

  1. Prepare Your Workspace:
    • Before you begin, make sure the area around the garage door sensors is clear of any debris, obstructions, or clutter. You’ll need access to both sensors and their mounting brackets, which are typically located on the garage door tracks near the ground.
    • Ensure that the garage door is fully closed before starting the alignment process. Use the wall-mounted control button or remote to close the door if necessary.
  2. Inspect the Sensors:
    • Start by visually inspecting both sensors to ensure that they are clean, free of dirt or debris, and securely mounted to the garage door tracks. Check for any signs of damage, such as cracks or loose wires, that may affect their operation.
    • Clean the sensor lenses with a soft, dry cloth to remove any dirt, dust, or smudges that may interfere with their ability to detect obstructions.
  3. Check the Alignment:
    • Look at the indicator lights on both sensors to verify that they are aligned properly. On most Chamberlain garage door openers, one sensor will have a green light, indicating power, while the other sensor will have a red or amber light, indicating alignment status.
    • If the sensors are aligned correctly, the indicator lights should be solid and not blinking. If one or both lights are blinking or flickering, it may indicate that the sensors are misaligned or obstructed.
  4. Adjust the Sensors:
    • To align the sensors, start by loosening the mounting screws on one or both sensors using a screwdriver. This will allow you to adjust the position of the sensors along the garage door tracks.
    • Use a level to ensure that the sensors are aligned vertically and parallel to each other. Place the level against the sensor housing or mounting bracket and adjust the position of the sensor until it is perfectly level.
    • Once the sensors are level, tighten the mounting screws securely to hold them in place. Double-check the alignment and make any necessary adjustments to ensure that both sensors are aligned properly.
  5. Test the Sensors:
    • After aligning the sensors, test their operation to ensure that they are functioning correctly. Open the garage door using the wall-mounted control button or remote and observe the sensor indicator lights.
    • As the door closes, wave a hand or object in front of one of the sensors to simulate an obstruction. The indicator light on that sensor should change from solid to blinking, indicating that the sensor has detected the obstruction.
    • If both sensors are working correctly, the garage door should stop closing and reverse direction automatically. If the door continues to close without reversing, or if one of the sensor lights does not change when obstructed, the sensors may need further adjustment or troubleshooting.
  6. Perform Additional Checks:
    • Once you’ve aligned the sensors and tested their operation, perform a visual inspection of the garage door tracks and surrounding area to ensure that there are no obstructions or objects blocking the sensors’ view.
    • Check the alignment periodically and after any adjustments or maintenance to ensure that the sensors continue to function properly.
  7. Finalize the Alignment:
    • Once you’re satisfied with the alignment and operation of the sensors, secure any loose wires or cables and tidy up the area around the garage door tracks.
    • It’s a good idea to mark the final positions of the sensors with a permanent marker or pen for future reference. This will make it easier to realign the sensors if necessary.

In summary, aligning Chamberlain Garage Door Repair Knoxville TN is a straightforward process that can be done with basic tools and a little patience. By following these steps and performing regular maintenance, you can ensure that your garage door operates safely and reliably for years to come. If you encounter any issues or difficulties during the alignment process, refer to your opener’s user manual or contact Chamberlain’s customer support for assistance.

Camco Commercial Door Company

853 East Wolf Valley Rd. Heiskell, TN 37754

1-865-776-9455

How To Replace Battery In Garage Door Opener – Camco Commercial Door Company

Replacing the battery in your Garage Door Repair Knoxville TN is a simple yet essential task to ensure the smooth operation of your garage door.

Most garage door openers use batteries to power the remote control or the control panel. Follow this comprehensive guide, broken down into detailed steps, to replace the battery in your garage door opener successfully.

: Identify the Type of Battery

Determine the type and size of the battery used in your garage door opener. Common battery types include 9-volt, AA, AAA, or coin-cell batteries. This information is typically specified in the user manual of your garage door opener or on the existing battery.

: Purchase a Replacement Battery

Once you know the type of battery required, purchase a replacement battery. Choose a high-quality battery from a reputable brand to ensure optimal performance and longevity.

: Gather Necessary Tools

Prepare the necessary tools for the task. In most cases, you’ll only need a screwdriver to access the battery compartment.

: Locate the Battery Compartment

Identify the location of the battery compartment on your garage door opener. This is typically found on the back of the remote control or on the control panel mounted on the garage wall.

: Open the Battery Compartment

Use a screwdriver to remove any screws securing the battery compartment cover. In some cases, the cover may have a latch or slide mechanism. Follow the specific instructions in your garage door opener’s user manual to open the compartment.

: Remove the Old Battery

Once the battery compartment is open, carefully remove the old battery. Pay attention to the orientation of the battery, noting the positive (+) and negative (-) terminals.

: Dispose of the Old Battery Properly

Dispose of the old battery following local regulations and guidelines for battery recycling. Many communities have designated recycling centers or drop-off locations for household batteries.

: Insert the New Battery

Insert the new battery into the battery compartment, ensuring that the positive and negative terminals align correctly with the markings in the compartment. Follow the manufacturer’s instructions for the specific orientation of the battery.

: Close the Battery Compartment

Securely close the battery compartment cover, either by tightening the screws or engaging the latch or slide mechanism. Ensure that the cover is tightly sealed to protect the battery and prevent dust or debris from entering.

: Test the Remote Control

If the battery replacement is for a remote control, test the remote’s functionality by pressing the buttons. The garage door opener should respond by opening or closing the garage door. If the remote control has multiple buttons for different functions, test each one.

: Test the Control Panel (if applicable)

If the battery replacement is for a control panel mounted on the garage wall, test the control panel’s functionality. Check if it displays the correct information and if any buttons or features are responsive.

: Check for Low Battery Indicators

Some garage door openers have low battery indicators that signal when the battery is running low. After replacing the battery, check for any low battery indicators on the remote control or control panel.

: Consider Using Rechargeable Batteries (optional)

If your garage door opener allows it, consider using rechargeable batteries to reduce environmental impact and save on battery costs over time. Ensure that the rechargeable batteries are compatible with your garage door opener.

: Document the Replacement Date

Keep a record of the date when you replaced the battery. This information can be useful for future reference, especially if you experience issues and need to troubleshoot.

: Schedule Regular Battery Replacements

Establish a schedule for regular battery replacements based on the manufacturer’s recommendations. This proactive approach helps prevent unexpected issues with your garage door opener due to aging or depleted batteries.

: Consult the User Manual (if needed)

If you encounter difficulties during the battery replacement process or have specific questions about your garage door opener, consult the user manual provided by the manufacturer for detailed instructions and troubleshooting tips.

By following these detailed steps, you’ve successfully replaced the battery in your Garage Door Repair Knoxville TN, ensuring reliable and consistent operation. Remember to prioritize safety during the process, and if you encounter any challenges, consult the relevant manuals or seek professional assistance.

Camco Commercial Door Company

1-865-776-9455

How To Adjust Chamberlain Garage Door Opener – Camco Commercial Door Company


Adjusting your Chamberlain Garage Door Repair Knoxville TN ensures smooth operation, reduces noise, and extends the life of the system.

Here’s a comprehensive guide with step-by-step instructions on how to adjust a Chamberlain garage door opener.

1. Safety First: Before starting any adjustments, prioritize safety. Disconnect the power to the garage door opener by unplugging it or turning off the circuit breaker. If your opener has a battery backup, disconnect it as well.

2. Check the Balance: A well-balanced garage door is essential for proper functioning. With the door in the closed position, manually lift it halfway. If the door stays in place, it’s balanced. If it falls or rises, the springs may need adjustment. Consult the opener’s manual for specific instructions on adjusting the springs.

3. Limit Settings Adjustment: Chamberlain garage door openers have limit settings that determine how far the door opens and closes. To adjust these settings:

  • Locate the limit adjustment screws on the opener. These are usually labeled “Up” and “Down.”
  • Using a flathead screwdriver, turn the adjustment screws clockwise to decrease the travel distance and counterclockwise to increase it.
  • Run the opener to test the adjustments. Make small changes until the door opens and closes fully without stopping or hitting the floor.

4. Force Settings Adjustment: Chamberlain openers have force settings that control the amount of force exerted during opening and closing. Adjust these settings if the door doesn’t close completely or if it reverses when closing:

  • Locate the force adjustment screws on the opener. These are often labeled “Up Force” and “Down Force.”
  • Use a flathead screwdriver to turn the screws. Increase the force if the door doesn’t close, and decrease it if the door reverses.
  • Test the adjustments by running the door multiple times.

5. Photo Eye Alignment: Chamberlain garage door openers are equipped with safety sensors known as photo eyes. Ensure these sensors are properly aligned to prevent the door from closing on objects or people:

  • Check for any obstructions between the sensors.
  • Adjust the sensors by loosening the wing nuts and gently repositioning them until the indicator lights on both sensors are aligned.
  • Tighten the wing nuts securely.

6. Lubrication: Regular lubrication is crucial for smooth operation. Apply a silicone-based lubricant to the opener’s chain or belt, rollers, hinges, and springs. Avoid using grease as it can attract dust and debris.

7. Chain or Belt Tension: If your Chamberlain opener has a chain or belt drive, ensure proper tension:

  • Refer to the opener’s manual for specific instructions on adjusting chain or belt tension.
  • Typically, there is an adjustment nut on the trolley mechanism. Tighten or loosen it to achieve the recommended tension.

8. Test and Fine-Tune: After making adjustments, run the opener through a complete cycle to test its operation. Pay attention to any unusual noises or movements. Fine-tune the settings as needed to achieve optimal performance.

9. Reconnect Power: Once you’re satisfied with the adjustments, reconnect the power to the garage door opener. If applicable, reconnect the battery backup.

10. Periodic Maintenance: Perform routine maintenance, including lubrication and visual inspections, to keep your Chamberlain garage door opener in top condition. Address any issues promptly to prevent further damage.

By following these step-by-step instructions, you can effectively adjust your Chamberlain Garage Door Repair Knoxville TN for optimal performance, safety, and longevity. Regular maintenance and occasional adjustments contribute to a well-functioning and reliable garage door system.

Camco Commercial Door Company

1-865-776-9455

How to Fix a Garage Door – Camco Commercial Door Company

Fixing a malfunctioning garage door can be a complex task that may require professional assistance, depending on the issue at hand. However, I can provide a concise overview of troubleshooting steps you can take to address common garage door malfunctions. Please note that these suggestions are general in nature and may not cover all possible scenarios.

Here are some steps to consider according to Garage Door Repair Knoxville TN:

  1. Identify the problem: When my garage door malfunctions, the first step I take is to observe and understand the specific issue. Is it not opening or closing? Is it making strange noises? Does it get stuck or move unevenly? Identifying the problem helps me determine the appropriate course of action.
  2. Check the power source: I always make sure to check if my garage door opener is receiving power. I inspect the power cord and ensure it is securely plugged into a functioning electrical outlet. If my opener has a battery backup, I verify that the battery is charged. If there is no power, I check the circuit breaker or fuse box to address any electrical issues.
  3. Inspect the remote control and wall switch: If my garage door does not respond to commands from the remote control or wall switch, I start by checking the batteries in the remote and replacing them if necessary. I also inspect the wall switch for any loose wires or damage. If the problem persists, I reprogram the remote control following the manufacturer’s instructions.
  4. Lubricate moving parts: To address squeaky or stiff garage doors, I turn my attention to lubricating the moving parts. I apply a silicone-based lubricant to the rollers, hinges, tracks, and springs. This helps reduce friction and ensures smooth operation. It’s important to avoid using grease or oil-based lubricants as they can attract dirt and debris.
  5. Check the safety sensors: If my garage door is equipped with safety sensors and it fails to close or opens immediately after closing, I inspect the sensors. I ensure they are clean and aligned properly. If there is any dirt or debris obstructing the sensor’s path, I carefully wipe it away. This usually resolves any issues related to the safety sensors.
  6. Inspect the tracks and rollers: I carefully examine the tracks for any bends, dents, or obstructions. If I notice minor issues, I gently straighten them using a rubber mallet or a block of wood. I also clean the tracks to remove any dirt or debris that could interfere with the door’s movement. Additionally, I inspect the rollers for any damage or wear, replacing them if necessary.
  7. Test the balance of the door: To ensure smooth operation, I test the balance of my garage door. I disconnect the opener and manually lift the door halfway. If it remains in place, it indicates that the door is properly balanced. However, if it falls or rises on its own, it may require professional adjustment to restore balance.
  8. Adjust the limit switches: If my garage door opens or closes only partially, I check the limit switches. These switches control the travel distance of the door. I refer to the manufacturer’s instructions to locate the limit switches and adjust them as necessary to ensure proper operation.
  9. Examine the springs and cables: If I suspect issues with the springs or cables, such as broken or damaged components, I know that these are complex and potentially dangerous to work with. In such cases, I always seek professional assistance from a knowledgeable garage door technician. They have the expertise and tools to safely inspect, repair, or replace the springs and cables.
  10. Seek professional assistance: If I have tried the above steps and the problem persists, or if I encounter more complex issues like a broken torsion spring or a malfunctioning opener motor, I understand the importance of contacting a professional garage door technician. They have the necessary skills and experience to diagnose and fix the problem safely and effectively.

Remember, as per Garage Door Repair Knoxville TN, garage doors can be heavy and potentially dangerous to work with. If you are unsure about performing any repairs or if the issue involves complex mechanisms, it is best to seek professional help to ensure the safety and proper functioning of your garage door.

Camco Commercial Door Company

Knoxville, TN

865-776-9455

Powered by WordPress & Theme by Anders Norén