The Largest Business Blog in Texas

Tag: garage door repair Argyle TX

How To Remove Paint From Wood Garage Door – Argyle Gates & Garage Doors

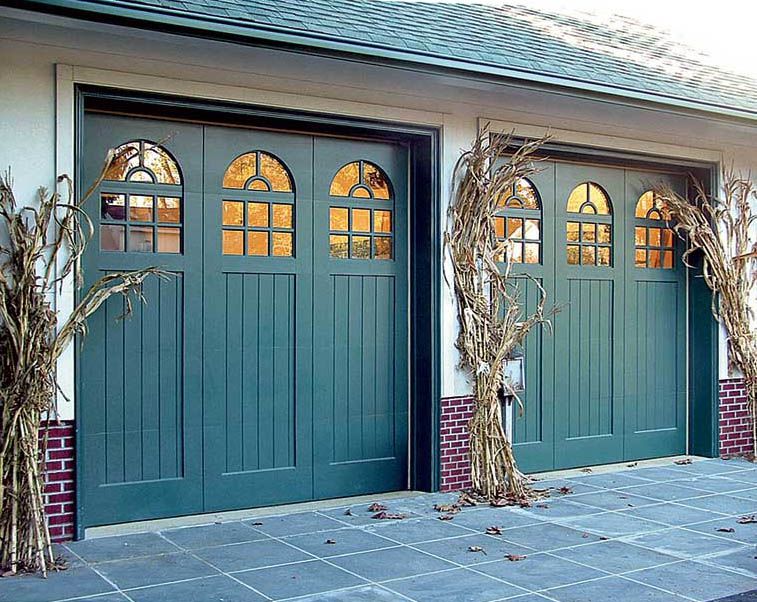
Removing paint from a wood Argyle Garage Door Repair is a careful process to preserve the natural beauty of the wood while achieving a clean and smooth surface.

Whether you’re refreshing the appearance of your garage door or correcting a paint job gone wrong, this step-by-step guide will help you effectively remove paint from your wood garage door.

: Gather Materials

Before you begin the paint removal process, gather all the necessary materials:

  • Paint stripper suitable for wood surfaces
  • Plastic or metal scraper or putty knife
  • Wire brush or steel wool
  • Sandpaper (medium and fine grit)
  • Drop cloths or plastic sheets
  • Protective gear (gloves, safety glasses, and a mask)
  • Clean rags or towels
  • Paint thinner or mineral spirits
  • Mild detergent
  • Bucket of soapy water
  • Garden hose or pressure washer
  • Wood filler (if needed)
  • Wood primer and paint (if planning to repaint)

: Prepare the Area

Start by preparing the area around the garage door. Lay down drop cloths or plastic sheets to protect the ground from paint chips and any residue produced during the paint removal process.

: Safety First

Put on protective gear, including gloves, safety glasses, and a mask. Paint strippers can contain harsh chemicals, and protection is essential to prevent skin and eye irritation.

: Test Paint Stripper

Before applying the paint stripper to the entire garage door, conduct a test on a small, inconspicuous area. This ensures compatibility with the wood surface and allows you to observe how the paint reacts to the stripper.

: Apply Paint Stripper

Following the manufacturer’s instructions, apply the paint stripper specifically designed for wood surfaces to the garage door. Use a brush or a roller to ensure an even coat. Allow the stripper to sit for the recommended time, typically 15-30 minutes, or as specified on the product.

: Scrape Off Paint

Once the paint stripper has had sufficient time to work, use a plastic or metal scraper or putty knife to gently scrape off the softened paint. Work in the direction of the wood grain to avoid damaging the surface. Remove as much paint as possible.

: Repeat if Necessary

For multiple layers of paint or stubborn areas, you may need to repeat the paint stripping process. Apply another coat of paint stripper and allow it to sit according to the manufacturer’s instructions before scraping off the loosened paint.

: Use Wire Brush or Steel Wool

For intricate or hard-to-reach areas, use a wire brush or steel wool to gently scrub away any remaining paint. Be cautious not to damage the wood surface, especially if you plan to keep the natural finish.

: Sand the Surface

After removing the majority of the paint, use medium-grit sandpaper to smooth the wood surface. This helps eliminate any residual paint and prepares the garage door for the next steps. Follow up with fine-grit sandpaper for a smoother finish.

: Clean the Surface

Wipe down the wood garage door with a mild detergent solution. Use a soft-bristle brush or sponge to gently scrub the surface and remove any remaining paint residue. This also helps prepare the surface for painting or further treatment.

: Rinse with Water

Thoroughly rinse the garage door with a garden hose or pressure washer to remove any detergent, paint stripper residue, or cleaning agents. Allow the door to dry completely before proceeding.

: Evaluate the Surface

Inspect the wood garage door to ensure that all paint has been effectively removed. If there are any remaining patches or stubborn areas, repeat the necessary steps until the surface is clean and smooth.

: Wood Filler (if needed)

If the wood has any gouges, holes, or imperfections, use a suitable wood filler to fill in these areas. Follow the manufacturer’s instructions for application and drying time. Sand the filled areas to achieve a smooth and even surface.

: Repaint if Desired

If you plan to repaint the wood garage door, apply a suitable wood primer to ensure proper adhesion of the new paint. Once the primer is dry, proceed to paint the door with the color of your choice. Follow the paint manufacturer’s instructions for the best results.

: Final Cleanup

Dispose of the paint chips and used materials in accordance with local regulations. Clean your tools and dispose of any leftover paint stripper properly.

In conclusion, removing paint from a wood Argyle Garage Door Repair requires a careful and systematic approach. Following these steps will help you effectively strip away old paint, preparing the wood surface for a fresh coat or leaving it ready for a natural finish. Always exercise caution with chemical products, wear appropriate protective gear, and adhere to the manufacturer’s instructions for optimal results.

Argyle Gates & Garage Doors

940-400-3769

How To Make Your Garage Door Opener Smart – Argyle Gates & Garage Doors

In today’s connected world, smart home technology has made our lives more convenient and efficient. One area where you can introduce this technology is in your garage. By making your Garage Door Repair Argyle TX, you can control it remotely, receive notifications, and integrate it with other smart devices.

In this comprehensive guide, we’ll walk you through the steps to transform your existing garage door opener into a smart one.

  1. Understanding Smart Garage Door Openers
    • What is a smart garage door opener?
    • Benefits of a smart garage door opener.
  2. Choosing the Right Smart Garage Door Opener
    • Compatibility with your existing garage door.
    • Connectivity options (Wi-Fi, Bluetooth, etc.).
    • Additional features (security, voice control, etc.).
  3. Gathering Required Materials
    • Smart garage door opener kit.
    • Tools (screwdriver, pliers, etc.).
    • Smartphone or tablet.
  4. Preparing Your Garage Door Opener (200 words)
    • Disconnect power to the opener.
    • Remove the cover.
    • Identify the existing control wires.
  5. Installing the Smart Garage Door Opener
    • Follow the manufacturer’s instructions.
    • Connect the smart opener to your Wi-Fi network.
    • Mount the control module securely.
  6. Configuring the Smart Garage Door Opener
    • Download and install the companion app.
    • Pair the app with the smart opener.
    • Set up user accounts and permissions.
  7. Testing and Troubleshooting
    • Test the smart garage door opener.
    • Troubleshoot common issues (connection problems, compatibility, etc.).
  8. Integrating with Smart Home Ecosystem
    • Connect your smart garage door opener to voice assistants (Alexa, Google Assistant).
    • Explore automation options (IFTTT, home automation hubs).
    • Ensure compatibility with other smart devices in your home.
  9. Enhancing Security and Safety
    • Set up alerts and notifications.
    • Enable remote monitoring.
    • Implement security features (PIN codes, automatic locks).
  10. Maintenance and Tips
    • Regularly update the firmware.
    • Replace batteries in remotes and sensors.
    • Keep your Wi-Fi network secure.
  11. Conclusion
    • Recap the benefits of having a smart garage door opener.
    • Emphasize the convenience and security it adds to your home.
    • Encourage readers to enjoy their new smart garage door opener.
  12. Additional Resources
    • Provide links to recommended products and manufacturer websites.
    • Suggest further reading and troubleshooting guides.

By following this comprehensive guide, you can easily turn your standard Garage Door Repair Argyle TX into a smart, connected device that adds both convenience and security to your daily life. Whether you’re at home or away, you’ll have complete control over your garage door, making your home smarter and safer.

Argyle Gates & Garage Doors

940-400-3769

Does Homeowners Insurance Cover Garage Doors-Argle TX Garage Door Repair

Homeowners insurance policies typically provide coverage for Garage Door Repair Argyle TX, but it’s essential to understand the specifics of your policy and the terms and conditions outlined by your insurance provider.

In this response, I will provide a comprehensive overview of how homeowners insurance may cover garage doors, the factors that influence coverage, and the typical claims process involved.

Homeowners insurance is designed to protect your property and belongings from various risks, including damage caused by natural disasters, accidents, and theft. While garage doors are generally covered under homeowners insurance, the extent of coverage can vary based on the type of policy you have and the specific circumstances surrounding the damage.

One of the primary factors that determine coverage is the cause of the damage. Homeowners insurance typically covers damage resulting from covered perils, such as fire, lightning, windstorms, hail, vandalism, and theft. If your garage door is damaged due to one of these covered events, your insurance policy may provide coverage for the repairs or replacement.

However, it’s important to note that homeowners insurance usually does not cover damage resulting from wear and tear, lack of maintenance, or negligence. If your garage door is old and deteriorated or if the damage is a result of your failure to properly maintain or secure it, the insurance company may deny your claim.

Additionally, homeowners insurance policies typically have a deductible, which is the amount you must pay out of pocket before your insurance coverage kicks in. The deductible amount is agreed upon when you purchase the policy, and it can vary depending on your policy and personal preferences. When filing a claim for garage door damage, you will need to pay the deductible before your insurance company covers the remaining cost of repairs or replacement.

To initiate a claim for garage door damage, you will need to contact your insurance company as soon as possible. They will guide you through the claims process, which usually involves documenting the damage and providing evidence, such as photographs or videos, to support your claim. It’s essential to provide accurate and detailed information to expedite the claim and ensure that you receive the appropriate coverage.

Once your claim is submitted, an insurance adjuster will assess the damage to determine the extent of coverage. They may inspect the garage door and consider factors such as its age, condition, and the cause of the damage. The adjuster will then provide an estimate for the repairs or replacement based on the terms of your policy and any applicable coverage limits.

It’s crucial to review your homeowners insurance policy carefully to understand the specific coverage for garage doors. Some policies may provide coverage for the structure of the garage, including the door, while others may cover only the contents inside the garage. If your policy only covers the contents, such as vehicles and personal belongings, it may not provide coverage for the garage door itself.

Furthermore, it’s worth considering additional coverage options that may provide enhanced protection for your garage door. Some insurance providers offer endorsements or add-ons that allow you to customize your policy and extend coverage for specific items, including garage doors. These endorsements typically come at an additional cost, but they can provide peace of mind by offering broader protection for your property.

In conclusion, homeowners insurance generally covers Garage Door Repair Argyle TX under certain circumstances. The specific coverage and extent of protection can vary depending on your policy, the cause of the damage, and factors such as deductible and coverage limits. It’s crucial to review your policy documents carefully, understand the terms and conditions, and contact your insurance provider for clarification if needed. By doing so, you can ensure that you have the appropriate coverage for your garage door and be prepared to navigate the claims process if necessary.

Argle TX Garage Door Repair

Argyle, Texas

940-400-3769

How to Replace Garage Door Seal – Argyle Garage Door Repair

Replacing a garage door seal is a simple process that can be done with a few basic tools and some patience.

In this guide, we will walk you through the steps to replace a Garage Door Repair Argyle TX seal:

Step 1: Measure the Garage Door Seal

The first step in replacing a garage door seal is to measure the existing seal. This will help you determine the length of the new seal you need to purchase. To measure the seal, close the garage door and measure the length of the seal along the bottom of the door. Make sure to measure the full length of the door, including any curves or angles.

Step 2: Purchase a New Garage Door Seal

Once you have measured the existing seal, you can purchase a new one from a hardware store or online retailer. Make sure to get the right length and type of seal for your garage door. There are several types of garage door seals available, including bottom seals, threshold seals, and weather-stripping seals.

Step 3: Remove the Old Garage Door Seal

To remove the old garage door seal, start by opening the garage door. Next, locate the seal along the bottom of the door. You may need to use a pry bar or pliers to remove any nails or staples holding the seal in place. Once the seal is free, pull it off the bottom of the door and discard it.

Step 4: Clean the Bottom of the Garage Door

Before installing the new seal, it’s important to clean the bottom of the garage door. Use a wire brush or scraper to remove any dirt, debris, or old adhesive from the surface. This will help the new seal adhere properly and ensure a tight seal.

Step 5: Install the New Garage Door Seal

To install the new garage door seal, start at one end of the door and position the seal so that the flat edge is flush against the bottom of the door. Make sure the seal is straight and in the correct position before attaching it. Use a staple gun or nails to secure the seal in place, making sure to space the fasteners evenly along the length of the seal.

Step 6: Test the Garage Door Seal

Once the new seal is installed, close the garage door and check the seal for any gaps or openings. If there are any gaps, adjust the seal as needed to ensure a tight fit. You can also test the seal by shining a flashlight under the closed door and looking for any light coming through.

Step 7: Trim the Excess Seal

If the new seal is longer than the length of the garage door, use a utility knife or scissors to trim off any excess material. Make sure to cut the seal straight and at a right angle to the bottom of the door.

Step 8: Apply Lubricant

To ensure the garage door operates smoothly, apply lubricant to the bottom of the door where the seal is attached. This will help the door slide smoothly over the seal and reduce wear and tear on the seal over time.

In conclusion, replacing a Garage Door Repair Argyle TX seal is a simple process that can be done with a few basic tools and some patience. By following these steps, you can install a new seal that will provide a tight, secure seal for your garage door and help keep out the elements.

Argyle Garage Door Repair

1004 Stonecrest Rd, Argyle, TX 76226, United States

1-940-326-5646

Powered by WordPress & Theme by Anders Norén