The Largest Business Blog in Texas

Category: Uncategorized

How To Reset Universal Garage Door Opener – McClellan County Garage Doors & Gates

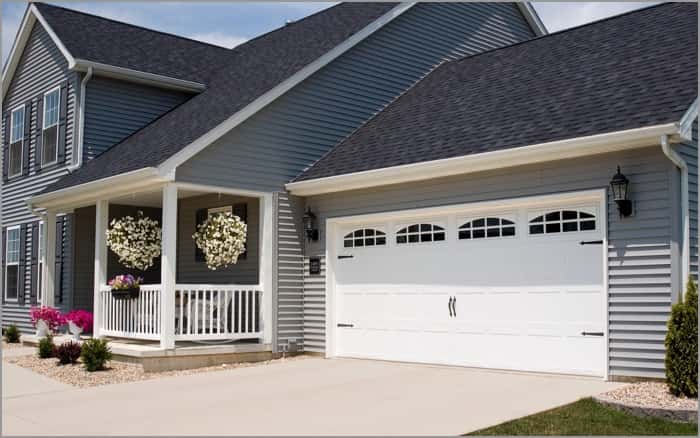
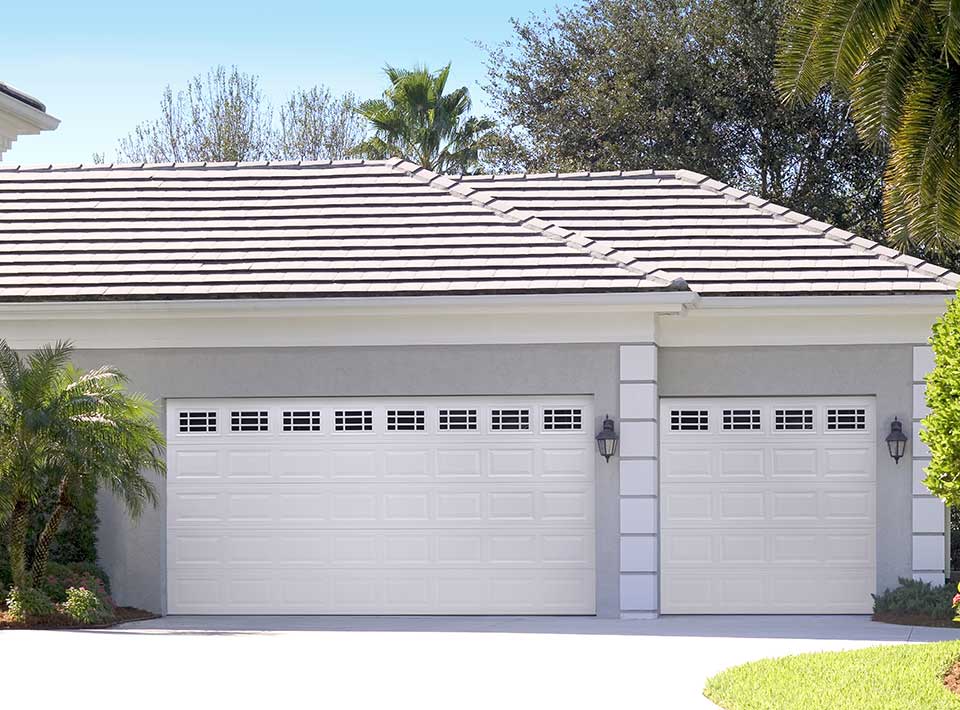
A universal Garage Door Repair Hewitt, TX opener allows you to control multiple garage doors from a single remote. However, there are instances when you might need to reset it, such as when changing the garage door opener’s code or encountering issues with its functionality. Resetting the universal garage door opener might seem daunting, but with the right approach and proper guidance, you can accomplish this task easily.


In this comprehensive guide, we will walk you through the process of resetting a universal garage door opener, step by step, to ensure smooth and trouble-free operation.

I. Gathering Essential Information

Before you begin the resetting process, it’s crucial to collect some essential information about your garage door opener. Refer to the owner’s manual or product documentation to find the model number, manufacturer, and any specific reset instructions they may provide. Additionally, you should know the type of remote control you’re using to program the opener, whether it’s a hand-held remote, a wall-mounted keypad, or a smartphone app.

II. Ensuring Safety Precautions

Safety should always be your top priority when working with garage doors. Make sure to unplug the opener or disconnect it from the power source to prevent accidental activation during the resetting process. Also, ensure that there are no obstructions or people in the garage that could be harmed while the door is in motion.

III. Clearing Existing Codes

To reset the universal garage door opener, you will typically need to clear any existing codes stored in the system. This ensures that the opener no longer responds to the old codes, providing a clean slate for programming new ones. The exact process may vary based on the brand and model, but generally, you can find a “Learn” or “Smart” button on the motor unit of the opener. Press and hold this button for about 10-15 seconds until the indicator light blinks or the unit emits a sound, signifying that the existing codes have been erased.

IV. Programming New Codes

Once the existing codes are cleared, you can proceed to program new ones. This step involves synchronizing your remote control or keypad with the universal garage door opener. Here’s a general outline of the process:

  1. Locate the “Learn” or “Smart” button on the garage door opener motor unit.
  2. Press the “Learn” button and release it. The indicator light should now be on, indicating that the opener is in programming mode.
  3. Within a specific time window (usually 30 seconds), press and hold the button on your remote control or keypad that you want to use to operate the garage door. Release the button once the indicator light on the motor unit blinks or turns off, confirming that the programming was successful.
  4. Test the programmed remote or keypad to ensure that it operates the garage door as intended. If not, repeat the programming process.

V. Resetting Wi-Fi or Smart Features

If your universal garage door opener is equipped with smart features, such as Wi-Fi connectivity or smartphone app integration, you may need to perform additional steps to reset these features. Refer to the manufacturer’s instructions to disconnect and reconnect the opener to your Wi-Fi network or reconfigure the app settings.

VI. Final Checks and Troubleshooting

After completing the reset process, ensure that all remotes and keypads are functioning correctly. If you encounter any issues, consult the troubleshooting section of your owner’s manual or contact customer support for further assistance.

Conclusion:

Resetting a universal Garage Door Repair Hewitt, TX opener may seem overwhelming, but by following this step-by-step guide, you can accomplish the task with confidence. Remember to prioritize safety, gather the necessary information, clear existing codes, program new ones, and, if applicable, reset any smart features. With a reset opener, you can enjoy smooth and reliable garage door operation once again.

McClellan County Garage Doors & Gates

508 Connie Dr #12, Hewitt, TX 76643, United States

1-254-232-5658

How Much are Electric Garage Door Openers? – Lakewood Garage Door Repair

Electric garage door openers are a popular and convenient addition to many homes. The cost of an electric garage door opener can vary depending on a number of factors, including the type of opener, the horsepower of the motor, and any additional features or accessories that are included.

As stated in Garage Door Lakewood OH, at the time of writing this answer in March 2023, electric garage door openers range in price from approximately $150 to $500 or more. The price includes the cost of the opener itself, as well as any installation or delivery fees that may apply.

There are several types of electric garage door openers available, including chain drive, belt drive, and screw drive openers. Chain drive openers are the most common and typically the least expensive. They use a chain to pull the door along the track, and they can be noisy. Belt drive openers use a belt instead of a chain, which makes them quieter but more expensive. Screw drive openers use a threaded rod to lift the door and are generally quieter than chain drive openers but can be more expensive.

The horsepower of the motor also plays a role in the cost of an electric garage door opener. Motors are typically available in 1/2, 3/4, and 1 horsepower options. A more powerful motor can lift heavier doors and may be necessary for larger or heavier doors. However, a more powerful motor can also be more expensive.

Additional features or accessories can also add to the cost of an electric garage door opener. For example, some openers come with a battery backup system that allows the opener to operate during power outages. Other openers come with Wi-Fi connectivity, allowing the homeowner to control the opener using a smartphone app. Safety features such as infrared sensors, which detect objects in the path of the door and stop it from closing, can also add to the cost of an opener.

Installation fees can also add to the total cost of an electric garage door opener. The cost of installation can vary depending on the complexity of the installation, the location of the installation, and any additional work that may be required.

It is important to consider the total cost of an electric garage door opener when making a purchase. While a less expensive opener may seem like a good deal, it may not have the features or horsepower necessary to properly lift and operate the door. It is also important to ensure that the opener is compatible with the type and size of the door being installed.

Overall, as per Garage Door Lakewood OH, the cost of an electric garage door opener can vary depending on a number of factors. It is important to carefully consider the type of opener, horsepower, and any additional features or accessories when making a purchase. Professional installation may also be necessary, which can add to the total cost of the opener.

Lakewood Garage Door Repair

1422 Elmwood Ave #7, Lakewood, OH 44107, United States

216-510-9359

How to Fix Garage Door hit by car – Sherman Oaks Garage Door & Gates

If your garage door has been hit by a car, the damage can range from minor dents and scratches to major structural damage.

Here are the steps from Garage Door Repair Sherman Oaks CA that you can follow to fix your garage door:

Step 1: Assess the Damage The first step in fixing a garage door hit by a car is to assess the damage. Look for any dents, scratches, or structural damage to the door, tracks, and hardware. Determine the extent of the damage to determine if it can be repaired or if the door needs to be replaced entirely.

Step 2: Secure the Door If the door is damaged to the point where it won’t stay closed, it’s important to secure the door to prevent further damage or security concerns. Use locking pliers or clamps to secure the door in place.

Step 3: Repair Minor Damage If the damage is minor, you can use a plunger or a suction cup to pop out any dents in the door. For scratches, use touch-up paint or a spray paint designed for garage doors to match the color of the surrounding areas. If the tracks or hardware are damaged, you can replace individual parts as needed.

Step 4: Replace Major Structural Damage If the damage is more severe, you may need to replace the entire door. This involves removing the old door and tracks, and installing a new door and tracks. This is a complex process that requires special tools and knowledge, so it’s best to contact a professional garage door repair technician for assistance.

Step 5: Prevent Future Damage To prevent future damage to your garage door, consider installing protective barriers such as bollards or posts in front of the door. You can also use warning signs or other visual cues to help drivers avoid hitting the door.

In conclusion, as per Garage Door Repair Sherman Oaks CA, fixing a garage door hit by a car involves assessing the damage, securing the door, repairing minor damage, replacing major structural damage, and preventing future damage. If the damage is severe or you’re not comfortable with DIY repairs, it’s best to contact a professional garage door repair technician for assistance.

Sherman Oaks Garage Door & Gates

14702 Ventura Blvd, Sherman Oaks, CA 91403

310-361-6378

How to Program a LiftMaster Garage Door Opener – OXR Overhead Garage Doors

If you’re like me and have a LiftMaster garage door opener, programming it can seem like a daunting task.

However, I’m here to guide you through the process and show you how easy it can be as per Garage Door Repair Oxnard CA.

First, I cleared the memory by pressing and holding the “learn” button on the back of the LiftMaster garage door opener until the LED light turned off. Then, I determined the frequency of my garage door opener by looking at the label on the back of the motor unit.

Once I knew the frequency, I set the code switches on the back of the LiftMaster garage door opener to match the frequency. For 315MHz frequency, I set the code switches to the “ON” position, and for 390MHz frequency, I set the code switches to the “OFF” position.

Next, I stood close to the garage door opener motor unit with the remote control in hand and pressed and released the “learn” button on the back of the motor unit. The LED light on the motor unit flashed, indicating that it was ready for programming.

Then, I pressed and held the button on the remote control that I wanted to program. The LED light on the garage door opener motor unit flashed again, indicating that the programming was successful.

To test the LiftMaster garage door opener, I stood clear of the garage door and pressed the button I just programmed on the remote control. The garage door opened or closed, depending on the button I pressed.

If you have more than one remote control that you want to program, follow the same process outlined above for each additional remote control.

To program the keyless entry system, I located the “learn” button on the back of the garage door opener motor unit and pressed it once. Then, I entered the desired four-digit code into the keyless entry system and pressed “enter.” I heard a click sound, indicating that the programming was successful.

In just a few simple steps according to Garage Door Repair Oxnard CA, I was able to program my LiftMaster garage door opener and keyless entry system. If you encounter any issues during the programming process, refer to the instruction manual that came with the LiftMaster garage door opener or contact the manufacturer for assistance.

OXR Overhead Garage Doors

1301 Seabridge Ln #3, Oxnard, CA 93035, United States

805-800-8965

Step by Step Process of Installing a Garage Door Opener

In this guide from Garage Door Repair Kansas City, I will walk you through the step-by-step process of installing a garage door opener, from gathering tools and materials to programming the remote control.

Step 1: Gather Tools and Materials

The first step in installing a garage door opener is to gather all the necessary tools and materials. You will need a drill, screwdriver, pliers, hammer, level, measuring tape, and a ladder. Additionally, you will need the garage door opener unit, mounting brackets, safety sensors, and a remote control.

Step 2: Install the Mounting Bracket

The next step is to install the mounting bracket for the garage door opener. Start by attaching the bracket to the ceiling, using the screws and anchors provided in the kit. Make sure the bracket is level, and use a measuring tape to ensure it is centered over the garage door. Once the bracket is secured in place, you can attach the motor unit to it.

Step 3: Install the Rail and Trolley

Next, you need to install the rail and trolley system. Start by attaching the rail to the motor unit, and then to the mounting bracket. The trolley should then be attached to the rail, and the garage door arm attached to the trolley. Make sure everything is level and aligned properly before securing it in place.

Step 4: Install the Safety Sensors

Most garage door openers come with safety sensors that prevent the door from closing if there is an obstruction. Install the sensors by attaching them to the wall on either side of the garage door, about six inches above the floor. Make sure they are facing each other and aligned properly, and then run the wires from the sensors to the motor unit.

Step 5: Connect the Power

Next, you need to connect the power to the garage door opener. This can be done by plugging the power cord into an outlet, or by wiring the opener directly into the electrical system of your home. Follow the instructions carefully and make sure everything is connected securely.

Step 6: Test the Door

Before using the garage door opener, you need to test the door to make sure it is working properly. Start by disconnecting the opener from the door, and then manually open and close the door to make sure it is functioning smoothly. Once you are satisfied with the door’s operation, re-connect the opener and test it again.

Step 7: Program the Remote Control

The final step is to program the remote control. This can be done by following the instructions provided with the opener. Generally, it involves pressing a button on the motor unit and then pressing a button on the remote control. Once the remote control is programmed, you can use it to open and close the garage door from the comfort of your car.

In conclusion, installing a garage door opener can be a challenging but rewarding task. By following the steps from Garage Door Repair Kansas City outlined in this guide, you can install a garage door opener in your home with ease. Just remember to take your time, follow the instructions carefully, and don’t hesitate to ask for help if you need it. Good luck!

Team Taylor Doors

210 SW Market St Suite 144, Lee’s Summit, MO 64063, United States

816-408-6999

Fundamental Solutions to Window Cleaning

Commercial Window Cleaning Keller TX

Window Cleaning Fundamentals

It is crucial to allow sunlight in regardless of the time of year. A lot of apartments and homes have windows, however, they’re not designed to take in the morning and afternoon sun.

Sun is a major source of Vitamin D. The reason that people feel depressed in winter isn’t solely due to cold temperatures or isolation, but also due to the lack of sunlight.

If your windows are in your home, take advantage of the sun’s rays. It’s free. You won’t need the same amount of fluorescent or electric lamps that burn all day. This will lower your energy bills and also offers you the feeling of vitality, a connection with nature, and positive, life-affirming vibrations.

How can you maintain your windows?

The most effective approach of all is to use newspapers and domestic whiskey to get a sparkling shine and clean windows each time. If you’d prefer to save the whiskey to use for another occasion, you may consider this cheap recipe:

Simply mix 1 cup white vinegar with one cup water, place it into a bottle then squirt! It should not smell like a salad as the scent of white vinegar disappears when it is dried. If you’d rather use commercial brands, there are plenty available.

Depending on how dirty they’re, you might need to wash them using a soapy sponge prior to beginning. If they’re covered with an insinuation of dirt or grime ensure you keep the window cleaner in your cupboard to give them an all-over smudge. The dirt that has been caked on may require a knife to gently remove, especially when the dirt was spray-on by mud and then has become easily adhered to the exterior of the windows. Contact – Window Glass Replacement Keller TX

When cleaning, the best method to go about it is to perform it in a whirling motion, either counterclockwise, or clockwise. It is crucial to avoid streaks of movement on the glass. These are visible in bright light and cause distraction. It is vital that you have enough water in order to remove the grease and grime on the glass, and also absorb the moisture so that there are no streaks.

Make sure to clean the edges, corners, and any other small hiding spots that hide grease, dust, and dirt.

A lot of professionals purchase the tiniest tool, which is a squeegee that has an edged tool that has a handle small enough to attach to an extended bristle. It is used with a horizontal movement. Certain squeegees come with a cushioned side.

They are made to soak up water and cleaning solutions. on the other side the strip of rubber that is used to clean up the whole mess in one sweep.

The user needs paper towels to clean the blade of rubber to ensure that no trace of dirt or cleaning solution is left. It is very fast and has a professional look which is ideal for homes, offices, and even vehicles. Visit Keller TX Full Window Replacement

A bright, well-lit window can make an enormous impact on the ambiance of your house. One small change can have an enormous difference, such as a touch of lipstick adding a totally different appearance to a women’s stunning face.

See our location on Google Map – Keller Window Cleaning

Voip Phone Systems Dallas

Voip Phone Systems Dallas. The business VoIP cloud service transforms your office phone system administration, call management, and caller experience with our suite of VoIP features.Financing equipment allows you to get the equipment you need now without affecting bank or credit lines.

The Different Factors That Affect the Cost of a New HVAC Unit

Underestimating the value of an HVAC system in people’s lives is a mistake. How can you underestimate something that plays a major role in your home’s comfort? That would just be wrong and shows how people need to pay more attention to HVAC systems.

Put more focus on a system that helps regulate how cool or how warm your home should be, depending on the season. And part of what you need to think about more is its cost. While you want the best quality units in your home, you also need to be mindful of the cost. If your budget can’t get the best quality, then you need to have a back-up plan in place.

To make the best plan in terms of your HVAC unit budget, you need to know the different factors from air conditioning colleyville tx that affect the cost of a new HVAC unit. Only then would you be able to make proper a decision about the HVAC units that you’re going to get for your home.

Factors Affecting the Cost of New HVAC Units

The Size of Your HVAC Unit

The size of your HVAC unit is important as each unit has a different cooling and heating capacity. These capacities are measured in British thermal units (BTUs). The higher the BTU the more expensive the HVAC unit. This is because of their capacity to produce cold air for houses with larger spaces.

Location of Your Home

The location of your home also plays a part. If it is located in a so-called metro area, then expect it to be more expensive. The components of the unit are surely going to cost more. And if you happen to live in a warmer climate, you’ll also need a more energy-efficient system. Obviously, the AC will be required to run for longer time periods.

Construction of Your Home

The construction of your home is also a factor. Its size and level of energy-efficiency need to be considered when it comes to the products involved in your HVAC unit’s installation. The bigger the house, the bigger the AC that it requires. However, you can save money if your home has insulated walls and energy-efficient windows. Just to be on the safe side, make sure that any cracks in the walls are properly sealed. Be sure to do the same around the doors.

Complexity of the Project

The complexity of the project is also something to consider. A more simple project will undoubtedly be more cost-effective than a more complex one. If there are no issues with your HVAC unit, then simply replace it with another one that has a similar BTU count. Among the possible issues that you could have are incorrect size and problems with the structure of the unit. If there are any changes that need to be made with the floors or walls of your home, then that could add to the cost of the project.

These are some of the different factors that affect the cost of a new HVAC unit. Each one should be considered carefully before any project involving a unit is made.

What is the best flooring for the Kitchen?

When it comes to choosing the flooring for your kitchen, the options are seemingly limitless. While you have a wide variety of flooring options to choose from, not all of them are the best option for your kitchen.

When you start designing your kitchen, you should start with the floor. Not only is the floor a design statement on its own, but it also affects every other element of your kitchen’s design. Not only does the style of the flooring affect your decision, but the material of your flooring should play a significant part in that decision.

Types of Flooring

Concrete

For a ground-level kitchen, concrete is an inexpensive option. In many cases, a concrete slab will already be in place under the kitchen’s existing flooring. A concrete surface can receive many different overlays in a variety of ways, such as polishing, staining, or painting.

Cork

Cork is an extremely versatile material and is a surprisingly durable flooring option. If you want to go with an environmentally friendly material, consider cork. Cork is also hypoallergenic, and due to its natural ability to repel dust, hair, and other particles, it promotes higher indoor air quality. Cork is also naturally antimicrobial, as it contains a substance called suberin. Suberin aides in repelling small vermin and insects, and makes cork floors resistant to the growth and colonization of unwanted organisms. Cork also provides thermal insulation and is easy to clean and refinish, as well as provides a cushioned layer under your feet.

Linoleum

Linoleum is another durable and environmentally friendly material. Like other flooring materials, Linoleum comes in a wide variety of colors and styles. Linoleum also provides a cushioned layer under your feet while being resilient, biodegradable, and does not emit harmful volatile organic compounds (VOCs). Due to the pigmentation of Linoleum throughout every layer, it easily camouflages any damage, such as scratches. If you want a low-maintenance flooring option, consider linoleum, which only needs occasional cleaning.

Tile

Tile is an easy to maintain type of flooring. Some tiles are coated with liquid glass, meaning that it’s easy to clean – making tile one of the most hygienic types of flooring out there. Tiles come in a wide variety of sizes, colors, textures, and styles. Ceramic tiles are environmentally friendly, as they don’t need to exploit environmental resources or use harsh chemicals in their production. Ceramic tiles are also chemical and temperature resistant, so they don’t rot when exposed to harsh chemicals and temperatures. Tile is also durable, and even after the installation costs, remains an affordable option.

Vinyl

Vinyl is one of the easiest to maintain and versatile types of flooring, as it is impenetrable to substances such as water. It is also insusceptible to stains and damage. For many Do-It-Yourselfers, vinyl is the flooring of choice, since it is inexpensive and easy to lay down on your own. Vinyl comes in many different styles, such as sheet vinyl, and vinyl tile, but can also mimic wood and come in planks that snap together.

Wood

Quite a bit happens in the kitchen that can damage wood flooring – dropping knives, and various other kitchen utensils, spilling liquids, heavy foot traffic, and more. However, if your wood flooring is properly treated and sealed, it can withstand the bumps and bruises that come with being a kitchen floor. Additionally, wood floors are more durable than you might think. A spill that is quickly cleaned up won’t damage your floor like standing water will. In many homes, wood floors last for 50 to 100 years or more, which increases the value of your home, and is attractive to the home buyer.

There are many types of flooring to consider for your kitchen. When choosing the best kind of flooring, some things to take into consideration are

  • how heavy the traffic is in your kitchen
  • how often you use your kitchen
  • what your style is
  • and if you are planning on eventually selling your home.

If you are having trouble deciding on a floor, talk to us, and we’ll be happy to point you in the right direction. We’ll point you in the right direction.

Hello world!

Welcome to WordPress. This is your first post. Edit or delete it, then start writing!

Page 2 of 2

Powered by WordPress & Theme by Anders Norén