The Largest Business Blog in Texas

Month: May 2023 Page 2 of 6

Can a Garage Door be Wider Than the Opening-Keller TX Garage Door

Yes, a Garage Door Repair Keller TX can be wider than the opening. While it may seem counterintuitive, there are circumstances where a wider garage door is desired or necessary. Let’s explore the reasons and considerations behind this.

Firstly, it’s important to note that the width of a garage door is typically measured from the inside of the door frame or opening, whereas the actual width of the door itself includes additional components such as tracks and hardware. So, when we discuss a wider garage door, we are referring to the door itself, including its tracks and hardware.

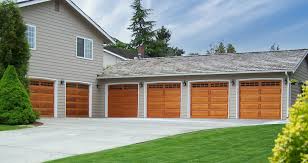
There are a few situations where a wider garage door might be preferred or required. One common reason is to accommodate larger vehicles or equipment. For instance, if you own a recreational vehicle (RV), a boat, or a larger truck, you may need a wider garage door to ensure easy entry and exit. Similarly, if you operate a business that utilizes larger vehicles or machinery, a wider garage door can provide the necessary clearance.

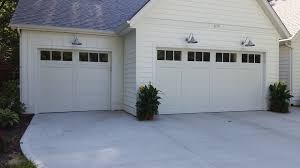
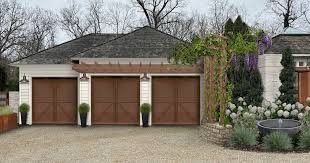
Additionally, a wider garage door can enhance the overall aesthetic appeal of a property. Some homeowners may prefer the appearance of a wider door, especially if they have a spacious garage or a modern architectural style. A wider door can create a grander entrance and provide a more visually pleasing look to the garage.

When considering installing a wider garage door, there are a few important factors to take into account. First, you need to assess the available space on either side of the garage opening. The width of the garage itself will determine how much additional room you have to work with. If the space is limited, expanding the garage opening may be necessary, which could involve architectural modifications to the structure.

Next, you need to consider the structural integrity of the garage. Widening the opening or installing a wider door may require reinforcing the surrounding walls and header to ensure they can support the increased weight and size of the door. Consulting with a professional contractor or engineer is crucial to assess the feasibility and safety of such modifications.

Another consideration is the availability of wider doors on the market. Standard garage doors come in various widths, but if you require a door wider than what is readily available, custom-made doors can be ordered from specialized manufacturers. Custom doors may come with a higher price tag and longer lead times, so factor these considerations into your planning.

Furthermore, upgrading to a wider garage door may necessitate adjustments to the garage door opener system. The opener needs to be compatible with the wider door and have sufficient power to operate it smoothly. If the existing opener is not compatible or powerful enough, it may need to be replaced or upgraded.

Installation of a wider garage door should always be done by experienced professionals. They will ensure that the door is properly aligned, balanced, and fitted with appropriate seals to maintain insulation and weather protection. Professionals will also ensure that the door operates smoothly and safely, minimizing the risk of accidents or damage.

In summary, a Garage Door Repair Keller TX can indeed be wider than the opening itself. This can be beneficial for accommodating larger vehicles or equipment and can also enhance the overall aesthetics of a property. However, widening a garage door requires careful planning, evaluation of available space, structural considerations, and potential modifications to the garage. Consulting with professionals is crucial to ensure a safe and successful installation.

Keller TX Garage Door

Keller, TX

817-697-2922

How to Attach Foam Board to Garage Door-Wise County Garage & Overhead Doors

Attaching foam board to a Garage Door Repair Wise County TX is a great way to improve insulation and energy efficiency. Foam boards, also known as rigid foam insulation, can help regulate temperature and reduce noise.

The process of attaching foam board to a garage door is relatively simple and can be completed using the following steps:

  1. Gather the necessary materials:
    • Foam board: Purchase foam board insulation panels from a local home improvement store. Choose panels with the desired thickness and R-value (insulating capacity).
    • Measuring tape: Use a measuring tape to measure the dimensions of your garage door panels accurately.
    • Utility knife: You will need a utility knife to cut the foam boards to the appropriate size.
    • Construction adhesive: Select a high-quality construction adhesive suitable for foam board insulation.
    • Caulk gun: A caulk gun will be needed to apply the construction adhesive.
    • Optional: Foil tape or duct tape can be used to seal the edges of the foam boards for added protection.
  2. Prepare the garage door:
    • Start by cleaning the surface of the garage door panels. Remove any dust, dirt, or debris that may hinder the adhesion of the foam boards.
    • Ensure that the garage door panels are dry before proceeding. Moisture can affect the effectiveness of the adhesive and compromise the insulation.
  3. Measure and cut the foam boards:
    • Measure the dimensions of each garage door panel using a measuring tape. Take accurate measurements to ensure a proper fit.
    • Transfer the measurements onto the foam boards and mark them accordingly.
    • Use a utility knife to cut the foam boards along the marked lines. Make straight, clean cuts to achieve precise fitting.
  4. Apply the construction adhesive:
    • Apply the construction adhesive to the backside of the foam board. Be sure to follow the manufacturer’s instructions for the specific adhesive being used.
    • Use a caulk gun to apply the adhesive in a zigzag pattern across the back of the foam board. This will help distribute the adhesive evenly.
    • Make sure to leave a small gap (about 1 inch) between the adhesive lines to allow for some flexibility during expansion and contraction of the foam board.
  5. Install the foam boards:
    • Carefully position the foam board onto the garage door panel, ensuring that it aligns with the edges and corners.
    • Firmly press the foam board against the garage door panel, applying even pressure to ensure proper adhesion.
    • Repeat the process for each garage door panel, one at a time, until all panels are covered with foam board insulation.
    • If desired, use foil tape or duct tape to seal the edges of the foam boards. This will provide additional protection and enhance the insulation’s effectiveness.
  6. Finishing touches:
    • Once all the foam boards are installed, step back and check for any gaps or areas that require further sealing.
    • Use foam sealant or caulk to fill any gaps between the foam boards and the garage door panels. This will help prevent air leaks and improve insulation.
    • Clean up any excess adhesive, foam, or debris that may have accumulated during the installation process.

By following these steps, you can successfully attach foam board insulation to your Garage Door Repair Wise County TX. It is important to note that the effectiveness of insulation depends not only on the foam board but also on the overall condition of the garage door. Ensure that the garage door is well-maintained, properly sealed, and in good working order for optimal insulation performance.

Wise County Garage & Overhead Doors

Briar, TX

940-360-3638

How to Adjust Genie Garage Door Opener Force Adjustment-Lantana Garage & Overhead Doors

Adjusting the force adjustment on a Genie Garage Door Repair Lantana TX opener is a relatively simple process that can be done by following a few steps. Proper adjustment of the force ensures that the garage door opens and closes smoothly and without any unnecessary strain on the motor.

Here’s a step-by-step guide on how to adjust the force adjustment on a Genie garage door opener:

Step 1: Identify the Force Adjustment Settings

Before making any adjustments, it’s important to locate the force adjustment settings on your Genie garage door opener. These settings are typically found on the main powerhead unit, which is usually mounted on the ceiling of your garage. Look for two dials or knobs labeled “Up Force” and “Down Force.” These dials control the force applied when opening and closing the garage door.

Step 2: Determine the Current Force Setting

To ensure accurate adjustments, it’s essential to determine the current force setting of your Genie garage door opener. Start by disconnecting the garage door opener from the power source to prevent any accidental movement. Then, manually open and close the garage door to gauge the amount of force required. Pay attention to any resistance or difficulty encountered during this process.

Step 3: Adjusting the Up Force

To adjust the upward force of the garage door opener, locate the “Up Force” dial or knob. It is usually marked with an arrow pointing upward. Turn the dial or knob clockwise to increase the force or counterclockwise to decrease it. Make small adjustments, testing the door’s movement after each adjustment. Repeat this process until the door opens smoothly without excessive force.

Step 4: Adjusting the Down Force

To adjust the downward force, locate the “Down Force” dial or knob, which is typically marked with an arrow pointing downward. Similar to the previous step, turn the dial or knob clockwise to increase the force or counterclockwise to decrease it. Test the door’s movement after each adjustment, making sure it closes smoothly without slamming shut or reversing unnecessarily.

Step 5: Test the Garage Door

Once you have made the necessary adjustments to the force settings, reconnect the garage door opener to the power source. Test the garage door’s operation by using both the wall-mounted control panel and the remote control. Open and close the door multiple times, observing its movement and listening for any unusual sounds. The door should open and close smoothly, without any excessive force or strain on the motor.

Step 6: Fine-Tuning the Adjustments

If the door still doesn’t operate as desired, you may need to fine-tune the force adjustments further. Repeat steps 3 and 4, making smaller adjustments until the door opens and closes smoothly without any issues. Remember to test the door after each adjustment to ensure optimal performance.

Step 7: Safety Considerations

While adjusting the force settings, it’s important to prioritize safety. Make sure there are no obstructions in the garage door’s path before testing its operation. Additionally, keep in mind that the force adjustments should only be made in small increments. Excessive force settings can lead to damage to the door or opener, while insufficient force may result in incomplete or unreliable door movement.

In conclusion, adjusting the force adjustment on a Genie Garage Door Repair Lantana TX opener is a straightforward process. By following the steps outlined above, you can ensure that your garage door operates smoothly and safely. Remember to exercise caution and make small adjustments until the desired performance is achieved.

Lantana Garage & Overhead Doors

3501 FM 407 #15, Lantana, TX 76226

940-400-3038

How to Program Legacy Garage Door Opener to Car-Keller Garage & Overhead Doors

Programming a legacy Garage Door Repair Keller TX opener to your car involves a series of steps to ensure compatibility and secure access. While the specific instructions may vary depending on the make and model of your vehicle and garage door opener, the following guide provides a general overview of the process.

It is important to consult the owner’s manual for your specific devices for accurate instructions. Please note that this guide assumes you have a basic understanding of programming and have the necessary tools and materials.

  1. Identify Compatibility: Before attempting to program your garage door opener to your car, confirm that your garage door opener is compatible with your vehicle. Check your car’s owner’s manual or contact the manufacturer to determine if your vehicle supports garage door opener integration.
  2. Gather Information: Collect the necessary information about your garage door opener and car. This typically includes the make and model of both devices. Also, locate the “Learn” or “Program” button on your garage door opener unit, which is usually found on the back or side.
  3. Clear Memory: If your car has previously been programmed to a different garage door opener or you’re experiencing issues, it’s advisable to clear the memory of the car’s integrated garage door opener system. Refer to your car’s owner’s manual for specific instructions on how to clear the memory.
  4. Locate Car’s Programming Buttons: Find the car’s programming buttons. These are usually located near the vehicle’s rearview mirror, visor, or on the overhead console. The buttons may vary in appearance depending on the car manufacturer but are typically labeled with icons such as a house or a gate.
  5. Put Opener in Programming Mode: Access the programming mode on your garage door opener by pressing and holding the “Learn” or “Program” button until the indicator light starts flashing. This typically takes a few seconds. Once the light is flashing, release the button.
  6. Car’s Programming Mode: Enter the programming mode on your car by pressing and holding the designated programming button. Hold the button until the indicator light on your car’s opener system starts flashing rapidly or the car’s display prompts you to continue.
  7. Sync Car and Garage Door Opener: Bring the car’s integrated garage door opener system within range of the garage door opener unit. This usually involves parking the car just outside the garage, ensuring the car is not in motion during programming.
  8. Pairing Process: Initiate the pairing process by pressing the programming button on the car once. The indicator light on the car’s opener system will either flash rapidly or remain solid, indicating successful programming.
  9. Test the Connection: Verify the programming by pressing the button on the car’s integrated opener system. This should activate the garage door opener and open or close the garage door accordingly. If the connection is not successful, repeat the steps or consult the manuals for both devices.
  10. Repeat for Multiple Doors: If you have multiple garage doors, follow the same process for each door individually. You may need to press different buttons on the car or garage door opener to differentiate between the doors during programming.
  11. Program Additional Features (Optional): Some garage door openers offer additional features, such as turning on house lights or opening gates. Consult your garage door opener’s manual for instructions on how to program these additional features to your car.
  12. Test and Troubleshoot: After programming, thoroughly test the integrated garage door opener system by opening and closing the garage door from the car multiple times. Ensure that the system works reliably and troubleshoot any issues as necessary.

Remember, this guide is a general overview, and the specific steps may differ based on your car’s make and model, as well as the Garage Door Repair Keller TX opener you are using. Always consult the owner’s manuals for accurate instructions tailored to your devices.

Keller Garage & Overhead Doors

3529 Heritage Trace Pkwy#12, Keller, TX 76244

817-769-3540

Where to Buy Garage Door Panels-Decatur Garage Door & Gates

When it comes to buying Garage Door Repair Decatur TX panels, there are several options available to you. Whether you’re looking to replace a damaged panel or upgrade the appearance of your garage, finding the right panels is essential.

Here are some places where you can buy garage door panels:

  1. Local Garage Door Retailers: Start your search by visiting local garage door retailers in your area. They often carry a wide range of garage door panels and can provide you with expert advice on choosing the right panels for your needs. These retailers may have a showroom where you can see different panel styles and materials in person.
  2. Online Retailers: The internet offers a vast array of options for purchasing garage door panels. Many online retailers specialize in garage doors and parts, making it convenient to browse through different panel options from the comfort of your home. Some popular online retailers include Amazon, eBay, and Wayfair. Be sure to read product descriptions, customer reviews, and check the return policies before making a purchase.
  3. Garage Door Manufacturers: Contacting garage door manufacturers directly can be a great way to source specific garage door panels. Most manufacturers have websites where you can browse their product catalogs and find information about authorized dealers in your area. By purchasing directly from the manufacturer, you can ensure that you’re getting authentic panels that match your garage door’s specifications.
  4. Local Contractors and Installers: Reach out to local contractors and installers who specialize in garage doors. They often have access to a variety of garage door panels and can help you find the right ones for your specific needs. They may also offer installation services if you prefer professional assistance.
  5. Salvage Yards and Secondhand Stores: If you’re looking for more affordable options, consider checking out salvage yards or secondhand stores. These places may have used or surplus garage door panels available at a lower cost. Keep in mind that the availability and condition of panels in these locations can vary, so it may require some effort to find the right panels for your garage.
  6. Garage Door Repair Companies: Contact local garage door repair companies to inquire about garage door panels. They may have access to panels through their suppliers or be able to recommend reputable sources for purchasing panels.
  7. Home Improvement Stores: Visit home improvement stores such as Home Depot, Lowe’s, or Menards. They often have sections dedicated to garage doors and may carry a selection of garage door panels. The advantage of shopping at these stores is that you can see the panels in person, compare prices, and get assistance from the staff.

Remember to measure your existing Garage Door Repair Decatur TX panels accurately and consider factors like material, style, insulation, and compatibility with your garage door opener before making a purchase. Additionally, consider the reputation and reliability of the seller or manufacturer to ensure a smooth buying experience.

Decatur Garage Door & Gates

300 S Trinity St, Decatur, TX 76234

940-202-7890

Steps to Program a Honda Odyssey Garage Door Opener – Palm Desert Garage & Overhead Doors

To program the garage door opener in your Honda Odyssey, follow these steps from Garage Door Repair Palm Desert CA:

  1. Prepare your garage door opener: Make sure you have the remote control or keypad for your garage door opener handy. Also, check the garage door opener itself for any programming buttons or switches.
  2. Locate the Homelink buttons: In your Honda Odyssey, the Homelink buttons are usually located on the ceiling console, above the rearview mirror. There are three buttons labeled “I”, “II”, and “III”.
  3. Clear existing codes (if necessary): If there are already codes programmed in the Homelink system, you may need to clear them before programming a new one. To do this, press and hold the two outer Homelink buttons (I and III) simultaneously for about 10 seconds, until the indicator light starts flashing rapidly. Release the buttons to clear the existing codes.
  4. Put the Homelink system in programming mode:a. Hold the remote control close to the Homelink buttons in the Honda Odyssey.b. Press and hold the button you wish to program on the Homelink system (I, II, or III). While holding the button, simultaneously press and release the corresponding button on the remote control. The Homelink indicator light will flash slowly at first, then rapidly. Keep holding the button until the indicator light starts flashing rapidly.c. Release both buttons. The Homelink system should now be in programming mode.
  5. Program the Homelink system with the garage door opener:a. On your garage door opener, locate the “Learn” or “Smart” button. This button is usually found on the motor unit near the antenna wire.b. Press the “Learn” or “Smart” button on the garage door opener and quickly return to your Honda Odyssey.c. Within 30 seconds, press and hold the programmed Homelink button (I, II, or III) in your Odyssey for a few seconds, then release it. Repeat this step two more times. On the third press, the garage door should activate, indicating that the programming is successful.
  6. Test the programmed button: Press the programmed Homelink button in your Honda Odyssey to test if it opens or closes the garage door. If it doesn’t work, repeat the programming steps and make sure you’re within range of the garage door opener.
  7. Repeat for additional garage doors (if applicable): If you have multiple garage doors or devices to program, repeat steps 5a to 5c for each device using a different Homelink button (I, II, or III).

Overall, according to Garage Door Repair Palm Desert CA, it’s important to note that the exact steps for programming the garage door opener in a Honda Odyssey may vary slightly depending on the model year and specific features of your vehicle. Therefore, it’s always a good idea to consult the owner’s manual or contact Honda customer support for precise instructions tailored to your vehicle model and year.

Palm Desert Garage & Overhead Doors

73210 Shadow Mountain Dr #3, Palm Desert, CA 92260, United States

760-654-6091

How to Open a Garage Door with Keypad – Ramona Valley Garage Door & Gates

To open my garage door using the keypad, I approach the exterior wall of my garage where the keypad is mounted. I take a moment to familiarize myself with the layout of the buttons on the keypad.

Now, by following Garage Door Repair Ramona CA, I enter my personalized access code into the numeric keypad. Carefully pressing each button, I input the sequence of numbers that I have set for my garage door opener. It’s important to enter the code accurately to ensure successful operation.

Once I’ve entered the code, I locate the “Enter” or “OK” button on the keypad and press it. This signals to the garage door opener that I have finished entering the code.

I wait for a moment as the garage door opener processes the entered code. If my code is correct, I hear a distinct clicking sound or notice a light indicator on the keypad, confirming that the code has been accepted.

With the code accepted, the garage door opener engages, and I can hear the motor starting. The garage door begins to open slowly and smoothly, providing access to the interior of the garage.

I patiently wait for the door to fully open, ensuring that it has reached its highest point before proceeding. It’s important to make sure the door is completely open and clear before attempting to enter the garage.

Once the door is fully open, I cautiously step inside the garage, being mindful of any potential obstructions or hazards along the way.

When I’m ready to close the garage door, I locate the “Close” or “Down” button on the keypad. With a simple press of the button, the garage door starts to close.

I wait again for the door to fully close, ensuring that it reaches the bottom and securely seals the garage. It’s essential to double-check that there are no people or objects in the way of the closing door for safety reasons.

In addition to these basic steps, my keypad may have additional features that I can explore. For example, I could program temporary access codes for visitors or activate the garage lights using specific buttons or codes. I refer to the manufacturer’s instructions or user manual to learn more about these functionalities and how to use them effectively.

By following these steps from Garage Door Repair Ramona CA and utilizing the features of my keypad, I can conveniently and securely open and close my garage door without the need for a physical key or remote control.

Ramona Valley Garage Door & Gates

842 B St #6, Ramona, CA 92065, United States

760-970-8367

Does Homeowners Insurance Cover Garage Doors-Argle TX Garage Door Repair

Homeowners insurance policies typically provide coverage for Garage Door Repair Argyle TX, but it’s essential to understand the specifics of your policy and the terms and conditions outlined by your insurance provider.

In this response, I will provide a comprehensive overview of how homeowners insurance may cover garage doors, the factors that influence coverage, and the typical claims process involved.

Homeowners insurance is designed to protect your property and belongings from various risks, including damage caused by natural disasters, accidents, and theft. While garage doors are generally covered under homeowners insurance, the extent of coverage can vary based on the type of policy you have and the specific circumstances surrounding the damage.

One of the primary factors that determine coverage is the cause of the damage. Homeowners insurance typically covers damage resulting from covered perils, such as fire, lightning, windstorms, hail, vandalism, and theft. If your garage door is damaged due to one of these covered events, your insurance policy may provide coverage for the repairs or replacement.

However, it’s important to note that homeowners insurance usually does not cover damage resulting from wear and tear, lack of maintenance, or negligence. If your garage door is old and deteriorated or if the damage is a result of your failure to properly maintain or secure it, the insurance company may deny your claim.

Additionally, homeowners insurance policies typically have a deductible, which is the amount you must pay out of pocket before your insurance coverage kicks in. The deductible amount is agreed upon when you purchase the policy, and it can vary depending on your policy and personal preferences. When filing a claim for garage door damage, you will need to pay the deductible before your insurance company covers the remaining cost of repairs or replacement.

To initiate a claim for garage door damage, you will need to contact your insurance company as soon as possible. They will guide you through the claims process, which usually involves documenting the damage and providing evidence, such as photographs or videos, to support your claim. It’s essential to provide accurate and detailed information to expedite the claim and ensure that you receive the appropriate coverage.

Once your claim is submitted, an insurance adjuster will assess the damage to determine the extent of coverage. They may inspect the garage door and consider factors such as its age, condition, and the cause of the damage. The adjuster will then provide an estimate for the repairs or replacement based on the terms of your policy and any applicable coverage limits.

It’s crucial to review your homeowners insurance policy carefully to understand the specific coverage for garage doors. Some policies may provide coverage for the structure of the garage, including the door, while others may cover only the contents inside the garage. If your policy only covers the contents, such as vehicles and personal belongings, it may not provide coverage for the garage door itself.

Furthermore, it’s worth considering additional coverage options that may provide enhanced protection for your garage door. Some insurance providers offer endorsements or add-ons that allow you to customize your policy and extend coverage for specific items, including garage doors. These endorsements typically come at an additional cost, but they can provide peace of mind by offering broader protection for your property.

In conclusion, homeowners insurance generally covers Garage Door Repair Argyle TX under certain circumstances. The specific coverage and extent of protection can vary depending on your policy, the cause of the damage, and factors such as deductible and coverage limits. It’s crucial to review your policy documents carefully, understand the terms and conditions, and contact your insurance provider for clarification if needed. By doing so, you can ensure that you have the appropriate coverage for your garage door and be prepared to navigate the claims process if necessary.

Argle TX Garage Door Repair

Argyle, Texas

940-400-3769

How Much do Garage Door Openers Cost-North Richland hills Best Garage & Overhead Doors

Garage Door Repair North Richland Hills TX openers are essential devices that provide convenience, security, and ease of access to our homes. Whether you’re looking to replace an old opener or install a new one, understanding the cost factors involved is crucial.

In this guide, we will explore the various types of garage door openers available in the market and discuss their costs, helping you make an informed decision.

  1. Types of Garage Door Openers: There are three primary types of garage door openers: a) Chain-Drive Openers: These are the most common and economical options. They use a metal chain to lift and lower the garage door. b) Belt-Drive Openers: These openers use a reinforced rubber belt to operate the door, offering quieter operation compared to chain-drive openers. c) Screw-Drive Openers: These openers utilize a threaded steel rod to move the garage door. They require less maintenance and are suitable for heavy doors.
  2. Cost Factors: Several factors influence the cost of garage door openers: a) Opener Type: Chain-drive openers are generally the least expensive, followed by belt-drive openers, with screw-drive openers being the most expensive. b) Horsepower (HP) Rating: The HP rating determines the opener’s lifting capacity. Higher HP ratings are typically more expensive. c) Additional Features: Openers with advanced features like battery backup, Wi-Fi connectivity, smart home integration, and security options tend to have higher price tags. d) Brand: Well-known and reputable brands often come with a higher price point due to their quality and reliability. e) Installation: The cost of professional installation should be considered if you’re not comfortable installing the opener yourself.
  3. Price Ranges: The price range for garage door openers can vary significantly based on the factors mentioned above. However, to provide a general idea: a) Chain-Drive Openers: These typically range from $150 to $300, depending on HP rating and additional features. b) Belt-Drive Openers: Expect to pay between $200 and $400 for belt-drive openers, with higher HP ratings and added features affecting the price. c) Screw-Drive Openers: These usually fall in the price range of $300 to $600, considering their durability and higher lifting capacity.
  4. Installation Costs: If you choose to hire a professional for installation, the cost will vary depending on your location and the complexity of the installation. On average, professional installation can add $150 to $300 to the overall cost. However, some retailers offer installation services as part of a package deal.
  5. DIY Installation: If you’re comfortable with DIY projects and have the necessary tools, you can save money by installing the garage door opener yourself. Manufacturers often provide detailed instructions, and there are numerous online tutorials available. However, keep in mind that improper installation can lead to safety hazards and potential damage to the opener or the door itself.
  6. Warranty Considerations: When purchasing a garage door opener, consider the warranty provided by the manufacturer. Higher-priced models often come with longer warranties, providing added peace of mind.

Conclusion: Garage Door Repair North Richland Hills TX opener prices vary depending on factors such as type, horsepower rating, additional features, and brand. While chain-drive openers are generally the most affordable, belt-drive and screw-drive openers offer quieter operation and increased durability, respectively. Remember to factor in installation costs if you’re not comfortable with DIY installation. By understanding the costs associated with garage door openers, you can make an informed decision that suits your needs and budget.

North Richland hills Best Garage & Overhead Doors

North Richland Hills, TX 76182

817-533-4913

How to Fix a Garage Door – Camco Commercial Door Company

Fixing a malfunctioning garage door can be a complex task that may require professional assistance, depending on the issue at hand. However, I can provide a concise overview of troubleshooting steps you can take to address common garage door malfunctions. Please note that these suggestions are general in nature and may not cover all possible scenarios.

Here are some steps to consider according to Garage Door Repair Knoxville TN:

  1. Identify the problem: When my garage door malfunctions, the first step I take is to observe and understand the specific issue. Is it not opening or closing? Is it making strange noises? Does it get stuck or move unevenly? Identifying the problem helps me determine the appropriate course of action.
  2. Check the power source: I always make sure to check if my garage door opener is receiving power. I inspect the power cord and ensure it is securely plugged into a functioning electrical outlet. If my opener has a battery backup, I verify that the battery is charged. If there is no power, I check the circuit breaker or fuse box to address any electrical issues.
  3. Inspect the remote control and wall switch: If my garage door does not respond to commands from the remote control or wall switch, I start by checking the batteries in the remote and replacing them if necessary. I also inspect the wall switch for any loose wires or damage. If the problem persists, I reprogram the remote control following the manufacturer’s instructions.
  4. Lubricate moving parts: To address squeaky or stiff garage doors, I turn my attention to lubricating the moving parts. I apply a silicone-based lubricant to the rollers, hinges, tracks, and springs. This helps reduce friction and ensures smooth operation. It’s important to avoid using grease or oil-based lubricants as they can attract dirt and debris.
  5. Check the safety sensors: If my garage door is equipped with safety sensors and it fails to close or opens immediately after closing, I inspect the sensors. I ensure they are clean and aligned properly. If there is any dirt or debris obstructing the sensor’s path, I carefully wipe it away. This usually resolves any issues related to the safety sensors.
  6. Inspect the tracks and rollers: I carefully examine the tracks for any bends, dents, or obstructions. If I notice minor issues, I gently straighten them using a rubber mallet or a block of wood. I also clean the tracks to remove any dirt or debris that could interfere with the door’s movement. Additionally, I inspect the rollers for any damage or wear, replacing them if necessary.
  7. Test the balance of the door: To ensure smooth operation, I test the balance of my garage door. I disconnect the opener and manually lift the door halfway. If it remains in place, it indicates that the door is properly balanced. However, if it falls or rises on its own, it may require professional adjustment to restore balance.
  8. Adjust the limit switches: If my garage door opens or closes only partially, I check the limit switches. These switches control the travel distance of the door. I refer to the manufacturer’s instructions to locate the limit switches and adjust them as necessary to ensure proper operation.
  9. Examine the springs and cables: If I suspect issues with the springs or cables, such as broken or damaged components, I know that these are complex and potentially dangerous to work with. In such cases, I always seek professional assistance from a knowledgeable garage door technician. They have the expertise and tools to safely inspect, repair, or replace the springs and cables.
  10. Seek professional assistance: If I have tried the above steps and the problem persists, or if I encounter more complex issues like a broken torsion spring or a malfunctioning opener motor, I understand the importance of contacting a professional garage door technician. They have the necessary skills and experience to diagnose and fix the problem safely and effectively.

Remember, as per Garage Door Repair Knoxville TN, garage doors can be heavy and potentially dangerous to work with. If you are unsure about performing any repairs or if the issue involves complex mechanisms, it is best to seek professional help to ensure the safety and proper functioning of your garage door.

Camco Commercial Door Company

Knoxville, TN

865-776-9455

Page 2 of 6

Powered by WordPress & Theme by Anders Norén