The Largest Business Blog in Texas

Month: April 2023 Page 2 of 6

How to Connect Garage Door Opener – East Downtown Garage Doors

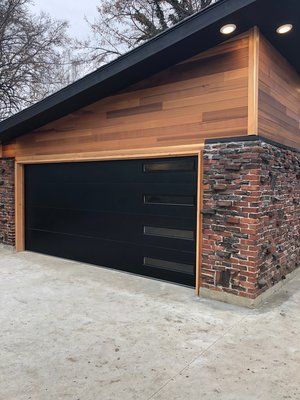
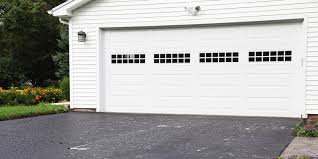
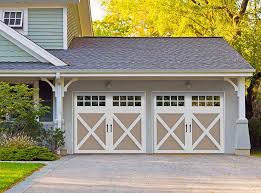
Connecting a Garage Door Repair Houston TX opener may seem like a daunting task, but with the right tools and some basic knowledge, it can be done relatively easily. In this guide, we will walk you through the steps to connect a garage door opener.

Before you begin, it’s important to make sure that your garage door opener is compatible with your garage door. Different garage door openers work with different types of doors, so be sure to read the manufacturer’s instructions to ensure that your opener is compatible with your door.

Tools You’ll Need

  • Garage door opener
  • Garage door remote
  • Garage door sensors
  • Wires
  • Wire cutters
  • Wire strippers
  • Screwdriver
  • Drill

Step 1: Mount the Garage Door Opener The first step in connecting a garage door opener is to mount it on the ceiling of your garage. Follow the manufacturer’s instructions carefully and make sure that the opener is securely mounted to prevent it from falling or vibrating while in use.

Step 2: Connect the Power Supply Once the opener is mounted, you need to connect the power supply. This is usually done by plugging the opener into an electrical outlet. Some openers may require hardwiring, in which case you will need to follow the manufacturer’s instructions carefully to ensure that the wiring is done correctly.

Step 3: Program the Remote The next step is to program the remote that comes with your garage door opener. This is usually done by pressing a button on the opener and then pressing a button on the remote. Follow the manufacturer’s instructions carefully to ensure that the remote is programmed correctly.

Step 4: Install the Sensors The sensors are an important safety feature of any garage door opener. They detect if something is in the path of the door and prevent the door from closing if there is an obstruction. To install the sensors, follow the manufacturer’s instructions carefully and make sure that they are mounted at the correct height and aligned properly.

Step 5: Connect the Wires Next, you need to connect the wires from the sensors to the opener. Use wire cutters and strippers to prepare the wires and then follow the manufacturer’s instructions to connect them to the opener. Make sure that the wires are connected securely to prevent them from coming loose.

Step 6: Test the Opener Before using the garage door opener, it’s important to test it to make sure that it’s working properly. Test the opener by opening and closing the door several times using the remote. Make sure that the sensors are working properly and that the door opens and closes smoothly.

Step 7: Adjust the Settings Once the opener is installed and tested, you may need to adjust the settings to suit your needs. This includes adjusting the force with which the door opens and closes, setting the travel limits, and adjusting the speed of the door. Follow the manufacturer’s instructions carefully to ensure that the settings are adjusted correctly.

In conclusion, connecting a Garage Door Repair Houston TX opener may seem like a complex task, but with the right tools and knowledge, it can be done relatively easily. Follow the manufacturer’s instructions carefully and take your time to ensure that the opener is installed correctly and working properly. Once the opener is installed, be sure to test it regularly to ensure that it’s working properly and make any necessary adjustments to suit your needs.

East Downtown Garage Doors

4105 Leeland St, Houston, TX 77023, United States

1-713-322-7436

How to Replace Garage Door Opener Remote-First Call Garage Door Southbelt

Replacing a Garage Door Repair Houston TX opener remote can be a daunting task, especially if you’re not familiar with the process.

However, with the right tools and instructions, it can be done easily in just a few simple steps. In this guide, we’ll take you through the process of replacing your garage door opener remote in detail.

Step 1: Identify the Model of Your Garage Door Opener

Before you start looking for a replacement remote, it’s important to know the model of your garage door opener. This information can usually be found on the opener itself or in the user manual that came with it. Knowing the model will ensure that you get the right replacement remote that’s compatible with your opener.

Step 2: Purchase a Replacement Remote

Once you know the model of your garage door opener, you can start looking for a replacement remote. You can find replacement remotes at most hardware stores, home improvement centers, or online. Make sure to get the exact model that’s compatible with your garage door opener.

Step 3: Clear the Memory of Your Garage Door Opener

Before you can program the new remote, you’ll need to clear the memory of your garage door opener. To do this, locate the “Learn” or “Program” button on your opener. Press and hold the button until the LED light on the opener blinks. This usually takes about 30 seconds. Once the LED light stops blinking, the memory is cleared.

Step 4: Program the New Remote

With the memory cleared, you can now program the new remote. To do this, follow these steps:

  1. Press and hold the “Learn” or “Program” button on your garage door opener until the LED light starts flashing.
  2. Press the button on the new remote that you want to use to operate the garage door.
  3. Release the button on the new remote.
  4. Wait for the LED light on the opener to stop flashing. This usually takes about 30 seconds.
  5. Test the new remote to make sure it’s working properly.

Step 5: Test the New Remote

Once you’ve programmed the new remote, test it to make sure it’s working properly. Stand outside your garage door and press the button on the remote. If the door opens or closes, then the remote is working correctly.

Step 6: Replace the Batteries

If the new remote doesn’t work, then the batteries may need to be replaced. To do this, locate the battery compartment on the remote and replace the old batteries with new ones. Make sure to use the correct type of batteries as specified in the user manual.

Step 7: Troubleshoot Any Issues

If the new remote still isn’t working, then there may be an issue with the garage door opener itself. Check the user manual for troubleshooting tips or contact a professional for assistance.

In conclusion, replacing a Garage Door Repair Houston TX opener remote can be done easily in just a few simple steps. By following these instructions, you can have your new remote programmed and ready to use in no time.

First Call Garage Door Southbelt

12373 Scarsdale Blvd suite c, Houston, TX 77089,

1-713-547-5170

Steps to Lower Garage Door – Garage Door Experts of Escondido

When it comes to lowering your garage door, there are a few important steps that you should follow to ensure that the process goes smoothly and safely.

Here are the steps that I recommend based from Garage Door Repair Escondido CA:

  1. First, check to make sure that the area around your garage door is clear of any obstacles. This will prevent anything from getting caught in the door or preventing it from closing properly.
  2. Next, disengage the door from the opener by pulling the emergency release cord. This will allow you to manually lower the door.
  3. Grasp the handle or handles on the inside of the door and lift the door slightly to disengage it from the tracks. You may need to use some force to lift the door, especially if it’s heavy.
  4. Once the door has been disengaged from the tracks, lower it slowly and carefully. Keep your hands on the door at all times, and make sure that it doesn’t slam shut. Lower the door until it’s fully closed.
  5. Finally, re-engage the door with the opener by pulling the emergency release cord back towards the opener until you hear it click. This will re-engage the door with the motor, allowing you to use your remote control or wall switch to operate the door as normal.

It’s important to note that manually lowering your garage door can be dangerous if you’re not familiar with the mechanics of the door. If you encounter any problems during the process, it’s best to call a professional for assistance.

In addition to following these steps, there are a few other things that you can do to ensure that your garage door operates smoothly and safely. Regular maintenance, such as lubricating the tracks and hinges, can help to extend the life of your door and prevent problems from occurring. It’s also a good idea to test your garage door regularly to ensure that it’s functioning properly and to identify any issues before they become more serious.

By following Garage Door Repair Escondido CA, I hope that this information is helpful to you, and that you’re able to lower your garage door safely and easily. If you have any further questions or need additional assistance, please don’t hesitate to ask.

Garage Door Experts of Escondido

510 N Escondido Blvd, Escondido, CA 92025, USA

760-306-5193

Can You Paint an Aluminum Garage Doors? – Laguna Hills Garage & Overhead Doors

I recently painted my aluminum garage doors, and I have to say that the process was easier than I expected. Before I started, I did some research to make sure that I had all of the necessary materials and that I understood the process. Overall, I was happy with the end result, and the doors look great.

In reference to Garage Door Repair Laguna Hills CA, the first step in painting the garage doors was to clean them thoroughly. I used a pressure washer to remove any dirt, grime, and debris from the surface of the doors. After the doors had dried, I used a wire brush to remove any loose paint or rust.

Next, I applied a coat of primer to the doors. The primer helps the paint adhere better to the surface of the aluminum and also helps to prevent rust and other forms of corrosion. I chose a primer that was specifically designed for use on metal surfaces, and I applied it evenly using a paintbrush.

After the primer had dried, I applied the first coat of paint. I chose a high-quality exterior paint that was designed for use on metal surfaces and could withstand harsh weather conditions. I used a paintbrush to apply the paint evenly, starting at the top of the doors and working my way down.

After the first coat of paint had dried, I applied a second coat. This helped to ensure that the color was even and that the doors were completely covered. I let the paint dry overnight before using the doors again.

One of the benefits of painting the garage doors myself was the cost savings. By doing it myself, I was able to save several hundred dollars on labor costs. Additionally, I enjoyed the sense of accomplishment that came with completing the project on my own.

It’s important to note that painted aluminum garage doors may require more maintenance than unpainted doors. Over time, the paint may start to chip or fade, and touch-ups or repainting may be necessary. However, with proper maintenance and care, a painted aluminum garage door can provide a beautiful and durable addition to your home’s exterior.

In conclusion, as per Garage Door Repair Laguna Hills CA, painting aluminum garage doors is a great way to update the look of your home’s exterior and add value to your property. With the right tools and techniques, it’s a relatively straightforward DIY project that can be completed over the course of a weekend. Just be sure to choose the right type of paint, prepare the surface of the door properly, and take your time to apply the paint evenly and carefully. The end result is well worth the effort!

Laguna Hills Garage & Overhead Doors

25361 McIntyre St #5, Laguna Hills, CA 92653, United States

949-776-5549

How Do Garage Door Safety Sensors Work – Lake Forest Garage & Overhead Doors

Garage door safety sensors are an essential component of any garage door opener system. They work by detecting obstacles in the path of a closing garage door and preventing the door from closing, thereby preventing accidents and injuries. In this article, we will discuss how garage door safety sensors work and their importance in keeping your garage and family safe.

According to Garage Door Repair Lake Forest CA, the basic principle behind garage door safety sensors is simple. Two sensors are placed on either side of the garage door, about six inches above the ground. One sensor emits an infrared beam, while the other sensor receives it. When the beam is broken, the garage door opener automatically stops the door from closing.

In more technical terms, garage door safety sensors use photoelectric sensors to detect obstacles in the path of the garage door. Photoelectric sensors work by emitting a beam of infrared light and detecting any changes in the light that are caused by an obstruction in the beam’s path. When an obstruction is detected, the sensor sends a signal to the garage door opener to stop the door from closing.

Garage door safety sensors typically consist of two components: a transmitter and a receiver. The transmitter emits the infrared beam, while the receiver detects the beam and sends a signal to the garage door opener. Both the transmitter and receiver are housed in small, plastic boxes that are mounted on the garage wall.

The transmitter and receiver are aligned so that the infrared beam travels from the transmitter to the receiver in a straight line. When an object interrupts the beam, the receiver detects the change and sends a signal to the garage door opener to stop the door from closing. If the garage door is already in motion when an obstruction is detected, the opener will reverse the door’s direction and open it back up.

Garage door safety sensors are designed to be very sensitive, so even small objects can trigger them. For example, a child’s toy or a broom that is leaning against the wall could be enough to interrupt the beam and stop the door from closing. While this sensitivity is important for safety, it can also cause false alarms, which can be frustrating for homeowners. To avoid false alarms, it is important to keep the area around the garage door sensors clear of any objects that could potentially trigger them.

One of the most common causes of garage door sensor malfunctions is misalignment. Over time, the sensors can become misaligned due to vibrations or other factors, causing the beam to be interrupted even when there is no obstruction. This can cause the garage door to stop or reverse direction unexpectedly. To fix a misaligned sensor, simply adjust the sensor so that it is pointing directly at the receiver.

Another common cause of garage door sensor malfunctions is dirt or debris on the lenses. If the sensors are dirty, the infrared beam may be scattered or weakened, causing false alarms or preventing the sensors from detecting an obstruction. To clean the sensors, simply wipe them with a clean, dry cloth.

In addition to safety sensors, many garage door openers also come equipped with a safety feature called a “photo-eye.” Photo-eyes are similar to safety sensors in that they use infrared technology to detect obstacles in the path of the garage door. However, unlike safety sensors, photo-eyes are installed at the bottom of the garage door and work by detecting any changes in the amount of light that is reflected back to the sensor. If an object breaks the beam of light, the photo-eye sends a signal to the garage door opener to stop or reverse the door’s direction.

In conclusion, as stated in Garage Door Repair Lake Forest CA, garage door safety sensors are a critical safety feature that should not be overlooked. They work by detecting obstacles in the path of a closing garage door and preventing the door from closing, thereby preventing accidents and injuries. Garage door safety sensors use photoelectric sensors to detect changes in the infrared beam, and they are typically installed on either side of the garage

Lake Forest Garage & Overhead Doors

26111 Birendra #4, Lake Forest, CA 92630, United States

949-356-7568

How to Frame Garage Door-Champions Garage Door of Spring

Framing a Garage Door Repair Spring TX involves creating a structure that supports and holds the weight of the garage door. This structure is typically made up of a header, jack studs, and king studs.

The framing process may seem daunting, but with the right tools and knowledge, it can be done in a few simple steps.

Step 1: Measure and mark the opening Before you start framing, you need to measure and mark the opening for the garage door. Measure the width and height of the opening and mark these measurements on the header. The header is the beam that will support the weight of the garage door. Make sure the header is long enough to span the entire width of the opening and that it is level.

Step 2: Cut the header and install the jack studs Cut the header to the length you need and then install the jack studs on each side of the opening. The jack studs support the ends of the header and transfer the weight of the garage door to the foundation. Make sure the jack studs are plumb and that they are attached securely to the header.

Step 3: Install the king studs Next, install the king studs on either side of the jack studs. The king studs support the weight of the header and transfer it to the floor. Make sure the king studs are plumb and that they are attached securely to the header and the floor.

Step 4: Install the trimmer studs and cripple studs The trimmer studs are vertical studs that support the header and transfer the weight of the garage door to the jack studs. Install the trimmer studs on either side of the jack studs. Make sure they are plumb and that they are attached securely to the header and the jack studs.

The cripple studs are shorter studs that fit between the bottom plate and the header. Install the cripple studs between the bottom plate and the header. Make sure they are plumb and that they are attached securely to the header and the bottom plate.

Step 5: Install the garage door hardware Once the framing is complete, you can install the garage door hardware. Follow the manufacturer’s instructions to install the tracks, rollers, and springs. Make sure the garage door is balanced and operates smoothly.

In conclusion, framing a Garage Door Repair Spring TX involves measuring and marking the opening, cutting and installing the header, jack studs, king studs, trimmer studs, and cripple studs, and installing the garage door hardware. With the right tools and knowledge, framing a garage door can be done in a few simple steps.

Champions Garage Door of Spring TX

15824 Champion Forest Dr, Spring, TX 77379, United States

1-281-947-3148

How to Align Your Garage Door Sensors? – Palm Desert Garage & Overhead Doors

As someone who has had to align my garage door sensors before, I can attest to the importance of proper alignment. Misaligned sensors can cause all sorts of problems, from the door not closing properly to creating a safety hazard for anyone who walks near the garage door.

Thankfully, as per Garage Door Repair Palm Desert CA, aligning the sensors is a fairly simple process. The first step is to inspect the sensors to ensure that they are clean and free of any damage. If they are dirty, a quick wipe with a soft, dry cloth should do the trick. If they are damaged, they will need to be replaced.

Once you have inspected the sensors, it’s time to check their alignment. The sensors should be facing each other directly and have a clear line of sight. If they are misaligned, you will need to adjust them.

To adjust the sensors, start by loosening the screws that hold them in place. Be careful not to remove the screws completely, as this could cause the sensors to fall off. Next, adjust the sensors until they are pointing directly at each other and have a clear line of sight. Use a level to ensure that they are both at the same height.

Once the sensors are properly aligned, tighten the screws to secure them in place. Be careful not to over-tighten the screws, as this could cause the sensors to become misaligned again.

Test the alignment of the sensors by opening and closing the garage door. If the door closes without any issues, the sensors are properly aligned. If the door still does not close properly, repeat the process of adjusting the sensors until they are properly aligned.

In conclusion, based from Garage Door Repair Palm Desert CA, aligning garage door sensors is an important maintenance task that should be performed regularly to ensure the safe and effective operation of your garage door. By following these steps, you can easily align the sensors and ensure that your garage door operates properly. Don’t hesitate to call a professional if you’re not comfortable doing it yourself or if you encounter any issues that require professional attention.

Palm Desert Garage & Overhead Doors

73210 Shadow Mountain Dr #3, Palm Desert, CA 92260, United States

760-654-609

How to Insulate a Roll up Garage Door-First Call Garage Door Sugar Land

Roll-up Garage Door Repair Missouri City TX are a common feature in many homes, and while they provide an easy way to access your garage, they can also be a significant source of heat loss. This heat loss can lead to increased energy bills, especially during the colder months of the year. Insulating your roll-up garage door is a simple and effective way to reduce this heat loss and save on your energy bills.

In this article, we’ll go over the steps involved in insulating a roll-up garage door, including the materials you’ll need and the techniques you’ll need to use. We’ll also provide some tips and tricks to make the process as easy and effective as possible.

Step 1: Measure Your Door The first step in insulating your roll-up garage door is to measure it. You’ll need to know the size of your door so you can purchase the right amount of insulation material. Measure the width and height of your door, making sure to account for any obstructions or irregularities.

Step 2: Choose Your Insulation Material There are several different types of insulation material you can use to insulate your roll-up garage door, including fiberglass batts, foam boards, and reflective insulation. Each type of insulation has its own benefits and drawbacks, so it’s important to choose the one that will work best for your specific situation.

Fiberglass batts are a popular option because they are relatively inexpensive and easy to install. They come in pre-cut sizes, so you can simply fit them into the cavities between your door panels. However, they can be difficult to install if your door has irregularities or obstructions, and they can be messy to work with.

Foam boards are another option. They are more expensive than fiberglass batts, but they offer better insulation performance. They are also easier to install in irregularly shaped doors. However, foam boards can be more difficult to cut to size and can be more challenging to install in very tight spaces.

Reflective insulation is a third option. It is made of a thin layer of aluminum foil, which reflects heat back into your garage. This type of insulation is often used in conjunction with other types of insulation, and it can be very effective at reducing heat loss. However, it can be more expensive than other types of insulation, and it can be difficult to install if you have an irregularly shaped door.

Step 3: Prepare Your Door Before you can install your insulation, you’ll need to prepare your door. Start by cleaning the door panels with soap and water to remove any dirt or debris. Once the door is clean, you’ll need to measure and mark the areas where you will be installing the insulation. Use a pencil to mark the areas where the insulation will go, making sure to leave a small gap around the edges of the door panels so the insulation can expand and contract with temperature changes.

Step 4: Install Your Insulation Once your door is prepared, you can start installing your insulation. If you’re using fiberglass batts, simply fit them into the cavities between the door panels, making sure to tuck them in snugly. If you’re using foam boards, cut them to size using a utility knife and fit them into the spaces between the door panels. If you’re using reflective insulation, you’ll need to cut it to size and attach it to the inside of your door using double-sided tape or adhesive.

Step 5: Finish Your Installation Once your insulation is installed, you’ll need to finish the job by sealing any gaps or cracks around the edges of your door. Use weatherstripping or caulk to seal any gaps, making sure to cover all the edges of the door panels. This will prevent air leaks and ensure that your insulation is as effective as possible.

Conclusion Insulating your roll-up garage door is a simple and effective way to reduce heat loss and save on your energy bills. By following the steps outlined above, you can install insulation that will keep your garage warmer in the winter and cooler in the summer. In addition to saving on energy costs, insulating your garage door can also help to reduce noise from outside and increase the overall comfort of your garage.

It’s important to note that if you’re not comfortable installing insulation on your own, you can always hire a professional to do the job for you. A professional installer will have the knowledge and experience necessary to ensure that your insulation is installed correctly and effectively.

In addition to insulating your garage door, there are other steps you can take to make your garage more energy-efficient. For example, you can install weatherstripping around the edges of your garage door to prevent air leaks, and you can install a sealant on your garage floor to prevent drafts. You can also install a programmable thermostat in your garage to control the temperature more effectively.

In conclusion, insulating your roll-up Garage Door Repair Missouri City TX is a simple and effective way to reduce heat loss and save on your energy bills. By choosing the right insulation material and following the steps outlined above, you can install insulation that will keep your garage warmer in the winter and cooler in the summer. Whether you choose to install the insulation yourself or hire a professional, the benefits of insulating your garage door are clear.

First Call Garage Door Sugar Land

2865 Dulles Ave, Missouri City, TX 77459, United States

1-281-603-9929

How to Fix Sensor on Garage Door-LMS Garage Door Roseville

Fixing a sensor on a Garage Door Repair Roseville CA can be a relatively simple task, but it is important to follow the correct steps to ensure that the sensor is installed properly and is functioning correctly.

Here is a step-by-step guide on how to fix a sensor on a garage door:

Step 1: Check the Sensor

Before installing a new sensor, it’s important to check the existing sensor to see if it is still functioning properly. You can do this by opening and closing the garage door while standing outside the garage. Observe if the door stops and reverses direction when it senses an obstruction in its path. If the door does not reverse, it may indicate that the sensor is faulty and needs to be replaced.

Step 2: Gather the Necessary Tools and Materials

To fix the sensor on your garage door, you’ll need a few tools and materials. These include a screwdriver, pliers, a ladder, a new sensor kit, and any additional hardware required for installation.

Step 3: Turn off the Power

Before beginning any work on the garage door, it’s important to turn off the power. This can be done by unplugging the garage door opener or turning off the circuit breaker that powers the opener.

Step 4: Remove the Old Sensor

The next step is to remove the old sensor from the garage door. This is typically done by unscrewing the sensor from its mounting bracket. The bracket is usually attached to the door frame or the wall near the garage door.

Step 5: Install the New Sensor

Once the old sensor has been removed, it’s time to install the new sensor. This is usually done by mounting the new sensor to the same location as the old sensor. Make sure to follow the manufacturer’s instructions for proper installation.

Step 6: Align the Sensors

Once the new sensor has been installed, it’s important to align it with the other sensor on the opposite side of the garage door. This can be done by using a level to ensure that the sensors are at the same height and angle. Adjust the position of the sensors as necessary to ensure that they are aligned properly.

Step 7: Test the Sensors

After the sensors have been aligned, it’s important to test them to ensure that they are functioning properly. This can be done by closing the garage door and waving a broomstick or other object in front of the sensors. If the door stops and reverses direction, the sensors are functioning properly. If the door does not reverse, adjust the sensors until they are aligned correctly.

Step 8: Secure the Sensors

Once the sensors have been properly aligned and tested, it’s time to secure them in place. This is usually done by tightening the screws that hold the sensors in place.

Step 9: Turn the Power Back On

After the sensors have been installed and tested, it’s time to turn the power back on. This can be done by plugging the garage door opener back in or turning the circuit breaker back on.

Step 10: Test the Door

The final step is to test the Garage Door Repair Roseville CA to ensure that it is functioning properly. This can be done by opening and closing the door several times to ensure that it stops and reverses direction when an obstruction is detected.

In conclusion, fixing a sensor on a garage door can be a straightforward process if you follow the correct steps. Always make sure to turn off the power before beginning any work on the garage door and follow the manufacturer’s instructions for proper installation.

LMS Garage Door Roseville

10341 Fairway Dr, Roseville, CA 95678, United States

1-916-398-2078

How to Replace Garage Door Spring-Fort Worth Garage Door Experts

Replacing a Garage Door Repair Fort Worth TX spring can be a challenging task, but with the right tools and knowledge, it can be done safely and effectively. In this guide, we’ll walk you through the steps of replacing a garage door spring.

Before starting, it’s important to note that garage door springs are under a lot of tension and can be dangerous to work with. If you’re not confident in your ability to replace a garage door spring, it’s best to hire a professional.

Tools you will need:

  • Replacement garage door spring
  • Winding bars
  • Socket wrench set
  • Adjustable wrench
  • Safety glasses
  • Gloves

Step 1: Determine the Type of Spring

There are two types of garage door springs: torsion and extension. Torsion springs are located above the garage door, while extension springs are located on either side of the door. Before you start, determine which type of spring you have.

Step 2: Release Tension from the Spring

Before you can remove the spring, you need to release the tension. This is done by using winding bars to loosen the tension on the spring. Insert the winding bars into the holes on the winding cone, and turn the bars to loosen the spring. Make sure to wear gloves and safety glasses, as the spring can snap back and cause injury.

Step 3: Remove the Spring

Once the tension is released, use a socket wrench set to loosen the set screws on the spring cones. Remove the screws and slide the spring off the shaft.

Step 4: Install the New Spring

Install the new spring onto the shaft, making sure it’s centered and the end is pointing towards the door. Use the socket wrench set to tighten the set screws on the spring cones.

Step 5: Wind the New Spring

Using the winding bars, wind the new spring until it has the same number of turns as the old spring. Make sure to wind the spring in the correct direction – if you’re not sure which way to wind it, consult the manufacturer’s instructions.

Step 6: Test the Door

Once the new spring is installed and wound, test the garage door to make sure it opens and closes smoothly. If the door is still not working properly, you may need to adjust the tension on the spring.

Step 7: Dispose of the Old Spring

Garage door springs are made of steel and can be recycled. Contact your local recycling center to see if they accept steel springs.

In conclusion, replacing a Garage Door Repair Fort Worth TX spring can be a challenging task, but with the right tools and knowledge, it can be done safely and effectively. Remember to always wear gloves and safety glasses, and if you’re not confident in your ability to replace a spring, it’s best to hire a professional.

Fort Worth Garage Door Experts TX

817 Currie St, Fort Worth, TX 76107

817- 242-5868

Page 2 of 6

Powered by WordPress & Theme by Anders Norén