The Largest Business Blog in Texas

Tag: garage door repair solon oh

How To Make Garage Door Close Automatically – Ohio Garage Door Repair


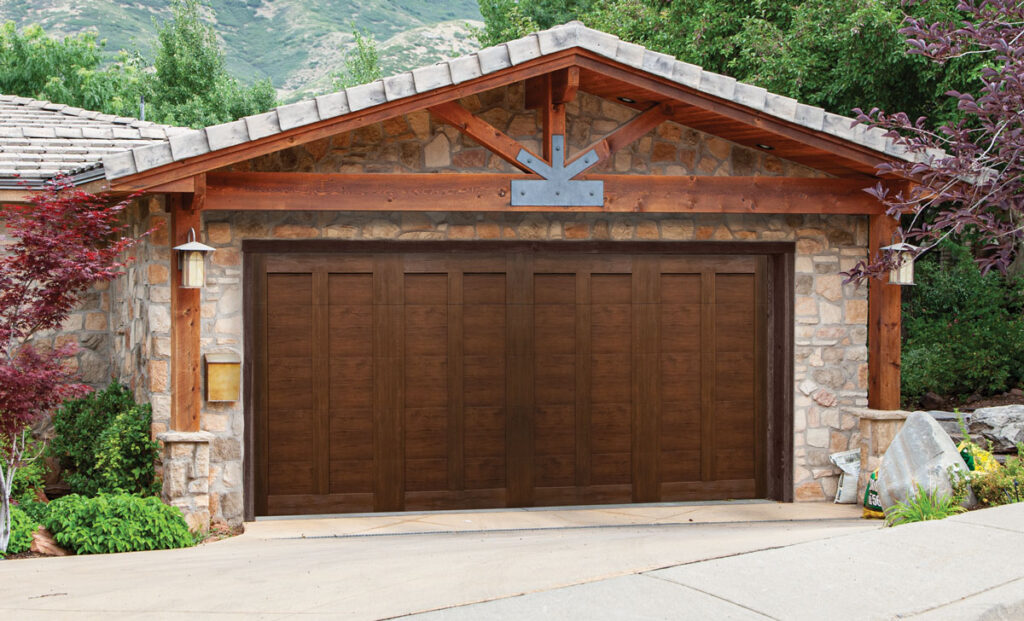
Garage Door Repair Solon OH
Making a garage door close automatically is a convenient and practical feature that enhances both security and convenience.

Here’s a detailed guide on how to achieve automatic garage door closure:

  1. Understand Automatic Closing Systems:
    • Automatic closing systems for garage doors typically involve the use of sensors, timers, or smart technology to trigger the closing process after a predetermined period of time or when certain conditions are met.
  2. Assess Existing Garage Door Setup:
    • Before proceeding with automatic closure installation, assess your existing garage door setup. Determine if your garage door opener is equipped with the necessary features to support automatic closing, such as a timer-to-close function or compatibility with smart home devices.
  3. Check Safety Requirements:
    • Automatic garage door closure must comply with safety regulations to prevent accidents or injuries. Ensure that your garage door opener meets safety standards and is equipped with features such as photoelectric sensors or infrared beams to detect obstructions and prevent closing on objects or people.
  4. Install a Timer-to-Close Feature (If Applicable):
    • If your garage door opener supports a timer-to-close feature, follow the manufacturer’s instructions to activate and configure this setting. Timer-to-close allows you to set a delay period after which the garage door will automatically close if left open.
  5. Adjust Closing Force Settings:
    • Ensure that the closing force settings on your garage door opener are properly adjusted to provide sufficient force to close the door securely without exerting excessive pressure. Refer to the opener’s user manual for instructions on adjusting the closing force settings.
  6. Install Smart Home Devices (Optional):
    • If your garage door opener is compatible with smart home devices, consider installing a smart garage door controller or Wi-Fi-enabled opener that allows you to control and monitor the door remotely using a smartphone app. Many smart garage door controllers offer scheduling and automation features for automatic closing.
  7. Program Automation Settings:
    • If using a smart garage door controller, access the manufacturer’s app or online platform to program automation settings for automatic door closure. Set specific times or conditions for the door to close automatically, such as after a certain period of inactivity or at a designated time each day.
  8. Test and Verify Operation:
    • Once the automatic closing system is configured, test the functionality to ensure proper operation. Open the garage door and activate the automatic closing feature to verify that the door closes smoothly and without issues. Test the safety sensors to ensure they detect obstructions and prevent closing if necessary.
  9. Perform Regular Maintenance:
    • To maintain optimal performance of the automatic closing system, perform regular maintenance on your garage door and opener. Keep sensors clean and free of debris, lubricate moving parts as needed, and inspect the system for any signs of wear or malfunction.
  10. Educate Household Members:
    • Inform household members, including children and visitors, about the automatic closing feature and safety precautions to prevent accidents. Emphasize the importance of keeping clear of the garage door’s path when it’s in motion and never attempting to override or tamper with the automatic closing system.

If you encounter any difficulties during installation or programming, consult the Garage Door Repair Solon OH or seek assistance from a professional garage door technician.

Ohio Garage Door Repair

7201 Longview Dr, Solon, OH 44139

1-440-773-2246

How To Make A Garage Side Door – Ohio Garage Door Repair


Creating a side door for your Garage Door Repair Solon OH Whether you’re building a new garage or adding a side door to an existing structure,

here’s a detailed guide on how to make a garage side door:

  1. Choose a Location:
    • Determine the ideal location for the side door based on your garage layout, accessibility needs, and local building codes. Consider factors such as proximity to driveway or walkway access and interior garage layout.
  2. Obtain Necessary Permits:
    • Before beginning construction, check with your local building department to obtain any necessary permits and ensure compliance with local building codes and regulations.
  3. Gather Materials and Tools:
    • Collect the materials and tools needed for the project, including:
      • Exterior-grade door (pre-hung or slab)
      • Door frame kit or lumber for framing
      • Hinges
      • Lockset and hardware
      • Screws and nails
      • Level
      • Tape measure
      • Circular saw or miter saw
      • Drill and driver
      • Safety gear (safety glasses, gloves, etc.)
  4. Prepare the Opening:
    • Measure and mark the dimensions of the door opening on the exterior wall of the garage. Use a level to ensure the opening is plumb and square.
    • Cut away any existing siding or sheathing to create the door opening using a circular saw or reciprocating saw. Take care to follow precise measurements to ensure a proper fit for the door frame.
  5. Install the Door Frame:
    • If using a pre-hung door, follow the manufacturer’s instructions for installing the door frame. If building a door frame from scratch, assemble the frame using lumber cut to size for the header, jambs, and sill.
    • Position the door frame in the opening and use shims to ensure it is level, plumb, and square. Secure the frame in place using screws or nails driven through the frame and into the surrounding wall framing.
  6. Hang the Door:
    • If using a pre-hung door, attach the hinges to the door frame according to the manufacturer’s instructions. Hang the door in the frame and test the swing to ensure smooth operation.
    • If using a door slab, attach hinges to the door slab and then to the door frame. Ensure the door is properly aligned within the frame and swings freely.
  7. Install Lockset and Hardware:
    • Install the lockset and hardware according to the manufacturer’s instructions. This may include drilling holes for the lockset and attaching the strike plate to the door jamb.
    • Test the lockset to ensure it functions correctly and securely latches when the door is closed.
  8. Weatherproofing and Sealing:
    • Apply weatherstripping or door sweep to the bottom of the door to prevent drafts and moisture infiltration. Seal any gaps or cracks around the door frame with caulk or expanding foam insulation.
    • Install exterior trim around the door frame to provide a finished appearance and further seal the opening against the elements.
  9. Finish and Paint:
    • Sand any rough edges and apply a coat of primer to the door and door frame. Once dry, apply a finish coat of paint or stain to match the exterior of your home.
  10. Test and Adjust:
    • Test the door for proper operation, including opening, closing, and locking. Make any necessary adjustments to the hinges, latch, or strike plate to ensure a secure and functional door.


Garage Door Repair Solon OH
If you’re unsure about any aspect of the installation process, consult a qualified contractor or building professional for assistance.

Ohio Garage Door Repair

7201 Longview Dr, Solon, OH 44139

1-440-773-2246

How To Erase Liftmaster Garage Door Remote – Ohio Garage Door Repair

Garage Door Repair Solon OH have become an indispensable convenience for modern homeowners, offering quick and hassle-free access to their garage spaces. Among the leading brands in this arena, Liftmaster stands out for its reliability and advanced features.

However, there are times when it becomes necessary to erase a Liftmaster garage door remote, whether due to security reasons or when transferring ownership of a property. In this article, we’ll delve into the process of erasing Liftmaster garage door remotes, ensuring a smooth and secure transition.

Understanding Liftmaster Garage Door Remotes

Liftmaster offers a range of garage door remotes catering to different models and user preferences. These remotes typically operate via radio frequency signals, transmitting coded instructions to the garage door opener to either open or close the door. Understanding the type of remote you have and how it communicates with the opener is crucial before attempting to erase it.

Reasons for Erasing Liftmaster Garage Door Remotes

There are several reasons why you might need to erase a Liftmaster garage door remote. One common reason is security concerns. If a remote is lost or stolen, there’s a risk that unauthorized individuals could gain access to your garage and potentially your home. Additionally, when selling or disposing of a property, erasing all existing remotes ensures that previous owners or tenants no longer have access.

Steps to Erase Liftmaster Garage Door Remote

There are two primary methods for erasing a Liftmaster garage door remote:

  1. Using the “Learn” Button:
    • Locate the “Learn” button on your garage door opener, usually found near the antenna wire.
    • Press and hold the “Learn” button until the indicator light next to it turns on, indicating that it’s in programming mode.
    • Within 30 seconds, press and hold the button on the remote you wish to erase until the opener’s lights blink, signifying successful erasure.
  2. Using the “Smart” Control Panel:
    • If your garage door opener features a smart control panel, access its settings menu.
    • Navigate to the remote programming section and select the option to erase remotes.
    • Follow the on-screen instructions to complete the erasure process.

Additional Tips and Considerations

  • If you encounter any issues during the erasure process, refer to the manufacturer’s manual for troubleshooting guidance.
  • Ensure that the remote’s battery is functioning properly, as a weak or depleted battery may affect the erasure process.
  • After erasing a remote, test the garage door opener to confirm that it no longer responds to the erased remote’s commands.

Conclusion:

In conclusion, knowing how to erase a Garage Door Repair Solon OH is essential for maintaining the security of your home and property. By following the simple steps outlined in this article, you can ensure that only authorized individuals have access to your garage, providing peace of mind and security for you and your family.

Ohio Garage Door Repair

7201 Longview Dr, Solon, OH 44139

1-440-773-2246

How To Program Universal Garage Door Opener – Ohio Garage Door Repair

Programming a universal Garage Door Repair Solon OH can be a straightforward process, ensuring compatibility with a variety of garage door opener brands.

Below are detailed instructions to guide you through the programming steps, ensuring a successful setup.

: Gather Necessary Tools and Information

Before you start, ensure you have fresh batteries for your universal garage door opener remote. Identify the make and model of your garage door opener to facilitate the programming process.

: Read the Universal Remote Manual

Consult the manual that came with your universal garage door opener. Each brand may have specific instructions, and the manual is a valuable resource for accurate programming steps.

: Identify the Learn Button or DIP Switches on the Opener

Locate the “Learn” button or DIP switches on your garage door opener. The “Learn” button is common in modern openers, while older models might use DIP switches. If using DIP switches, take note of the switch positions.

: Clear Opener Memory (if needed)

If you’re reprogramming the remote or experiencing issues, clear the opener’s memory. This is usually done by holding down the “Learn” button or following specific instructions in the opener’s manual.

: Press the Learn Button or Set DIP Switches

Press the “Learn” button on the garage door opener or set the DIP switches to the desired code as per the opener’s manual. This action prepares the opener to receive signals from the universal remote.

: Prepare Universal Remote for Programming

Follow the instructions in your universal remote manual to enter programming mode. This often involves pressing and holding specific buttons until a light on the remote begins to flash.

: Program the Universal Remote

Press the button on the universal remote that you want to program for your garage door opener. Hold the button until the indicator light on the remote changes, confirming that the code has been transmitted.

: Test the Universal Remote

Test the programmed button on the universal remote to ensure it effectively opens and closes the garage door. If successful, proceed to program additional buttons for other doors or features.

: Programming Homelink (if applicable)

If your vehicle is equipped with Homelink, follow the vehicle’s manual for programming instructions. Typically, this involves pressing a button on the Homelink system and then pressing the button on the universal remote.

: Final Testing

Conduct thorough testing of all programmed buttons on the universal remote and, if applicable, the Homelink system. Ensure consistent and reliable operation by opening and closing the garage door multiple times.

: Troubleshooting

If any issues arise, check the remote’s battery, ensure it’s within range of the opener, and confirm that you are following the correct steps. Refer to the universal remote manual for troubleshooting tips or contact customer support.

: Refer to the Manuals

For model-specific details or unique features, refer to the manuals of both the universal remote and your garage door opener. These resources provide additional information and troubleshooting guidance.

By carefully following these comprehensive steps, you should be able to successfully program your universal Garage Door Repair Solon OH, providing you with convenient and versatile control over your garage door.

Ohio Garage Door Repair

7201 Longview Dr, Solon, OH 44139

1-440-773-2246

How To Reprogram Homelink Garage Door Opener – Ohio Garage Door Repair

Reprogramming a HomeLink Garage Door Repair Solon OH involves a systematic process to establish a secure and functional connection between your vehicle’s HomeLink system and the garage door opener.

Below is a comprehensive guide to help you reprogram your HomeLink garage door opener. Keep in mind that specific steps may vary based on your vehicle’s make and model, as well as the type of garage door opener you have.

1. Clear Existing HomeLink Buttons (if needed): If you are reprogramming HomeLink due to issues or changing the setup, it’s recommended to clear out any existing buttons. Press and hold the two outside HomeLink buttons until the indicator light starts flashing rapidly. This clears any existing programming.

2. Identify Your Garage Door Opener: Determine the make and model of your garage door opener. You may need this information for specific programming steps.

3. Locate the “Learn” or “Smart” Button on the Opener: Most garage door openers have a “Learn” or “Smart” button on the motor unit. Find this button, as it is crucial for programming HomeLink. The button is typically located on the back or side of the motor unit.

4. Choose a HomeLink Button: Decide which HomeLink button you want to program for your garage door. You may have up to three buttons on your HomeLink system.

5. Enter Programming Mode on HomeLink: Press and hold the desired HomeLink button and simultaneously press and hold the “Learn” or “Smart” button on the garage door opener motor unit. Hold both buttons until the HomeLink indicator light starts flashing slowly. This indicates that HomeLink is in programming mode.

6. Train HomeLink with Garage Door Opener: Hold your garage door opener remote about 1-3 inches away from the HomeLink buttons and press the button on the remote. Simultaneously, press and release the HomeLink button you are programming. Repeat this step several times until the HomeLink indicator light changes from flashing slowly to a solid or fast flash.

7. Test the HomeLink System: Press the programmed HomeLink button in your vehicle and test if it opens and closes the garage door. If successful, programming is complete.

8. Repeat for Additional Buttons (if applicable): If you have more than one HomeLink button to program, repeat the process for each additional button.

9. Security+ 2.0 Technology (if applicable): If your garage door opener uses Security+ 2.0 technology, additional steps may be required. Follow the specific instructions in your garage door opener manual for Security+ 2.0 technology.

10. Homelink Training Mode (if needed): Some garage door openers have a separate HomeLink training mode. If your opener requires this, follow the instructions in the garage door opener manual to enter training mode before programming HomeLink.

11. Troubleshooting: If the reprogramming process is unsuccessful, refer to your vehicle’s owner’s manual for HomeLink troubleshooting tips. Ensure you are following the correct procedure and that your garage door opener is compatible with HomeLink.

12. Secure HomeLink: Once successfully programmed, keep your HomeLink secure. Avoid sharing the programming information or leaving the vehicle in an easily accessible location.

13. Regular Maintenance: Periodically check and update HomeLink if you change garage door openers or remotes. Follow the same reprogramming process to ensure continued functionality.

In conclusion, reprogramming your HomeLink Garage Door Repair Solon OH involves identifying the garage door opener model, locating the “Learn” or “Smart” button, clearing existing buttons if needed, choosing a HomeLink button, entering programming mode on HomeLink, training HomeLink with the garage door opener, testing the system, repeating for additional buttons if applicable, addressing Security+ 2.0 technology if needed, entering HomeLink training mode if required, troubleshooting if necessary, securing HomeLink, and performing regular maintenance. Following these steps will help you successfully reprogram your HomeLink garage door opener for smooth and secure operation.

Ohio Garage Door Repair

7201 Longview Dr, Solon, OH 44139

1-440-773-2246

How to Change Battery in Garage Door Opener – Ohio Garage Door Repair

Here’s a step-by-step guide on how I personally change the battery in my garage door opener based from Garage Door Repair Services:

  1. First, I gather the necessary tools and equipment. I make sure to have a small flathead screwdriver or a coin, and a replacement battery that matches the required specifications of my garage door opener. It’s important to check the manufacturer’s instructions or the label on the battery compartment to ensure the correct battery type.
  2. With the tools and battery ready, I locate the battery compartment on my garage door opener. It is usually located on the back or side of the main housing unit. In some models, the battery compartment may be on the front panel. I take a moment to familiarize myself with the layout and design of the compartment.
  3. Using the small flathead screwdriver or a coin, I carefully open the battery compartment. If there is a slot for turning, I insert the coin and turn it counterclockwise to loosen the cover. If there is a small screw, I use the flathead screwdriver to remove it and lift off the cover. I set aside the cover in a safe place where it won’t get lost.
  4. Inside the battery compartment, I see the old battery. I take note of its orientation before removing it to ensure I insert the new battery correctly. If there is a small clip holding the battery in place, I release it or gently push the battery to the side to disengage it. If there is a spring mechanism, I press it down or to the side to release the battery.
  5. Once the old battery is free, I carefully remove it from the compartment, making sure not to touch any metal contacts. I set the old battery aside for proper disposal later, following the local regulations for battery disposal.
  6. Now, I take the new battery and check its polarity, ensuring it matches the correct orientation indicated in the battery compartment. If the positive (+) and negative (-) signs are labeled, I align the new battery accordingly. I insert the new battery into the compartment, making sure it fits securely.
  7. With the new battery in place, I position the cover back onto the battery compartment. If there is a screw, I insert it and use the flathead screwdriver to tighten it. If there is a slot, I align the cover and turn it clockwise until it is securely fastened. I double-check to ensure the cover is properly closed.
  8. Now it’s time to test the garage door opener with the new battery. I stand away from the door and use either the remote control or the wall-mounted control panel to operate the garage door. I press the appropriate button to open and close the door, observing its smooth operation. If the door responds well without any issues, the battery replacement was successful.
  9. Finally, I make sure to dispose of the old battery responsibly. I follow the local guidelines for battery recycling and take the old battery to a designated recycling center or a collection point. Proper disposal helps protect the environment and ensures the safe handling of hazardous materials.

By following these steps from Garage Door Repair Services, I can easily change the battery in my garage door opener, ensuring that it continues to function reliably. Regularly replacing the battery when needed helps prevent any interruptions in the operation of the garage door opener and keeps it running smoothly.

Ohio Garage Door Repair

7201 Longview Dr, Solon, OH 44139

440-773-2246

Powered by WordPress & Theme by Anders Norén