The Largest Business Blog in Texas

Tag: garage door repair Grapevine TX Page 1 of 2

How Much To Install A Garage Door – Grapevine Garage Door & Gates

Garage Door Repair Grapevine TX can vary widely depending on several factors, including the type of door, its size, material, insulation, design, additional features, labor costs, and any necessary modifications to the garage structure.

While I can’t provide an exact quote, I can offer a comprehensive overview of the factors that influence the cost of garage door installation and provide guidance on what to consider when budgeting for this project.

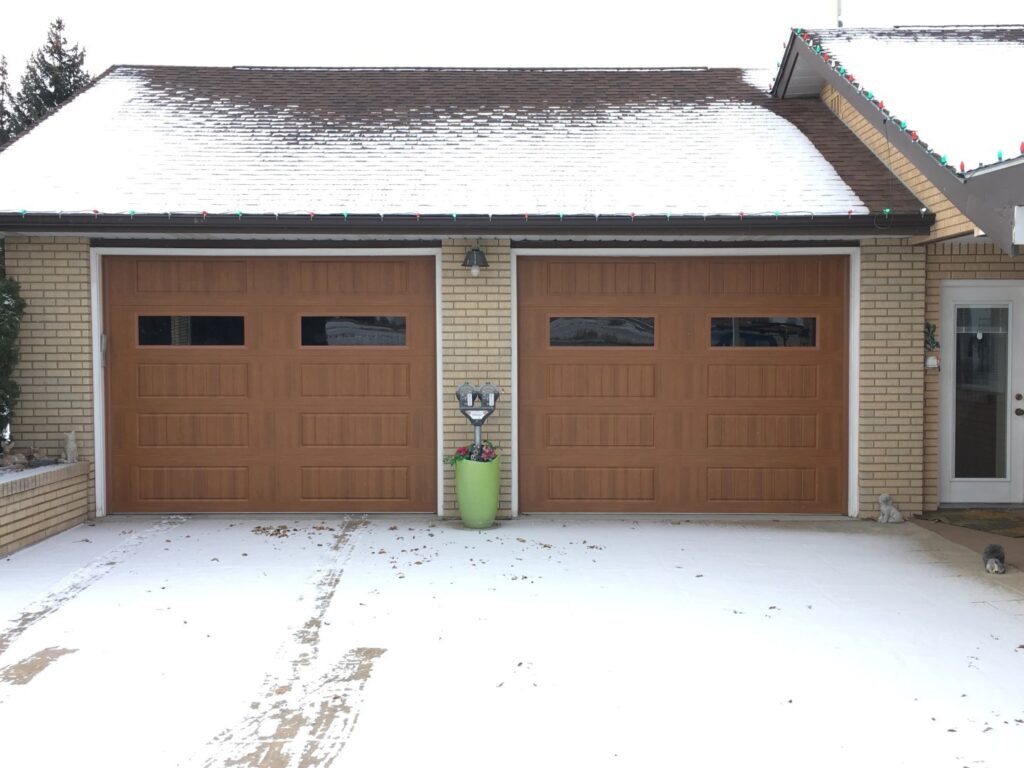
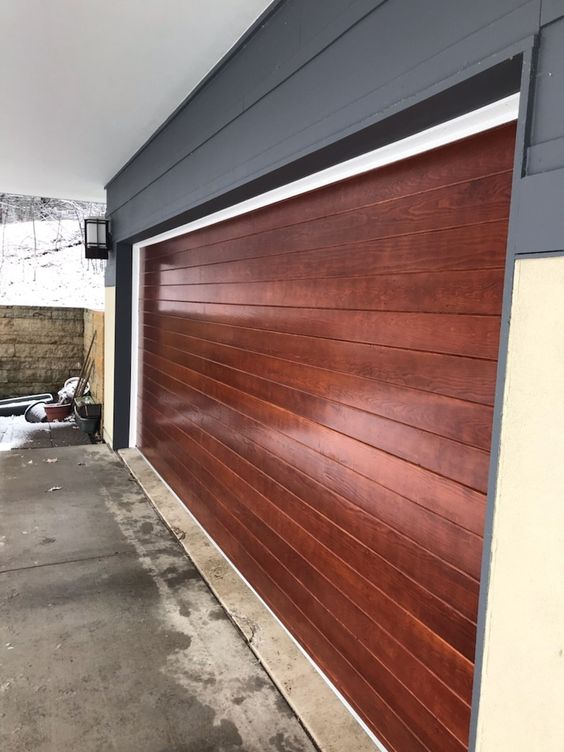
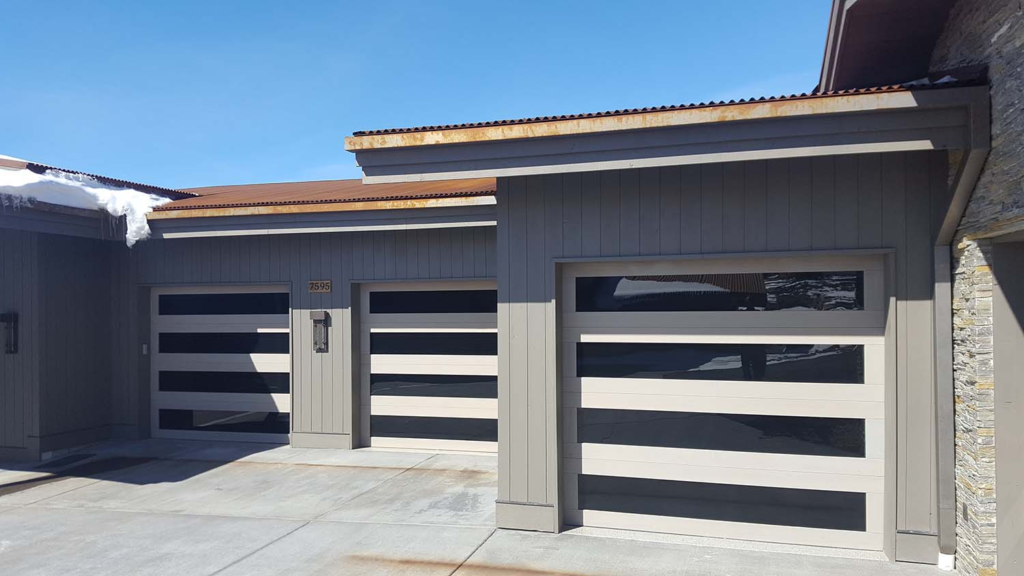
  1. Type of Garage Door: There are several types of garage doors available, including sectional, roll-up, slide-to-side, and side-hinged doors. Sectional doors, which are comprised of horizontal panels that slide up and overhead, are the most common type and typically the most affordable. Roll-up doors, which coil into a compact drum above the opening, are often used in commercial settings but can also be installed in residential garages. Slide-to-side and side-hinged doors offer unique opening mechanisms and design options but may be more expensive to install.
  2. Size of the Door: The size of the garage door opening will impact the cost of installation. Standard residential garage doors typically range in width from 8 to 18 feet and in height from 7 to 8 feet, although custom sizes are available for larger or non-standard openings. Larger doors require more material and labor to install, which can increase the overall cost of the project.
  3. Material and Insulation: Garage doors are available in a variety of materials, including steel, aluminum, wood, vinyl, and fiberglass. Each material has its own advantages and price points, with steel being the most popular choice for its durability and affordability. Insulated garage doors, which feature a layer of foam or other insulation material sandwiched between metal panels, offer improved energy efficiency and noise reduction but may come at a higher cost compared to non-insulated doors.
  4. Design and Style: Garage doors come in a wide range of designs and styles to complement different architectural aesthetics and personal preferences. Traditional raised-panel doors, contemporary flush-panel doors, and carriage-style doors are among the most popular options. Decorative hardware, windows, and custom finishes can also add to the overall cost of the door.
  5. Additional Features and Accessories: Various additional features and accessories can enhance the functionality and appearance of a garage door but may increase the total cost of installation. These features may include remote-controlled operation, keyless entry systems, battery backup systems, Wi-Fi connectivity for smartphone control, motion-activated lighting, and automatic garage door openers with safety sensors and security features.
  6. Labor Costs: Labor costs for garage door installation can vary depending on the complexity of the project, local labor rates, and the experience level of the installer. Professional installation is recommended to ensure proper fit, alignment, and operation of the door, as well as compliance with local building codes and safety standards. Some companies may offer installation as part of a package deal when purchasing a new garage door, while others may charge a separate fee for installation services.
  7. Modifications and Repairs: If the garage opening requires modifications or repairs to accommodate the new door, such as framing adjustments, electrical wiring for opener installation, or removal of an existing door, these additional tasks will add to the overall cost of the project. It’s essential to factor in any necessary modifications or repairs when budgeting for garage door installation.
  8. Warranty and Maintenance: Consider the warranty and maintenance requirements associated with the garage door and opener. Many manufacturers offer warranties ranging from one to ten years or more, covering defects in materials and workmanship. Regular maintenance, such as lubrication, tightening of hardware, and periodic inspections, can help extend the lifespan of the door and prevent costly repairs down the road.

When budgeting for garage door installation, it’s essential to consider all of these factors and obtain quotes from multiple reputable contractors or garage door companies in your area. By comparing prices, evaluating the features and options available, and choosing a qualified installer, you can ensure a successful and cost-effective garage door installation that meets your needs and budget.

Grapevine Garage Door & Gates

1-817-809-2507

How Do I Reset My Genie Garage Door Opener – Grapevine Gates & Garage Doors

Resetting your Grapevine Garage Door Repair is a straightforward process that typically involves clearing the existing programming and setting it up again.

Follow these detailed steps to ensure a successful reset:

  1. Locate the Reset Button: Find the “Learn Code” button on your garage door opener. This button is usually located on the motor unit.
  2. Clear Existing Programming: Press and hold the “Learn Code” button until the LED light on the motor unit turns off. This action erases all existing codes.
  3. Prepare Remote Control: Make sure you have the remote control for your garage door opener. If you have multiple remotes, gather them all.
  4. Press Learn Code Button Again: After releasing the “Learn Code” button, quickly press it again. The LED light on the motor unit should start blinking.
  5. Program Remote Control: Within 30 seconds of pressing the “Learn Code” button, press the button on your remote control that you want to use for your garage door. Hold it until the LED light on the motor unit flashes or the garage door moves.
  6. Repeat for Additional Remotes: If you have multiple remotes, repeat the process for each one. The opener can typically store multiple remote codes.
  7. Test the Remote: Stand at a reasonable distance from the garage door and test each remote to ensure they open and close the door smoothly.
  8. Keypad Programming (Optional): If your Genie garage door opener has a keypad, follow the manufacturer’s instructions to reset and program it.
  9. Verify Safety Sensors: Ensure that the safety sensors at the bottom of the garage door tracks are aligned properly. They should have a clear line of sight.
  10. Adjust Travel Limits (if needed): If your garage door doesn’t open or close completely, you may need to adjust the travel limits. Refer to your Genie opener’s manual for instructions on how to do this.
  11. Final Testing: Perform a final test of the entire system to make sure everything is working as expected.
  12. Consult the Manual: If you encounter any issues or if your Genie model has specific instructions, refer to the user manual for detailed information.

Remember, the steps might vary slightly based on the specific model of your Grapevine Garage Door Repair, so always consult the user manual for accurate and model-specific instructions.

Grapevine Gates & Garage Doors

601 W Wall St, Grapevine, TX 76051

817-790-9634

How To Remove Chamberlain Garage Door Opener Wall Button – Grapevine Gates & Garage Doors

Removing the Chamberlain Garage Door Repair Grapevine TX is a relatively simple task that can be accomplished with just a few steps.

Follow these instructions carefully to ensure a smooth removal process:

  1. Prepare for the Task: Before you start, make sure to disconnect the power to the garage door opener to ensure safety during the removal process. Locate the circuit breaker or power source for the garage door opener and turn it off.
  2. Gather Necessary Tools: You’ll need a few basic tools for this task, including a flat-head screwdriver and a pair of pliers. Ensure that you have these tools readily available.
  3. Identify the Wall Button Type: Chamberlain garage door openers may have different types of wall buttons. Some are directly mounted on the wall, while others might be attached to a mounting bracket. Identify the type of wall button you have before proceeding.
  4. Removing a Directly Mounted Wall Button:
    • Use the flat-head screwdriver to carefully pry off the wall button cover. Insert the screwdriver into the slot or groove on the side of the button and gently pry it off.
    • Once the cover is removed, you should see the screws holding the wall button in place.
    • Use the screwdriver to remove these screws, and the wall button should come off easily.
  5. Removing a Wall Button Attached to a Bracket:
    • If your wall button is attached to a mounting bracket, locate the bracket screws.
    • Use the screwdriver to remove the screws securing the bracket to the wall.
    • Once the bracket is removed, you can access the screws holding the wall button in place.
    • Remove these screws to detach the wall button.
  6. Disconnecting Wires:
    • After removing the wall button, you’ll likely find wires connected to it.
    • Use the pliers to gently disconnect the wires from the terminals on the back of the wall button. Take note of the wire colors or label them for reinstallation.
  7. Secure Loose Wires:
    • To prevent any accidents or damage, secure the loose wires using electrical tape or wire connectors.
  8. Patch Any Holes:
    • If there are holes left in the wall from the removed wall button, patch them up with spackle or a wall repair kit.
  9. Reconnect Power:
    • Once the wall button is successfully removed and any necessary repairs are made, reconnect the power to the garage door opener.
  10. Test the Garage Door Opener:
    • Test the garage door opener to ensure that it functions properly without the wall button.

By following these step-by-step instructions, you should be able to remove the Chamberlain Garage Door Repair Grapevine TX safely and efficiently. If you encounter any difficulties or have specific model-related concerns, refer to the manufacturer’s manual or seek professional assistance.

Grapevine Gates & Garage Doors

817-631-6355

How To Close In A Garage Door Opening – Grapevine’s Maid Pros

Closing in a  Garage Door Repair Grapevine TX is a task that requires careful consideration and planning. Whether you’re converting the space into a living area, a home gym, or simply sealing it off for added security, the process involves several steps. Let’s delve into a comprehensive guide that covers the key aspects of closing in a garage door opening.

Garage Door Repair

1. Assessing the Structure: Before you begin, thoroughly inspect the existing garage door structure. Note any electrical wiring, plumbing, or structural elements that might be impacted by the closure. It’s crucial to ensure that your modifications comply with local building codes and regulations.

2. Remove the Garage Door: Start by disconnecting the garage door opener and removing the door. This typically involves releasing the tension on the torsion spring, disconnecting the door from the opener, and carefully lifting it out of the tracks. Enlist the help of others to avoid accidents, as garage doors can be heavy.

3. Framing the Opening: With the door removed, you’ll need to frame the opening to prepare it for closure. Use pressure-treated lumber for framing to prevent moisture damage. Install studs, headers, and sills to create a sturdy framework. Ensure that the framing is level and plumb to provide a solid foundation for the closure.

4. Insulation and Vapor Barrier: Enhance the energy efficiency of the closed-in space by installing insulation within the framing. Choose insulation with an appropriate R-value for your climate. Additionally, include a vapor barrier to prevent moisture from seeping into the enclosed area. This step is essential for maintaining a comfortable and dry environment.

5. Exterior Finishing: Apply exterior siding or sheathing to the framed structure. This not only enhances the visual appeal of the closed-in space but also provides protection against the elements. Choose materials that complement the existing exterior of your home for a cohesive look.

6. Interior Finishing: Finish the interior with drywall or other suitable materials. Tape and mud the seams, and paint or finish the walls according to your design preferences. Consider adding additional electrical outlets and lighting fixtures to accommodate the new use of the space.

7. Windows and Doors: If your closed-in space requires natural light, consider installing windows. Choose energy-efficient windows that match the style of your home. Install an exterior door that complements the overall design and provides a secure entry point. Ensure that both windows and doors are properly sealed to prevent drafts.

8. Flooring: Select flooring materials that suit the function of the closed-in space. Options include laminate, hardwood, tile, or carpet. Ensure that the flooring is installed correctly and is level for a polished and professional finish.

9. HVAC Considerations: If you plan to use the closed-in space for living or working, assess the heating, ventilation, and air conditioning (HVAC) needs. Extend existing HVAC systems or install independent units to maintain a comfortable indoor environment.

10. Finishing Touches: Complete the project with finishing touches such as baseboards, trim, and any additional features specific to your intended use of the space. Pay attention to details to achieve a polished and seamless integration with the rest of your home.

Conclusion: Closing in a  Garage Door Repair Grapevine TX involves a series of careful steps, from initial assessment to the finishing touches. By following this comprehensive guide, you can transform your garage into a functional and attractive space that adds value to your home. Always consult with professionals when needed, and ensure that your modifications comply with local building codes and regulations.

Grapevine’s Maid Pros

1527 W State Hwy 114, Grapevine, TX 76051, United States

1-817-442-2239

How To Align A Garage Door Sensor – Grapevine Gates & Garage Doors

Aligning  Garage Door Repair Grapevine TX sensors is a crucial task to ensure the proper functioning and safety of your garage door. Misaligned sensors can prevent the door from closing or cause it to reverse unexpectedly. Follow these detailed steps to align your garage door sensors

effectively.

: Understand the Basics

Before you start aligning the sensors, it’s essential to understand their basic components. Garage door sensors typically consist of two units—one on each side of the door. These sensors transmit an invisible beam of light between them. When this beam is interrupted, it signals the garage door to stop closing or to reverse its direction.

: Inspect for Obstructions

Begin by inspecting the area around each sensor. Clear away any debris, dirt, or spider webs that might be obstructing the sensors. Make sure there are no physical obstacles blocking the path between the two units.

: Check Sensor Alignment

Look at the alignment of each sensor. They should be facing each other directly and be perfectly level. Use a level tool to ensure that both sensors are at the same height. If they are misaligned, it can cause issues with the signal transmission.

: Adjust Sensor Brackets

Most sensors are attached to adjustable brackets. Loosen the screws holding the brackets in place and gently adjust the sensors until they are facing each other squarely. Use a level again to make sure they are perfectly aligned both horizontally and vertically.

: Tighten Brackets

Once you’ve aligned the sensors correctly, tighten the screws on the brackets securely. This ensures that the sensors stay in place and maintain their alignment over time. Be cautious not to over-tighten, as this could affect the alignment.

: Test the Alignment

After making adjustments, it’s crucial to test the alignment. Open and close the garage door to see if it operates smoothly without any interruptions. If the door still has issues closing, recheck the alignment and make further adjustments if necessary.

: Check Wiring Connections

Inspect the wiring connections for each sensor. Ensure that the wires are securely connected to the sensors and are not damaged. Faulty wiring can also cause sensor issues, so it’s essential to address any issues with the wiring.

: Clean Sensor Lenses

Even if the sensors appear clean, it’s a good practice to clean their lenses with a soft, dry cloth. Dust or smudges on the lenses can interfere with the beam of light. Regular cleaning helps maintain optimal sensor performance.

: Consider Environmental Factors

Evaluate the environment around your garage door. Direct sunlight, reflective surfaces, or other sources of infrared interference can affect sensor performance. If needed, consider using shields or shades to protect the sensors from external interference.

: Consult the Manual

If you’re still experiencing issues after following these steps, consult the manufacturer’s manual for specific guidance. It may provide additional troubleshooting steps or information on common issues related to your particular garage door sensor model.

In conclusion, aligning  Garage Door Repair Grapevine TX sensors is a relatively simple process that can prevent major issues with your garage door’s operation. Regular maintenance and attention to detail ensure that the sensors function correctly, providing a safe and efficient garage door system.

Grapevine Gates & Garage Doors

817-631-6355

How To Install Garage Doors Youtube – Grapevine’s Best Garage Doors

Installing a Garage Door Repair Grapevine TX is a complex and potentially dangerous task that requires careful planning and expertise.

It’s strongly recommended that you consult the manufacturer’s installation instructions and consider hiring a professional if you’re not experienced with this type of project. However, I can provide you with a basic overview of the steps involved in installing a garage door in or less.

This guide is for informational purposes only and does not replace the manufacturer’s instructions or professional advice. Garage door installation can be hazardous, and any mistakes can lead to injury or damage. Proceed with caution and consult with a professional if needed.

Tools and Materials You’ll Need:

  • Garage door and track system
  • Garage door opener (if applicable)
  • Mounting hardware
  • Power drill
  • Screwdriver
  • Level
  • Wrenches
  • Measuring tape
  • Sawhorses
  • Safety glasses
  • Gloves

: Preparation Before you start, ensure you have all the necessary tools and materials. Review the manufacturer’s instructions and safety guidelines thoroughly.

: Remove the Old Door (If Applicable) If there’s an existing garage door, you’ll need to remove it carefully. Disconnect the opener, if any, and unbolt the door from the track. Carefully lower the door to the ground, preferably with the help of a friend.

: Assemble the Track Begin by assembling the horizontal and vertical track sections according to the manufacturer’s instructions. Use a level to ensure they are plumb and straight. Attach angle brackets to the vertical track and secure them to the wall.

: Install the Rollers Attach the rollers to the garage door panels as per the manufacturer’s instructions. These rollers will run along the horizontal tracks.

: Attach the Hinges Install the hinges onto the garage door sections. Typically, there are multiple hinge points along each section. Ensure they are properly aligned and securely fastened.

: Install the Bottom Seal Attach the bottom seal to the bottom of the door to help with weatherproofing. Trim any excess seal as needed.

: Hang the Door With the help of a friend, lift the garage door into place. Insert the rollers into the horizontal tracks and ensure the door is level. Secure the horizontal track to the wall using appropriate fasteners.

: Install the Springs Install the torsion or extension springs according to the manufacturer’s instructions. These springs counterbalance the weight of the door and are under high tension. Exercise extreme caution during this step and consider hiring a professional if you’re unsure.

: Attach the Cables Attach the lifting cables to the bottom of the door and thread them through the pulleys and springs. Ensure the cables are properly tensioned and secure.

: Install the Opener (If Applicable) If you’re installing a garage door opener, follow the manufacturer’s instructions to mount the opener to the ceiling and connect it to the door. This may involve setting up the motor unit, drive system, and safety sensors.

: Test the Door Before fully securing everything, test the garage door to ensure it opens and closes smoothly. Check for any alignment or balance issues. Adjust the springs and cables as needed.

: Secure the Door Once you’re satisfied with the door’s operation, secure all mounting brackets, tracks, and other hardware. Make sure everything is properly tightened.

: Install Weatherstripping Apply weatherstripping around the sides and top of the door to prevent drafts and moisture infiltration.

: Connect the Opener to Power If you installed a garage door opener, connect it to a power source following the manufacturer’s instructions.

: Program the Opener (If Applicable) If your garage door opener has remote controls, program them according to the manufacturer’s instructions.

: Test the Opener Test the opener to ensure it operates smoothly and that safety features, such as the automatic reversal system, work correctly.

: Final Checks Inspect the entire installation for any loose hardware, misalignments, or safety concerns. Make any necessary adjustments or repairs.

: Clean Up Remove any debris and tools from the work area. Dispose of old garage door components properly.

: Safety First Review safety precautions with all household members who will be using the garage door. Emphasize the importance of proper operation and safety features.

: Regular Maintenance Regularly inspect and maintain your garage door to ensure it operates smoothly and safely. Lubricate moving parts as recommended by the manufacturer.

Remember that this is a general overview of Garage Door Repair Grapevine TX. The specific steps may vary depending on the type and brand of the door you’re installing. Always refer to the manufacturer’s instructions for the most accurate guidance, and if you’re not comfortable with any aspect of the installation, consider hiring a professional installer to ensure safety and proper operation.

Grapevine’s Best Garage Doors

820 Kings Canyon Dr, Grapevine, TX 76051, United States

1-817-790-9634

Broken Garage Door Spring? Steps to Handle the Situation – Grapevine Gates & Garage Doors

As a homeowner who has experienced the unexpected challenges of maintaining a property, one of the most frustrating and perplexing issues I’ve encountered is a broken garage door spring. It’s a problem that can disrupt your daily routine and leave you wondering how to address it.

In this article, I’ll share my personal experience and provide valuable insights into the steps to handle a broken garage door spring effectively according to Garage Door Repair Grapevine TX.

The Surprise of a Broken Garage Door Spring

It was a typical morning, and I was preparing to leave for work. As I pressed the button to open my garage door, I heard an unusual and unsettling noise—a loud bang followed by a sudden halt in the door’s movement. I knew something was seriously wrong. I cautiously approached the garage and saw that one of the springs had snapped, rendering the door inoperable. My initial reaction was one of frustration and concern, but I soon realized that I needed to take specific steps to address the situation.

Understanding the Role of Garage Door Springs

Before delving into the steps to handle a broken garage door spring, it’s essential to understand the critical role these springs play in the operation of your garage door. Most garage doors use one of two types of springs:

1. Torsion Springs:

Torsion springs are typically mounted horizontally above the garage door. They store energy when the door is in the closed position and release it to assist in lifting the door when you open it.

2. Extension Springs:

Extension springs are installed vertically on either side of the garage door. They stretch and contract to support the weight of the door as it opens and closes.

Both types of springs are under significant tension and are essential for balancing the garage door’s weight. When one of these springs breaks, it can disrupt the door’s balance and functionality.

Steps to Handle a Broken Garage Door Spring

Dealing with a broken garage door spring can be daunting, but taking the right steps can help you address the situation safely and effectively. Here’s a comprehensive guide:

1. Disengage the Garage Door Opener:

The first and most crucial step is to disengage the garage door opener. This prevents the opener from attempting to lift the heavy door, which can cause further damage and safety hazards.

2. Ensure Safety:

Broken garage door springs can release a significant amount of tension, potentially causing injury or damage. Ensure that everyone, including children and pets, stays away from the area until the issue is resolved.

3. Close the Door Manually:

If the garage door is in the open position, it’s essential to close it manually. You may need assistance, as a garage door can be heavy without the support of functioning springs. Use caution and avoid placing your hands or fingers near moving parts.

4. Secure the Door:

Once the door is closed, secure it in place. Use locking pliers or C-clamps to prevent it from accidentally opening while you work on the springs.

5. Identify the Broken Spring:

Examine the garage door springs to identify the one that has broken. Typically, it’s the spring that has a visible gap or appears to be separated.

6. Replace Both Springs (Recommended):

It’s often recommended to replace both garage door springs, even if only one is broken. This ensures that both springs have similar levels of tension and helps prevent future imbalances.

7. Measure the Springs:

To order the correct replacement springs, you’ll need to measure the length, wire diameter, and inside diameter of the broken spring. It’s essential to be accurate in your measurements to ensure a proper fit.

8. Order Replacement Springs:

Once you have the measurements, order the replacement springs from a reputable garage door parts supplier. It’s advisable to consult a professional technician or the manufacturer’s recommendations to ensure you get the right springs for your specific door.

9. Gather the Necessary Tools:

You’ll need specific tools to replace the garage door springs, including winding bars, a socket wrench, and safety glasses. Make sure you have these tools on hand before starting the replacement process.

10. Seek Professional Help (Optional):

While some experienced DIYers may attempt to replace garage door springs themselves, it’s a task that can be dangerous if not done correctly. Consider seeking the assistance of a professional garage door technician, especially if you’re not confident in your abilities or lack the necessary tools.

11. Follow Safety Procedures:

If you decide to replace the springs yourself, follow strict safety procedures. Ensure that the winding bars are correctly inserted into the winding cones, and wear safety glasses to protect your eyes from potential spring tension release.

12. Install the Replacement Springs:

Carefully remove the old, broken springs and install the new ones according to the manufacturer’s instructions. This process requires precision and attention to detail.

13. Test the Door:

After installing the replacement springs, carefully remove the securing clamps or pliers and test the garage door’s functionality. Ensure that it opens and closes smoothly without any imbalance or unusual noises.

14. Lubricate Moving Parts:

Lubricate all moving parts, including rollers, hinges, and tracks, to ensure smooth operation and extend the life of the springs and other components.

15. Regular Maintenance:

To prevent future issues, schedule regular maintenance for your garage door, including inspections and lubrication. Address any wear or damage promptly to avoid costly repairs.

Conclusion: Restoring Functionality and Safety

Overall, based from Garage Door Repair Grapevine TX, handling a broken garage door spring can be a challenging task, but by following the steps outlined above, you can address the situation safely and effectively. Remember that safety should always be a top priority, and if you’re unsure about your ability to replace the springs yourself, seeking professional assistance is a wise choice. A fully functional garage door not only provides convenience but also enhances the security and curb appeal of your home, making it well worth the effort to ensure it operates smoothly and safely.

Grapevine Gates & Garage Doors

601 W Wall St, Grapevine, TX 76051, United States

817-631-6355

How to Change Garage Door Opener Code – Grapevine Gates & Garage Doors

Changing the code on your Garage Door Repair Grapevine, TX opener is an important security measure to ensure the safety of your home.

A new code prevents unauthorized access to your garage, protecting your property and belongings.

Step 1: Gather Materials Before you begin, make sure you have the following materials and tools ready:

  1. Ladder
  2. Screwdriver (Phillips and flathead)
  3. New remote control or keypad (if necessary)
  4. Your garage door opener’s user manual (helpful for reference)
  5. Safety glasses (optional but recommended)

Step 2: Disable Power To ensure safety during the process, disconnect the power to your garage door opener. You can do this by unplugging it from the electrical outlet or turning off the circuit breaker that supplies power to the garage.

Step 3: Locate the Control Panel Every garage door opener has a control panel. This panel is typically located on the ceiling near the center of the garage. Use a ladder to reach it safely. If you can’t find the control panel, refer to your garage door opener’s user manual for specific guidance.

Step 4: Open the Control Panel Most control panels have a cover that can be removed with a screwdriver. Carefully remove the cover to access the controls inside.

Step 5: Locate the Learn Button Inside the control panel, you’ll find a “Learn” or “Program” button. This button is usually a small, colored button, often red, purple, or yellow. It may be labeled as such or simply have a picture of a padlock.

Step 6: Clear Existing Codes To start fresh, it’s essential to clear any existing codes from your garage door opener. Press and hold the “Learn” button for about 10 seconds until the indicator light on the opener blinks, usually indicating that the memory is cleared. Refer to your user manual if your opener has different instructions for this step.

Step 7: Choose a New Code Now it’s time to select a new code. If you’re using a remote control or keypad, refer to their respective manuals for instructions on how to program them with a new code. If you’re using the control panel itself, proceed to the next step.

Step 8: Set the New Code on the Control Panel Use the control panel to input your new code. This typically involves pressing a series of buttons or using a keypad to enter the desired code. Follow the instructions in your user manual or on the control panel itself.

Step 9: Test the New Code Before closing the control panel, test the new code to ensure it works. Press the new code on your remote control, keypad, or control panel and check if the garage door opener responds by opening or closing the door.

Step 10: Replace the Control Panel Cover If the new code works correctly, replace the cover on the control panel and secure it with the screws you removed earlier.

Step 11: Restore Power Turn the power back on by either plugging the garage door opener back in or flipping the circuit breaker switch.

Step 12: Program Remotes and Keypads (if necessary) If you’ve changed the code on the garage door opener, you’ll also need to reprogram any remote controls or keypads that you use to access the garage. Refer to the user manuals for these devices for specific instructions on how to pair them with the new code. This typically involves pressing a button on the remote or keypad and then entering the new code.

Step 13: Test All Remotes and Keypads After programming, test all remotes and keypads to make sure they work with the new code. Stand inside the garage and use each device to open and close the garage door.

Step 14: Update Access Information If you’ve shared your old code with family members or trusted individuals, be sure to inform them of the new code. This step is crucial to ensure that everyone who needs access to the garage is aware of the change.

Step 15: Keep a Record It’s a good practice to keep a record of your new garage door opener code in a safe and secure place. This will come in handy in case you forget the code in the future.

Step 16: Regularly Change the Code For added security, consider changing your garage door opener code periodically. This helps prevent unauthorized access, especially if someone who knows the old code should no longer have access.

Step 17: Consult Professional Help If you encounter any issues during this process or if you’re unsure about any steps, don’t hesitate to consult a professional garage door technician. They can assist you in changing the code and ensure everything is functioning correctly.

Changing your Garage Door Repair Grapevine, TX opener code is a relatively simple process that enhances the security of your home. Following these steps carefully will help you accomplish this task effectively. Always prioritize safety when working with garage door openers and electrical systems, and consult a professional if you encounter any difficulties.

Grapevine Gates & Garage Doors

601 W Wall St, Grapevine, TX 76051, United States

1-817-631-6355

How To Open Garage Door With No Electricity – Grapevine Gates & Garage Doors

Opening a Garage Door Repair Grapevine TX without electricity is possible, although it requires some manual effort and the right tools. Whether you’re facing a power outage or your automatic garage door opener is malfunctioning, being able to manually open the door is important for maintaining access to your garage.

Here’s a comprehensive guide on how to open a garage door with no electricity:

Step 1: Gather Your Tools and Materials

Before you begin, gather the necessary tools and materials:

Tools:

  • Stepladder or stool
  • Emergency release cord (usually red with a handle)
  • Wrenches (adjustable or open-end)
  • Safety glasses

Materials:

  • Lubricant (silicone-based or garage door-specific)

Step 2: Identify the Emergency Release Cord

  1. Locate the Cord: The emergency release cord is typically a red cord with a handle that hangs from the trolley connected to the garage door opener carriage.

Step 3: Disengage the Automatic Opener

  1. Open the Door: If the garage door is closed, lift it slightly using your hands to take the pressure off the trolley and carriage.
  2. Lift the Door: Use a stepladder to reach the emergency release cord. Pull the cord down and toward the door to disengage the opener’s carriage from the door.
  3. Check for Disengagement: Gently lift the garage door a few inches to ensure that the door is disconnected from the automatic opener. The door should move easily without resistance.

Step 4: Lift the Door Manually

  1. Lift the Door: With the door disengaged, lift the garage door manually using both hands. Keep a firm grip on the bottom of the door as you lift.
  2. Use Your Legs: Lift with your legs, not your back, to prevent strain or injury.

Step 5: Secure the Door

  1. Hold the Door: While the door is open, use one hand to hold the bottom of the door to prevent it from closing unexpectedly.
  2. Prop the Door: If needed, use a piece of wood or another sturdy object to prop the door open while you work inside the garage.

Step 6: Inspect and Lubricate

  1. Inspect Moving Parts: While the door is open, inspect the tracks, rollers, hinges, and springs for any signs of wear, rust, or damage.
  2. Lubricate: If possible, apply a small amount of lubricant to the moving parts, such as the rollers and hinges, to ensure smoother operation.

Step 7: To Close the Door

  1. Lower the Door: When you’re ready to close the garage door, carefully lower it by hand. Make sure there are no obstructions in the door’s path.
  2. Re-engage the Opener: After the power is restored or your opener is functioning again, re-engage the automatic opener by pulling the emergency release cord back toward the opener until it clicks into place.

Step 8: Regular Maintenance

  1. Maintain Moving Parts: Perform regular maintenance on the moving parts of your garage door, such as lubrication and visual inspections, to ensure smooth operation.

Step 9: Safety Precautions

  1. Safety Gear: Always wear safety glasses and exercise caution when manually operating the garage door.
  2. Beware of Springs: Torsion springs are under high tension and can be dangerous. Avoid touching or attempting to adjust the springs.

In conclusion, opening a Garage Door Repair Grapevine TX without electricity involves disengaging the automatic opener using the emergency release cord and lifting the door manually. By following these steps and taking the necessary safety precautions, you can continue to access your garage even during power outages or when the opener is not functioning. Remember that proper maintenance of your garage door system is essential for its reliable and safe operation.

Grapevine Gates & Garage Doors

601 W Wall St, Grapevine, TX 76051, United States

1-817-631-6355

From Selection to Installation: The Comprehensive Guide to Hiring Garage Door Professionals – Grapevine Gates & Garage Doors

When I embarked on the journey of hiring a garage door professional, I quickly realized that there’s a lot more to the process than meets the eye. The garage door is a crucial part of my home’s functionality and appearance, so I wanted to ensure that I made the right choice from start to finish.

Here’s my comprehensive guide from Garage Door Repair Grapevine TX to hiring garage door professionals, taking you through each step of the process.

1. Assessing My Needs

Before I even began my search for a garage door professional, I took the time to assess my needs. Did I need a complete door replacement, repairs, or just some maintenance? I made a list of specific issues I had noticed with my garage door’s performance, which helped me communicate effectively with potential professionals later on.

2. Researching and Shortlisting Professionals

I started my search by asking friends and family for recommendations and browsing through online platforms. Local directories also proved to be useful in finding professionals in my area. As I researched, I paid close attention to their reputation, customer reviews, and past projects to create a shortlist of potential candidates.

3. Checking Credentials

One aspect that I knew was crucial from the start was checking credentials. I made sure to verify their licensing and insurance to ensure they were qualified and covered in case of any accidents. This step gave me peace of mind knowing that I was dealing with professionals who met legal requirements.

4. Requesting Quotes

With my shortlist in hand, I reached out to each professional and requested detailed quotes for my project. I learned that a comprehensive quote should outline everything, from material costs to labor and any additional fees. It was important for me to remember that the lowest quote might not always be the best option – quality matters.

5. Conducting Interviews and Consultations

I narrowed down my list further by conducting interviews and consultations with a few of the professionals. This was a chance for me to discuss my project in detail, ask questions about their experience, and get a sense of their communication style. These interactions helped me get a feel for their professionalism and how well we could work together.

6. Reviewing Portfolios

I requested portfolios from the remaining professionals to get a sense of their previous work. Looking through their past projects allowed me to see their craftsmanship and whether their style aligned with what I had in mind. It gave me confidence in their ability to handle my project.

7. Seeking References

References played a big role in my decision-making process. I reached out to past clients to hear about their experiences working with the professionals. This step provided valuable insights into their overall satisfaction, communication skills, and whether they delivered on their promises.

8. Making My Decision

After gathering all the information, I took my time to evaluate each professional based on their credentials, quotes, consultations, portfolios, and references. I weighed the overall value they offered rather than just the cost. It was important for me to choose a garage door professional who aligned with my needs and inspired trust.

9. Project Planning and Agreement

Once I had made my decision, I ensured that all the project details and expectations were outlined in a written agreement. This agreement included the scope of work, materials, timeline, payment schedule, and any warranties. Reviewing and signing the agreement provided clarity and prevented any misunderstandings.

10. Overseeing the Installation

Throughout the installation process, I maintained open communication with the garage door professional. I regularly checked in on the progress and addressed any concerns immediately. This approach ensured that I was informed every step of the way and allowed for adjustments if needed.

11. Quality Assurance and Follow-Up

After the installation was complete, I conducted a thorough inspection to ensure that the work met my expectations. I tested the garage door’s functionality and addressed any issues promptly. Reputable professionals take pride in their work and are committed to ensuring customer satisfaction.

12. Ongoing Maintenance and Care

With my new garage door in place, I discussed a maintenance plan with the professional. Regular maintenance is essential to prolonging the door’s lifespan and preventing future problems. Following their recommendations for maintenance tasks helps keep the garage door operating smoothly.

In summary, as stated from Garage Door Repair Grapevine TX, hiring a garage door professional was a journey that required careful consideration and research. From assessing my needs and researching professionals to overseeing the installation and planning for ongoing maintenance, each step played a critical role in the success of my project. By following this comprehensive guide, I was able to make an informed decision and collaborate with a qualified and trustworthy garage door professional who enhanced my home’s functionality, security, and curb appeal.

Grapevine Gates & Garage Doors

601 W Wall St, Grapevine, TX 76051, United States

817-6316355

Page 1 of 2

Powered by WordPress & Theme by Anders Norén