The Largest Business Blog in Texas

Tag: Garage Door Repair Forth Worth TX

How To Reset Universal Garage Door Opener – Tarrant County Door & Gate


Garage Door Repair Forth Worth TX While the exact steps may vary depending on the brand and model of the universal remote, the general process remains similar across most devices.

In this guide, we’ll provide you with a comprehensive step-by-step approach to reset a universal garage door opener

Materials You’ll Need:

  1. Universal garage door opener remote
  2. Owner’s manual for the universal remote
  3. Ladder (if needed to access the garage door opener)

Step-by-Step Guide:

Step 1: Clear the Memory of the Universal Remote:

  1. Locate the “Reset” or “Learn” button on the universal garage door opener remote. This button is typically found inside the battery compartment or on the back of the remote.
  2. Press and hold the “Reset” or “Learn” button for approximately 10-15 seconds until the LED indicator light on the remote blinks rapidly. This action clears the existing programming from the remote’s memory, preparing it for reprogramming.

Step 2: Access the Garage Door Opener:

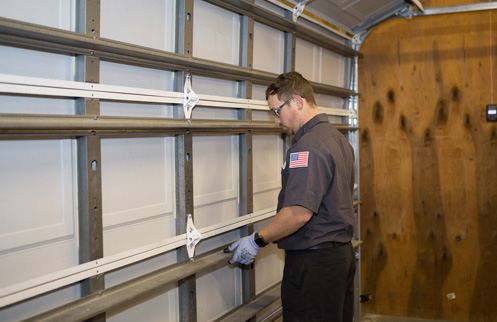
  1. Use a ladder if necessary to access the garage door opener motor unit, typically located in the ceiling of your garage. Ensure the ladder is stable and securely positioned before climbing.

Step 3: Locate the “Learn” or “Program” Button on the Garage Door Opener:

  1. Find the “Learn” or “Program” button on the garage door opener motor unit. This button is usually situated near the antenna wire or on the back or side of the motor unit.
  2. Consult the owner’s manual for your garage door opener if you’re uncertain about where to find the “Learn” or “Program” button.

Step 4: Prepare the Garage Door Opener for Programming:

  1. Press the “Learn” or “Program” button on the garage door opener motor unit. The indicator light on the motor unit will illuminate or blink, signaling that it is ready to receive a new programming signal.
  2. The indicator light on the motor unit may blink for approximately 30 seconds, indicating that the programming mode is active. Refer to your garage door opener’s owner’s manual for specific instructions regarding the programming mode’s duration.

Step 5: Program the Universal Remote:

  1. Within 30 seconds of pressing the “Learn” or “Program” button on the garage door opener motor unit, press and release the desired button on the universal garage door opener remote. Select a button that you wish to use to operate the garage door.
  2. The LED indicator light on the remote will illuminate or blink, indicating that it’s transmitting the programming signal to the garage door opener motor unit.
  3. Wait for the indicator light on the garage door opener motor unit to confirm successful programming. This confirmation may be indicated by a solid or flashing light, depending on the model.
  4. Repeat this process if your universal remote has multiple buttons, and you want to program additional features or openers.

Step 6: Test the Universal Remote:

  1. Press the programmed button on the universal remote to test if it opens or closes the garage door.
  2. If the garage door responds as expected, the programming was successful. If not, repeat the programming process from Step 4.

Step 7: Finalize and Secure:

  1. Once you’ve successfully programmed the universal garage door opener remote, securely close the battery compartment if applicable.
  2. Mount the remote in a convenient location within your vehicle or home, ensuring easy access for operation.

Step 8: Store the Owner’s Manual:

  1. Keep the owner’s manual for the universal remote in a safe and accessible place for future reference.
  2. Consult the manual for troubleshooting tips or additional programming options if needed.

Garage Door Repair Forth Worth TX It’s essential to refer to the specific instructions provided with your universal remote for detailed programming steps and troubleshooting tips.

Tarrant County Door & Gate

6408 Marlette Ct, Fort Worth, TX 76182, United States

1-817-456-2958

https://maps.app.goo.gl/idfiJwHwC7LjtcHG7

How To Program Clicker Products Garage Door Opener – Tarrant County Door & Gate


Programming a Clicker Products garage door opener involves a series of steps that can vary slightly depending on the specific model of your Clicker remote and the type of  Garage Door Repair Forth Worth TX However, the general process remains consistent across most Clicker Products remotes.

Here’s a comprehensive guide on how to program your Clicker Products garage door opener:

  1. Identify Your Clicker Remote:
    • Determine the model of your Clicker Products garage door opener remote. This information is usually printed on the remote’s casing or can be found in the user manual.
  2. Access the Garage Door Opener:
    • Locate the “Learn” or “Program” button on your garage door opener unit. This button is typically located near the antenna wire or on the back panel of the opener motor.
  3. Clear Previous Programming (if necessary):
    • If your Clicker remote has been previously programmed to another garage door opener, you may need to clear its memory before programming it to a new opener. Consult your remote’s user manual for instructions on how to perform a factory reset.
  4. Prepare Your Clicker Remote:
    • Ensure that the battery in your Clicker remote is installed and functional. If needed, replace the battery with a new one to ensure reliable operation during programming.
  5. Enter Programming Mode on the Garage Door Opener:
    • Press and release the “Learn” or “Program” button on your garage door opener unit. The indicator light on the opener should illuminate or blink, indicating that it’s ready to learn a new remote control.
  6. Press the Desired Button on Your Clicker Remote:
    • Within 30 seconds of pressing the “Learn” or “Program” button on the opener, press and release the button on your Clicker remote that you want to program. The indicator light on the opener should respond by blinking or changing its behavior.
  7. Test the Clicker Remote:
    • To verify that the programming was successful, press the button on your Clicker remote that you just programmed. The garage door opener should respond by activating the door, either opening or closing it. If the door responds as expected, the programming was successful.
  8. Repeat for Additional Buttons (if necessary):
    • If your Clicker remote has multiple buttons, or if you have additional Clicker remotes to program, repeat the programming process for each button or remote following steps 5 to 7.
  9. Finalize Programming and Exit Programming Mode:
    • Once all desired buttons or remotes have been programmed successfully, press the “Learn” or “Program” button on the garage door opener unit again to exit programming mode. The indicator light on the opener should stop blinking or return to its normal state, indicating that the programming process is complete.
  10. Test Each Clicker Remote:
    • After exiting programming mode, test each programmed Clicker remote to ensure that it operates the garage door opener correctly. Press the buttons on the remotes individually and observe the response of the garage door opener. If any remote fails to operate the door, repeat the programming process for that remote.
  11. Optional: Sync with HomeLink or Car’s Integrated Garage Door Opener (if applicable):
    • If you have a system in your vehicle or an integrated garage door opener feature, consult your vehicle’s manual or the Clicker remote’s manual for instructions on syncing the remote with these systems.

If you encounter any  difficulties during the programming process, Garage consult the  Garage Door Repair Forth Worth TX troubleshooting section of your remote’s manual or contact Clicker Products customer support for assistance.

Tarrant County Door & Gate

6408 Marlette Ct, Fort Worth, TX 76182, United States

1-817-456-2958

Powered by WordPress & Theme by Anders Norén