The Largest Business Blog in Texas

Month: September 2023 Page 2 of 8

How To Measure Garage Door Track Radius – Palmdale Garage & Overhead Doors

Measuring the radius of a Garage Door Repair Palmdale CA is an important step when it comes to repairing or replacing a garage door.

Knowing the correct radius helps ensure that the door operates smoothly and safely. In this guide, we’ll walk you through the process of measuring the garage door track radius in detail, step by step.

Tools and Materials You’ll Need:

  1. Tape measure
  2. Pencil or marker
  3. Ladder (if necessary)
  4. Helper (optional)

: Gather Your Materials Before you start, make sure you have all the necessary tools and materials listed above. Having everything on hand will help you complete the task efficiently.

: Safety Precautions Safety should always come first. Ensure that the garage door is in the closed position and disconnected from the opener to avoid any accidental movements. Use a ladder if needed, and consider having a helper for stability and assistance.

: Identify the Track Type Garage door tracks come in two common types: standard radius and high lift. Standard radius tracks are curved, while high lift tracks have a steeper angle. It’s essential to know which type you have, as this will affect the measurement process.

: Locate the Bottom Bracket The bottom bracket is the part of the track closest to the floor. You’ll need to measure from this point to determine the track radius. Typically, the bottom bracket is near the center of the garage door.

: Measure the Vertical Height Using your tape measure, measure the vertical height from the floor to the bottom of the track. This measurement represents the distance from the floor to the center of the track.

: Measure the Horizontal Distance Next, measure the horizontal distance from the bottom bracket to the wall where the track is mounted. Make sure to measure the distance parallel to the floor. This measurement is essential for calculating the radius.

: Calculate the Radius Now, it’s time to calculate the radius. Use the Pythagorean theorem, which states that in a right triangle, the square of the hypotenuse (the longest side) is equal to the sum of the squares of the other two sides. In this case, the hypotenuse is the radius we’re trying to find.

: Take the Square Root After calculating the square of the radius, take the square root to find the actual radius of the garage door track. You can use a calculator or a smartphone app for this calculation if needed.

: Record the Radius Once you’ve found the radius, record it for future reference. It’s a good idea to write it down on a piece of paper or mark it directly on the track for easy access.

: Confirm the Measurement Double-check your measurements to ensure accuracy. If they seem off, repeat the process to get a more precise result.

: Consult a Professional (If Necessary) If you’re uncertain about your measurements or if you’re planning to replace the garage door or track, it’s wise to consult a professional garage door technician. They can provide expert guidance and assistance.

In conclusion, measuring the Garage Door Repair Palmdale CA is a crucial step in maintaining or replacing your garage door system. By following these steps and taking your time to ensure accurate measurements, you’ll be better equipped to make informed decisions when it comes to garage door repairs or replacements. Always prioritize safety and consider seeking professional assistance when needed for more complex tasks.

Palmdale Garage & Overhead Doors

3510 E Ave Q6, Palmdale, CA 93550, United States

1-661-449-9984

How To Measure Garage Door Bottom Seal – Ontario Garage & Overhead Doors

The Garage Door Repair Ontario CA plays a crucial role in maintaining your garage’s energy efficiency, protecting it from pests, and preventing water and debris from entering.

To ensure a proper fit and effective sealing, accurate measurement is essential. In this comprehensive guide, we will walk you through the step-by-step process of measuring your garage door bottom seal. Follow these instructions carefully to ensure a snug and efficient seal.

Tools and Materials You’ll Need

Before you start measuring your garage door bottom seal, gather the following tools and materials:

  1. Tape measure
  2. Pencil or marker
  3. Safety goggles (optional)
  4. Step ladder (if necessary)
  5. Assistant (optional, but can be helpful)

: Safety First

If your garage door is particularly heavy or difficult to reach, consider wearing safety goggles and using a step ladder. Safety should always be a top priority when working on garage doors.

: Close the Garage Door

Ensure that your garage door is completely closed before starting the measurement process. This ensures that you measure accurately for a seal that will fit when the door is in its closed position.

: Locate the Existing Seal

If your garage door already has a bottom seal, locate it. It is typically positioned along the bottom edge of the door. You may need to inspect closely or feel for the seal, as it can sometimes be hidden or worn down.

: Measure the Width

Starting from one end of the garage door, use your tape measure to measure the width of the door. Measure from the inside edge of the weatherstripping or seal on one side to the inside edge on the opposite side. Be as precise as possible, and record the measurement.

: Measure the Thickness

Next, measure the thickness of the existing seal. This measurement is essential, especially if you are replacing the seal, as it ensures the new seal will properly fill the gap. Measure the thickness from the bottom of the door to the bottom edge of the existing seal.

: Determine the Type of Seal

Garage door seals come in various types, including T-style, U-style, and bulb-style seals. Examine the profile of your existing seal to determine which type it is. This will help you choose the right replacement seal.

: Check for Wear and Tear

Inspect the existing seal for any signs of wear and tear, such as cracks, tears, or compression. This assessment will help you decide whether it’s time to replace the seal.

: Measure the Length

Unroll the tape measure along the entire width of the garage door bottom, following the contour of the door. Record the measurement. If there are any obstructions like brackets or tracks, measure up to them and note their locations.

: Account for Overhang

If your garage door has an overhang or threshold, measure the distance from the bottom edge of the door to the top of the threshold. This measurement will help ensure a proper fit for the new seal.

: Consider Sealing Gaps

If there are gaps or irregularities in the garage floor, measure the width and depth of these gaps. This information may be helpful if you decide to install additional seal material to cover these gaps.

: Consult Manufacturer Guidelines

If you are replacing the garage door bottom seal with a specific brand or model, consult the manufacturer’s guidelines for precise measurement instructions. Different brands may have specific requirements for their seals.

: Take Multiple Measurements

To ensure accuracy, it’s a good practice to take multiple measurements of the width, thickness, and length. This helps minimize errors and ensures you have the correct dimensions.

: Record Your Measurements

Record all the measurements you’ve taken in a notebook or on a piece of paper. Having a written record will make it easier to select the right replacement seal and to double-check your measurements.

: Shop for Replacement Seals

Armed with your accurate measurements, you can now start shopping for the appropriate replacement seal. Consider the type of seal, material, and brand that best suits your needs.

Conclusion:

Measuring your Garage Door Repair Ontario CA accurately is crucial to ensuring a snug and effective seal. By following the steps outlined in this comprehensive guide and recording your measurements carefully, you’ll be well-prepared to select and install the right replacement seal for your garage door. A properly fitted seal will help maintain your garage’s energy efficiency, keep out pests and debris, and protect against water intrusion.

Ontario Garage & Overhead Doors

1353 E 7th St, Ontario, CA 91764, United States

1-909-442-4206

How To Manually Lock Liftmaster Garage Door – Victorville Garage & Overhead Doors

Locking a LiftMaster Garage Door Repair Victorville CA is a straightforward process that can be accomplished in just a few steps.

It’s important to understand that there are different models and types of LiftMaster garage door openers, so the exact method may vary slightly depending on your specific model. However, I’ll provide a general guide that should work for most LiftMaster garage door openers.

Before You Begin: Before attempting to manually lock your LiftMaster garage door, make sure that the door is fully closed. It’s also a good idea to disconnect the power to the garage door opener to prevent any accidental activation during the process. This can usually be done by unplugging it from the electrical outlet or turning off the circuit breaker that powers the garage door opener.

Manually Locking Your LiftMaster Garage Door:

  1. Locate the Emergency Release Cord: The emergency release cord is a red cord hanging from the trolley (the carriage that moves along the rail) of your garage door opener. It’s usually connected to the trolley by a plastic handle. This cord is used to disengage the opener from the door so you can manually operate it.
  2. Pull the Emergency Release Cord: Grasp the handle on the emergency release cord and pull it down and toward the garage door. This action will disengage the opener from the door, allowing you to operate the door manually without the assistance of the motor.
  3. Manually Move the Garage Door: With the opener disengaged, you can now manually open or close the garage door. To lock the door in the closed position, lower it all the way down until it touches the floor. Make sure it is fully closed and secure.
  4. Engage the Locking Mechanism (If Applicable): Some LiftMaster garage doors have a built-in locking mechanism. If your model has this feature, it typically involves a sliding bar or bolt that you can engage to physically lock the door in place. Refer to your owner’s manual for specific instructions on how to use the locking mechanism if it’s available on your opener.
  5. Release the Emergency Release Cord: Once you have manually locked the garage door, you can return the emergency release cord to its original position. Simply pull the cord toward the garage door opener until it clicks or snaps back into place.
  6. Reconnect the Power (Optional): If you disconnected the power to the garage door opener earlier, you can now plug it back in or turn the circuit breaker back on.

Testing the Lock: After manually locking your LiftMaster garage door, it’s a good idea to test the lock to ensure it’s functioning correctly. Attempt to open the door manually by lifting it from the closed position. If the lock is engaged properly, the door should not move.

Remember that this is a general guide, and the specific steps may vary depending on your LiftMaster model. Always consult your owner’s manual for instructions tailored to your particular Garage Door Repair Victorville CA. Additionally, if you encounter any difficulties or are unsure about the process, consider contacting a professional garage door technician for assistance.

Victorville Garage & Overhead Doors

12245 Honeybear Ln, Victorville, CA 92392, United States

1-760-592-0365

How Do I Reset My Automatic Garage Door – First Call Garage Doors


Resetting an Garage Door Repair Richmond TX involves a series of steps that blend technology with mechanical precision.

In this detailed guide, we’ll embark on a journey to reset your automatic garage door, ensuring a smooth transition from confusion to functionality.

: Preliminary Checks

Before diving into the reset process, conduct some preliminary checks. Ensure that the garage door is fully closed and that the area around it is clear of any obstructions. Safety first! Clearing the path ensures a secure environment for the upcoming reset operation.

: Disconnect the Power

Locate the power source for your automatic garage door opener and disconnect it. This may involve unplugging it from the electrical outlet or turning off the circuit breaker dedicated to the garage door opener. This step ensures a safe working environment during the reset process.

: Manual Mode Activation

Most automatic garage doors have a manual release mechanism. Find the manual release cord, typically hanging down from the trolley on the opener rail. Pull this cord to disengage the garage door opener from the door. This allows you to operate the door manually.

: Manually Open and Close the Door

With the garage door now in manual mode, lift it manually to the fully open position. Once open, close it manually as well. This manual operation helps in resetting the internal mechanisms of the garage door opener.

: Reconnect the Power

After manually opening and closing the door, it’s time to bring the power back. Reconnect the power source to the garage door opener. This is usually done by plugging it back into the electrical outlet or turning on the circuit breaker.

: Test the Remote Control

If your automatic garage door is operated by a remote control, test it after the power is restored. Press the button on the remote control to see if the door responds by opening and closing. This step ensures that the connection between the remote and the opener is intact.

: Keypad and Additional Accessories

If your garage door system includes a keypad or other accessories, such as sensors or smart home integration, test each of them. Enter the keypad code and check if the door responds accordingly. Ensure that all accessories are synchronized with the garage door opener.

: Sensor Alignment Check

Garage door openers typically have safety sensors near the floor. Ensure that these sensors are properly aligned. If they are misaligned, the door may not close properly. Adjust the sensors so that they face each other directly and are free from obstructions.

: Lubrication and Inspection

As part of the reset process, take the opportunity to inspect the entire garage door system. Check for any signs of wear and tear, loose hardware, or unusual sounds. Lubricate moving parts, such as hinges and rollers, to ensure smooth operation.

: Gradual Adjustment

If your garage door has travel and force adjustment settings, consider making gradual adjustments. These settings control how far the door travels and the force it applies when closing. Refer to your garage door opener manual for specific instructions on adjusting these settings.

: Professional Assistance

If, after following the above steps, your automatic garage door still exhibits issues or malfunctions, it may be time to seek professional assistance. Garage door systems are complex, and a trained technician can diagnose and address underlying issues that may require expert attention.

In conclusion, this comprehensive guide serves as your roadmap to resetting your Garage Door Repair Richmond TX. For model-specific nuances and additional insights, always refer to your garage door opener manual—a valuable resource for troubleshooting and maintenance. With these steps, you’ll navigate the reset process with confidence, restoring your automatic garage door to optimal functionality.

First Call Garage Doors

20527 Farm to Market 1093 Unit B205, Richmond, TX 77407

1-713-248-2684

Garage Door Sensor Calibration: A Job for the Pros – Temple Overhead & Garage Doors

As a homeowner who values the safety and functionality of my garage door, I’ve come to understand the critical role that garage door sensors play in preventing accidents and ensuring smooth operation. When I first encountered issues with my garage door sensors, I, like many homeowners, thought I could handle the calibration on my own. However, through a series of trial and error, I learned that garage door sensor calibration is a job best left to the professionals.

I’ll share my experiences and explore why garage door sensor calibration is a task that should be entrusted to the experts based from Garage Door Repair Temple TX.

The Importance of Garage Door Sensors

Before delving into my own journey, let’s emphasize the significance of garage door sensors. These sensors are a fundamental safety feature of modern garage door systems, consisting of an infrared beam that spans the width of the door’s opening. When functioning correctly, they detect obstacles or objects in the path of the closing door, causing it to reverse direction and preventing accidents or damage.

My DIY Attempt

When I noticed that my garage door was not responding properly to the sensor, I decided to take matters into my own hands. After all, how hard could it be to calibrate a couple of sensors, right? Armed with a basic understanding from online tutorials and a willingness to save some money, I embarked on my DIY sensor calibration adventure.

1. Cleaning Sensors: My first step was to clean the sensor lenses, assuming that dust or debris might be obstructing the infrared beam. I meticulously wiped them clean, hoping this simple act would resolve the issue.

2. Adjusting Alignment: When cleaning didn’t yield the desired results, I moved on to adjusting the alignment of the sensors. I loosened the sensor brackets and attempted to reposition them to achieve a perfect alignment, ensuring the infrared beam was unobstructed.

3. Checking Wiring: After alignment adjustments, I moved on to inspecting the wiring connections between the sensors and the garage door opener. I tightened loose connections and replaced damaged wires in the hopes of restoring functionality.

Despite my best efforts, my DIY sensor calibration was far from successful. The garage door continued to exhibit erratic behavior, sometimes reversing prematurely and other times not responding at all. It became clear that I was in over my head.

Why DIY Sensor Calibration Can Be Risky

Through my experience, I discovered several reasons why DIY garage door sensor calibration can be a risky endeavor:

1. Limited Knowledge: Garage door sensors are sensitive devices that require precise calibration. DIYers may lack the in-depth knowledge and experience needed to understand the intricacies of sensor operation and calibration.

2. Delicate Components: Garage door sensors are delicate and can easily be damaged during calibration attempts. Mishandling or incorrect adjustments can result in permanent damage, requiring expensive replacements.

3. Safety Risks: Calibration often involves temporarily disabling or adjusting the safety features of the sensors. Any mistake in this process can compromise the safety of the garage door system, potentially leading to accidents or injuries.

4. Misdiagnosis: Homeowners may misdiagnose the underlying issue. Garage door sensor problems can stem from various sources, including electrical issues, sensor misalignment, or even a malfunctioning garage door opener. Incorrectly diagnosing the problem can lead to ineffective calibration attempts.

5. Voiding Warranties: Attempting DIY sensor calibration or repairs may void warranties on the garage door or its components. In the long run, this could prove costly if a major issue arises that would have been covered by the warranty.

6. Frustration and Time: My DIY attempt at sensor calibration led to days of frustration and wasted time. In the end, I had to seek professional assistance, resulting in a longer period of inconvenience.

The Value of Professional Sensor Calibration

After my DIY misadventure, I decided to call in the professionals to address the sensor calibration issue. Here’s what I learned from that experience:

1. Expertise: Garage door technicians have the specialized knowledge and training to diagnose sensor problems accurately and perform precise calibrations. They understand the technology and can identify the root cause of sensor issues.

2. Safety Priority: Professionals prioritize safety above all else. They know how to temporarily disable safety features safely during calibration and ensure they are reactivated correctly.

3. Specialized Tools: Garage door experts have access to specialized tools and equipment designed for sensor calibration, ensuring that adjustments are accurate and effective.

4. Comprehensive Diagnosis: Professionals conduct a thorough assessment of the entire garage door system to identify any underlying issues contributing to sensor problems. This comprehensive approach ensures a long-term solution.

5. Warranty Preservation: Hiring professionals for sensor calibration helps preserve any existing warranties on your garage door system, providing peace of mind in case of future issues.

6. Time and Convenience: Professional sensor calibration is efficient and minimizes downtime. Technicians can typically resolve the issue quickly, allowing you to get back to using your garage without unnecessary delays.

Conclusion: Trust the Experts

In summary, as per Garage Door Repair Temple TX and my experience taught me a valuable lesson: garage door sensor calibration is a task that should be entrusted to the professionals. While DIY endeavors can be fulfilling, attempting to calibrate garage door sensors without the necessary expertise and tools can lead to costly mistakes and safety risks. When it comes to ensuring the safety and functionality of your garage door, it’s best to leave sensor calibration to the experts who have the knowledge and experience to get the job done right.

Temple Overhead & Garage Doors

1079 Spring Terrace Loop, Temple, TX 76502, United States

817-813-6380

How To Make Your Garage Door Opener Smart – Argyle Gates & Garage Doors

In today’s connected world, smart home technology has made our lives more convenient and efficient. One area where you can introduce this technology is in your garage. By making your Garage Door Repair Argyle TX, you can control it remotely, receive notifications, and integrate it with other smart devices.

In this comprehensive guide, we’ll walk you through the steps to transform your existing garage door opener into a smart one.

  1. Understanding Smart Garage Door Openers
    • What is a smart garage door opener?
    • Benefits of a smart garage door opener.
  2. Choosing the Right Smart Garage Door Opener
    • Compatibility with your existing garage door.
    • Connectivity options (Wi-Fi, Bluetooth, etc.).
    • Additional features (security, voice control, etc.).
  3. Gathering Required Materials
    • Smart garage door opener kit.
    • Tools (screwdriver, pliers, etc.).
    • Smartphone or tablet.
  4. Preparing Your Garage Door Opener (200 words)
    • Disconnect power to the opener.
    • Remove the cover.
    • Identify the existing control wires.
  5. Installing the Smart Garage Door Opener
    • Follow the manufacturer’s instructions.
    • Connect the smart opener to your Wi-Fi network.
    • Mount the control module securely.
  6. Configuring the Smart Garage Door Opener
    • Download and install the companion app.
    • Pair the app with the smart opener.
    • Set up user accounts and permissions.
  7. Testing and Troubleshooting
    • Test the smart garage door opener.
    • Troubleshoot common issues (connection problems, compatibility, etc.).
  8. Integrating with Smart Home Ecosystem
    • Connect your smart garage door opener to voice assistants (Alexa, Google Assistant).
    • Explore automation options (IFTTT, home automation hubs).
    • Ensure compatibility with other smart devices in your home.
  9. Enhancing Security and Safety
    • Set up alerts and notifications.
    • Enable remote monitoring.
    • Implement security features (PIN codes, automatic locks).
  10. Maintenance and Tips
    • Regularly update the firmware.
    • Replace batteries in remotes and sensors.
    • Keep your Wi-Fi network secure.
  11. Conclusion
    • Recap the benefits of having a smart garage door opener.
    • Emphasize the convenience and security it adds to your home.
    • Encourage readers to enjoy their new smart garage door opener.
  12. Additional Resources
    • Provide links to recommended products and manufacturer websites.
    • Suggest further reading and troubleshooting guides.

By following this comprehensive guide, you can easily turn your standard Garage Door Repair Argyle TX into a smart, connected device that adds both convenience and security to your daily life. Whether you’re at home or away, you’ll have complete control over your garage door, making your home smarter and safer.

Argyle Gates & Garage Doors

940-400-3769

How To Open Craftsman Garage Door Opener Keypad – First Call Garage Door of Missouri City

If you’ve recently purchased or installed a Craftsman Garage Door Repair Missouri City TX, you’re probably wondering how to use it effectively to access your garage.

These keypads offer convenience and security, allowing you to enter your garage without a remote or a traditional key. In this comprehensive guide, we’ll walk you through the step-by-step process of opening your Craftsman garage door opener keypad.

1. Introduction

Craftsman garage door opener keypads are a fantastic addition to your garage, providing easy access and enhanced security. In this article, we’ll guide you on how to make the most out of your keypad.

2. Locating the Keypad

Start by finding the keypad. Craftsman keypads are typically installed outside the garage, next to the garage door. It should be easily accessible but out of sight from the street.

3. Understanding the Keypad Layout

Familiarize yourself with the keypad’s layout. It usually consists of numeric buttons, a “Enter” or “Open” button, and sometimes additional function buttons.

4. Setting Up Your Personal PIN

To use the keypad, you’ll need to set a personal identification number (PIN). This code will serve as your “key” to the garage. Follow the manufacturer’s instructions to program your unique PIN.

5. Opening the Garage Door

Once your PIN is set, opening the garage door is as simple as entering the code and pressing the “Enter” or “Open” button. The door will respond by opening or closing, depending on its current state.

6. Changing Your PIN

For security reasons, it’s advisable to change your PIN periodically. We’ll guide you on how to do this to keep your garage secure.

7. Resetting the Keypad

If you ever forget your PIN or face issues with the keypad, don’t worry; there’s a way to reset it. We’ll explain the reset process in detail.

8. Battery Replacement

To ensure your keypad works reliably, you’ll need to replace the batteries from time to time. Learn when and how to do this effectively.

9. Troubleshooting Common Issues

Garage door keypads can sometimes experience glitches. We’ll cover common issues and how to resolve them quickly.

10. Maintenance Tips

Proper maintenance can extend the lifespan of your keypad. We’ll provide you with essential maintenance tips to keep it in excellent condition.

11. Enhancing Garage Security

Discover how using a keypad can enhance the security of your garage, making it less vulnerable to unauthorized access.

12. Benefits of Using a Keypad

We’ll explore the various advantages of using a Craftsman garage door opener keypad, including convenience and peace of mind.

13. Conclusion

In conclusion, a Craftsman Garage Door Repair Missouri City TX is a valuable addition to your home. It offers convenience, security, and peace of mind. By following the steps and tips outlined in this guide, you can make the most of your keypad and ensure your garage remains secure.

First Call Garage Door of Missouri City

1718 Crescent Oak Dr, Missouri City, TX 77459, United States

1-281-595-8036

How To Connect MYQ To Garage Door Opener – First Call Garage Door of Sugarland

Connecting your MyQ smart Garage Door Repair Sugarland TX to your garage door opener is a straightforward process that involves several steps.

MyQ technology allows you to control and monitor your garage door remotely using a smartphone app. Below, I’ll guide you through the process in detail with clear explanations to ensure a successful setup.

: Check Compatibility Before you start, make sure your garage door opener is compatible with MyQ. Visit the official Chamberlain MyQ website or consult your garage door opener’s manual to verify compatibility. Most newer garage door openers are compatible, but it’s essential to confirm this.

: Gather Necessary Equipment You will need the following items for this installation:

  • MyQ Smart Garage Hub (which includes the hub itself, sensors, mounting brackets, and screws)
  • Wi-Fi network and password
  • A smartphone or tablet with the MyQ app installed

: Install the MyQ Smart Garage Hub

  1. Begin by ensuring your garage door is closed and disconnecting the power to your garage door opener for safety.
  2. Find a suitable location for the MyQ Smart Garage Hub. It should be within Wi-Fi range and easily accessible. The hub is typically installed near your garage door opener motor unit.
  3. Use the provided mounting brackets and screws to attach the hub securely to the wall.

: Connect the Sensors The MyQ Smart Garage Hub comes with two sensors: one for the door and one for the wall. Follow these steps to connect them:

  1. Attach the door sensor to the top panel of your garage door using the provided adhesive tape or screws.
  2. Mount the wall sensor on the wall, close to the MyQ Smart Garage Hub, using the provided screws.

: Power On the MyQ Smart Garage Hub

  1. Plug in the MyQ Smart Garage Hub to a nearby electrical outlet.
  2. Reconnect the power to your garage door opener.

: Set Up the MyQ App

  1. Download and install the MyQ app on your smartphone or tablet from the App Store (for iOS) or Google Play (for Android).
  2. Open the MyQ app and sign in or create a MyQ account if you don’t already have one.

: Add Your Garage Door Opener

  1. In the MyQ app, tap the “+” icon or “Add Device” option to add a new garage door opener.
  2. Follow the on-screen instructions to set up your MyQ Smart Garage Hub. You’ll need to provide your Wi-Fi network name and password during this step.
  3. Once the hub is connected to your Wi-Fi network, it will search for your garage door opener. Make sure the door sensor is correctly aligned with the wall sensor.
  4. The app should identify your garage door opener. Select it from the list and follow the prompts to complete the setup.

: Test the System

  1. After successfully adding your garage door opener to the MyQ app, you can now test the system.
  2. Use the app to open and close your garage door remotely. You can also set up schedules, receive notifications, and monitor the status of your garage door.

: Troubleshooting If you encounter any issues during the setup process, consult the troubleshooting section in the MyQ app or refer to the user manual. Common issues may include Wi-Fi connection problems or sensor alignment issues.

: Enjoy Remote Control Congratulations! You’ve successfully connected your MyQ Smart Garage Hub to your garage door opener. You can now control and monitor your garage door remotely using the MyQ app from anywhere with an internet connection.

Remember to periodically check for firmware updates and maintain your MyQ system to ensure optimal performance and security.

In conclusion, setting up MyQ with your Garage Door Repair Sugarland TX allows for convenient and secure control of your garage door. Follow these steps carefully to ensure a seamless installation process, and enjoy the benefits of remote garage door management.

First Call Garage Door of Sugarland

15500 Voss Rd ste 425, Sugar Land, TX 77498, United States

1-713-597-5105

How To Change Wifi On MYQ Garage Door Opener – Temple Overhead & Garage Doors

Your MyQ Garage Door Repair Temple TX connects to your home Wi-Fi network to enable remote control and monitoring through a smartphone app.

If you’re changing your Wi-Fi network or need to reconnect your MyQ device to a different network, you’ll need to follow a few steps to get it back online. In this guide, we’ll walk you through the process step by step, ensuring a smooth transition to your new Wi-Fi network.

1. Preparation: Before you begin, gather all the necessary information and equipment:

  • Your MyQ garage door opener.
  • A smartphone or tablet with the MyQ app installed.
  • Your new Wi-Fi network name (SSID) and password.
  • Access to your garage door opener’s control panel or the “Learn” button.
  • A ladder or stool if your opener is mounted high.

2. Clear Previous Wi-Fi Settings: If your MyQ garage door opener is currently connected to an old Wi-Fi network, you need to clear its previous settings. To do this, locate the “Learn” button on your garage door opener, usually near the back or side. Press and hold it for about 10 seconds until the LED light next to the button turns off. This action will erase the existing Wi-Fi settings.

3. Install MyQ App: If you haven’t already, download and install the MyQ app on your smartphone or tablet. You can find it in the App Store (for iOS) or Google Play Store (for Android). Open the app and create an account if you don’t have one.

4. Add a Device: Once the app is installed and you’ve created an account, follow these steps to add your MyQ garage door opener to the app:

  • Open the MyQ app and log in.
  • Tap the “+” symbol to add a device.
  • Choose “Garage Door Opener” from the list.
  • The app will prompt you to scan the serial number barcode on your garage door opener. Alternatively, you can manually enter the serial number located on the device.
  • Follow the on-screen instructions to complete the setup process.

5. Connect to New Wi-Fi: Now that your MyQ device is recognized in the app, it’s time to connect it to your new Wi-Fi network. Here’s how:

  • Tap on your newly added garage door opener in the app to access its settings.
  • Look for an option related to Wi-Fi or Network Settings. It may be labeled differently depending on your MyQ model.
  • Select this option and follow the prompts to enter the SSID and password for your new Wi-Fi network. Make sure to double-check the information for accuracy.
  • The app will initiate the connection process. Your MyQ garage door opener’s LED light should begin flashing, indicating that it’s attempting to connect.
  • Wait for a successful connection confirmation in the app. This may take a minute or two.

6. Test the Connection: To ensure that your MyQ garage door opener is connected to the new Wi-Fi network, perform a quick test. Open the app and attempt to operate your garage door remotely. If it opens and closes without issues, your connection is successful. If not, double-check your Wi-Fi settings and ensure you entered the correct SSID and password.

7. Troubleshooting: If you encounter any issues during the setup process or the connection test, here are some common troubleshooting steps:

  • Check your Wi-Fi network’s stability and signal strength.
  • Ensure your smartphone or tablet is connected to the same Wi-Fi network.
  • Restart your MyQ garage door opener by disconnecting it from power for a few seconds and then reconnecting it.
  • Review the Wi-Fi credentials you entered for accuracy.
  • Contact MyQ customer support for further assistance if the problem persists.

8. Final Thoughts: Changing the Wi-Fi network on your MyQ Garage Door Repair Temple TX may seem daunting at first, but by following these step-by-step instructions and staying patient, you can successfully complete the process. With your garage door opener connected to your new Wi-Fi network, you’ll enjoy the convenience of remote control and monitoring, enhancing the security and accessibility of your home. Remember to keep your Wi-Fi credentials safe and up-to-date to ensure uninterrupted access to your garage door opener.

Temple Overhead & Garage Doors

1079 Spring Terrace Loop, Temple, TX 76502, United States

1-817-813-6380

Customizing Your Garage Door with Professional Design Services – Keller Garage Door & Gate Repairs

As a homeowner who takes pride in the appearance of my property, I’ve always believed that every element of a home should reflect the homeowner’s personality and style. When it came to my garage door, I realized that it presented a unique opportunity to enhance the curb appeal of my home. That’s when I discovered the world of professional design services for customizing garage doors.

In reference to Garage Door Repair Keller TX, I’ll share my journey into the realm of garage door customization, the benefits of working with design professionals, and how this personalized approach can transform the look and feel of your home.

The Power of a Customized Garage Door

Your garage door is not just a functional element; it’s an essential part of your home’s exterior that can significantly impact its overall appearance. Customizing your garage door allows you to:

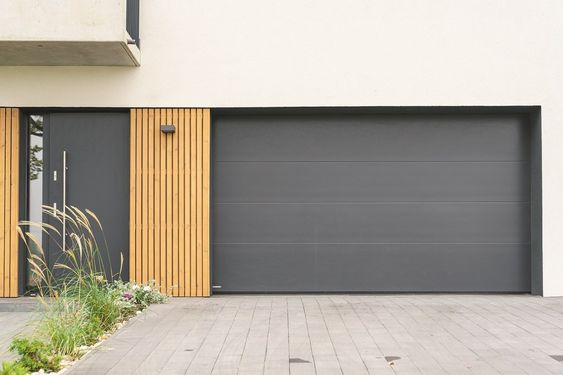
1. Boost Curb Appeal: A well-designed and customized garage door can instantly elevate the curb appeal of your home, making it stand out in your neighborhood.

2. Reflect Your Style: Customization allows you to express your personal style and preferences, ensuring that your garage door complements the architectural aesthetics of your home.

3. Enhance Property Value: A thoughtfully designed and customized garage door can increase the resale value of your home, making it more appealing to potential buyers.

4. Create a Cohesive Look: Customized garage doors can seamlessly integrate with the overall design and color scheme of your home, creating a harmonious and polished look.

The Role of Professional Design Services

While you may have a vision for your ideal garage door, bringing that vision to life requires the expertise of professional design services. Here’s how working with design professionals can transform your garage door customization project:

1. Expert Guidance: Design professionals have a deep understanding of design principles, color theory, and architectural aesthetics. They can provide expert guidance to ensure your custom garage door complements your home’s style and character.

2. Tailored Solutions: Design professionals take the time to understand your preferences, lifestyle, and vision. They tailor their recommendations to create a customized garage door that’s uniquely yours.

3. Material and Finish Selection: Professionals can help you choose the right materials, finishes, and textures that not only enhance the look of your garage door but also ensure durability and longevity.

4. Color Coordination: Design experts can assist in selecting colors that harmonize with your home’s exterior, making your garage door a seamless part of the overall design.

5. Integration with Architectural Features: If your home has distinctive architectural features, design professionals can ensure that your customized garage door complements and enhances these elements.

6. Innovative Design Ideas: Professionals stay updated with the latest design trends and innovative solutions. They can introduce creative ideas that you may not have considered, taking your customization to the next level.

The Customization Process

The process of customizing your garage door with professional design services typically involves the following steps:

1. Consultation: The first step is a consultation with the design professional. During this meeting, you’ll discuss your vision, preferences, and any specific design ideas you have in mind.

2. Design Concept: Based on your input, the design professional will create a customized design concept for your garage door. This concept includes elements like color schemes, materials, and decorative features.

3. Material Selection: Once the design concept is approved, the next step is selecting the appropriate materials for your garage door. This includes choosing the type of wood, metal, or other materials that align with your design.

4. Custom Details: Design professionals can add custom details such as decorative hardware, window inserts, and architectural motifs to enhance the overall look of your garage door.

5. Color Coordination: The color palette for your garage door will be carefully selected to match your home’s exterior and your personal preferences.

6. Professional Installation: After finalizing the design, the customized garage door is expertly manufactured and professionally installed. The installation process is handled by skilled technicians to ensure precision and functionality.

7. Final Inspection: A thorough inspection is conducted to ensure that the customized garage door meets your expectations in terms of design, quality, and functionality.

Types of Garage Door Customization

Customization options for garage doors are diverse and allow you to create a truly unique look for your home. Here are some common customization features:

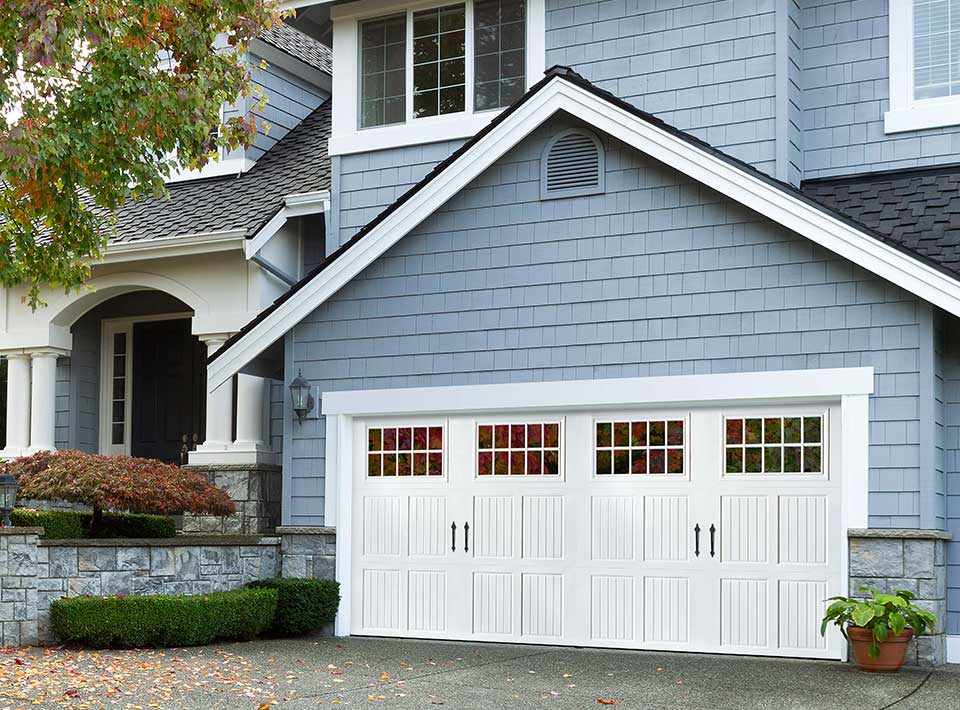
1. Decorative Hardware: Add decorative handles, hinges, and other hardware elements that enhance the overall aesthetic.

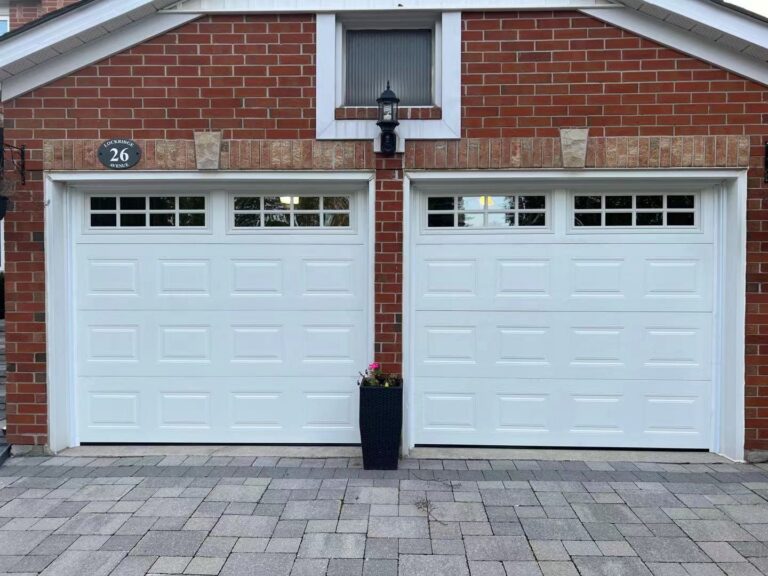
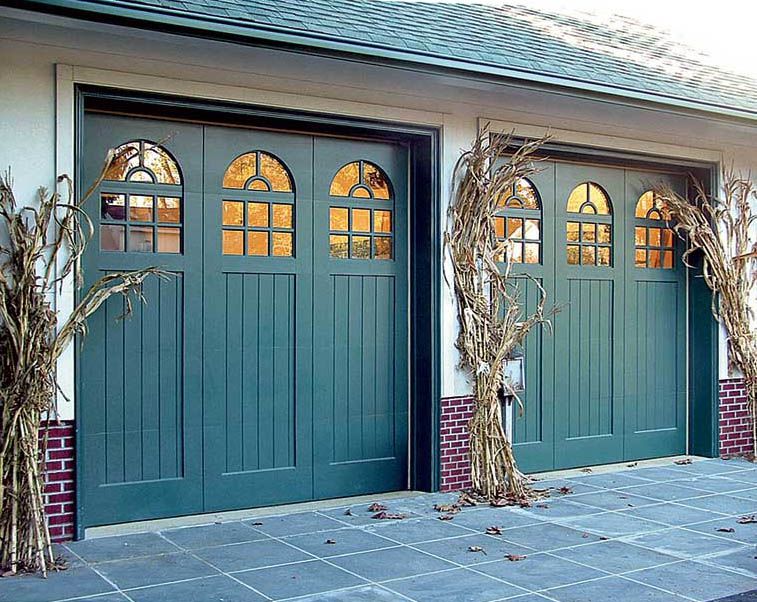
2. Window Inserts: Incorporate windows with different styles and patterns to create visual interest and allow natural light into your garage.

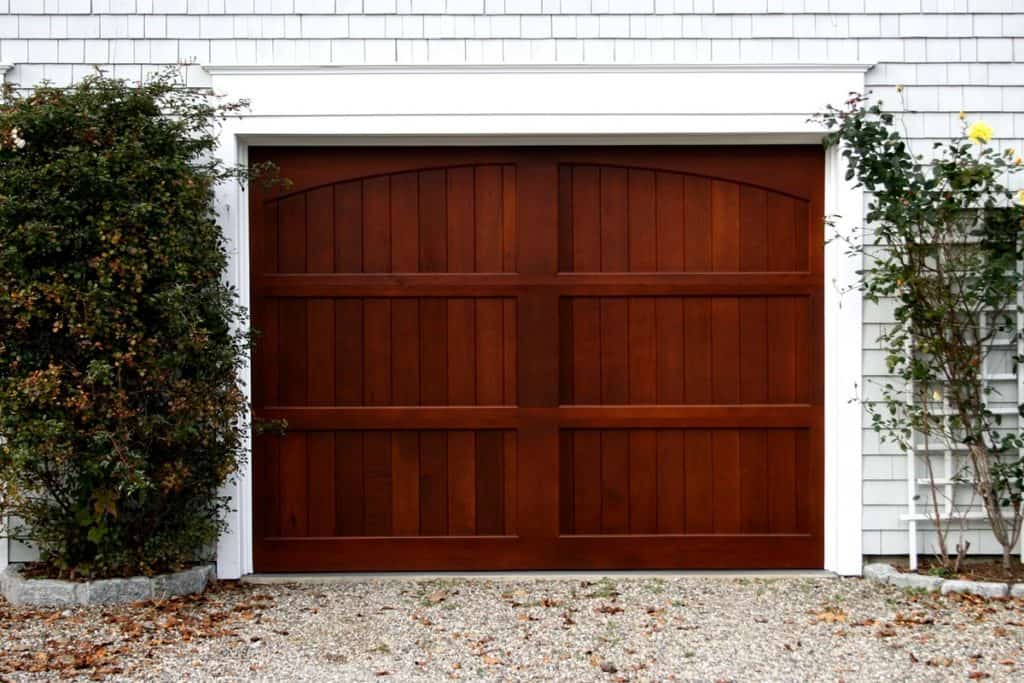
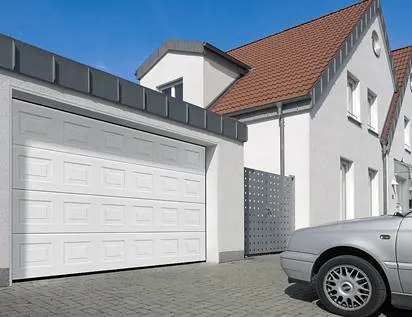
3. Architectural Details: Consider adding architectural details such as panel designs, arches, or raised panels to match your home’s architectural style.

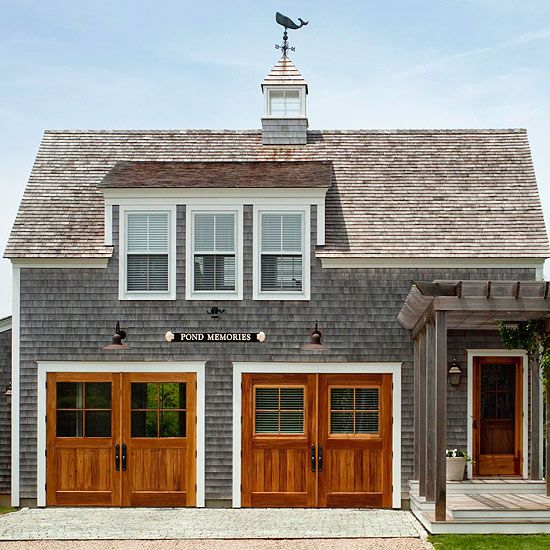
4. Custom Paint or Stain: Choose custom paint or stain colors that complement your home’s color scheme and create a cohesive look.

5. Insulation Options: Select insulation options that improve energy efficiency and temperature control inside the garage.

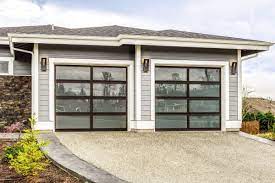
6. Unique Finishes: Opt for unique finishes like faux wood grain, rustic textures, or modern metallics to achieve the desired look.

7. Innovative Openers: Upgrade to innovative garage door openers that provide added convenience and security features.

Benefits of Professional Garage Door Customization

Customizing your garage door with the assistance of design professionals offers numerous benefits:

1. Personalization: Tailor your garage door to your unique style and preferences, ensuring it reflects your personality and taste.

2. Enhanced Curb Appeal: Elevate the overall look of your home, creating a lasting impression on visitors and passersby.

3. Increased Property Value: A well-designed and customized garage door can add value to your home, making it a more attractive option for potential buyers.

4. Improved Functionality: Customization can also enhance the functionality of your garage door, making it more convenient to use.

5. Longevity: High-quality materials and professional installation ensure the longevity and durability of your customized garage door.

Conclusion: Elevate Your Home with Custom Garage Door Design

As a homeowner who has experienced the transformative power of professional garage door customization, I can attest to the incredible impact it has on the overall appearance and value of your home. Don’t settle for a standard garage door when you have the opportunity to create a personalized masterpiece that perfectly complements your home’s style.

Overall, according to Garage Door Repair Keller TX, embrace the world of professional design services and embark on a journey to customize your garage door, ensuring it becomes a standout feature that enhances your home’s curb appeal and leaves a lasting impression on everyone who crosses your threshold. With the guidance of design experts, your customized garage door will become a true reflection of your style and a source of pride for your home.

Keller Garage Door & Gate Repairs

1213 Hillside Dr, Keller, TX 76248, United States

817-769-3540

Page 2 of 8

Powered by WordPress & Theme by Anders Norén